Appearance
How to use the template editor
The template editor is a full drag-and-drop image editor. You can add, remove, and rearrange layers of the template. You can also edit the properties of each element, such as the text, color, and size. When you open the editor, a random product will be loaded into the template - however you can easily switch to another product using the search or random product buttons.
It's important to note that you don't design the template for a specific product. The random product is just a placeholder to help you visualize how the template will look with a product.
Section overview
The template editor is divided into several sections:
- Canvas - This is where you will be designing your template
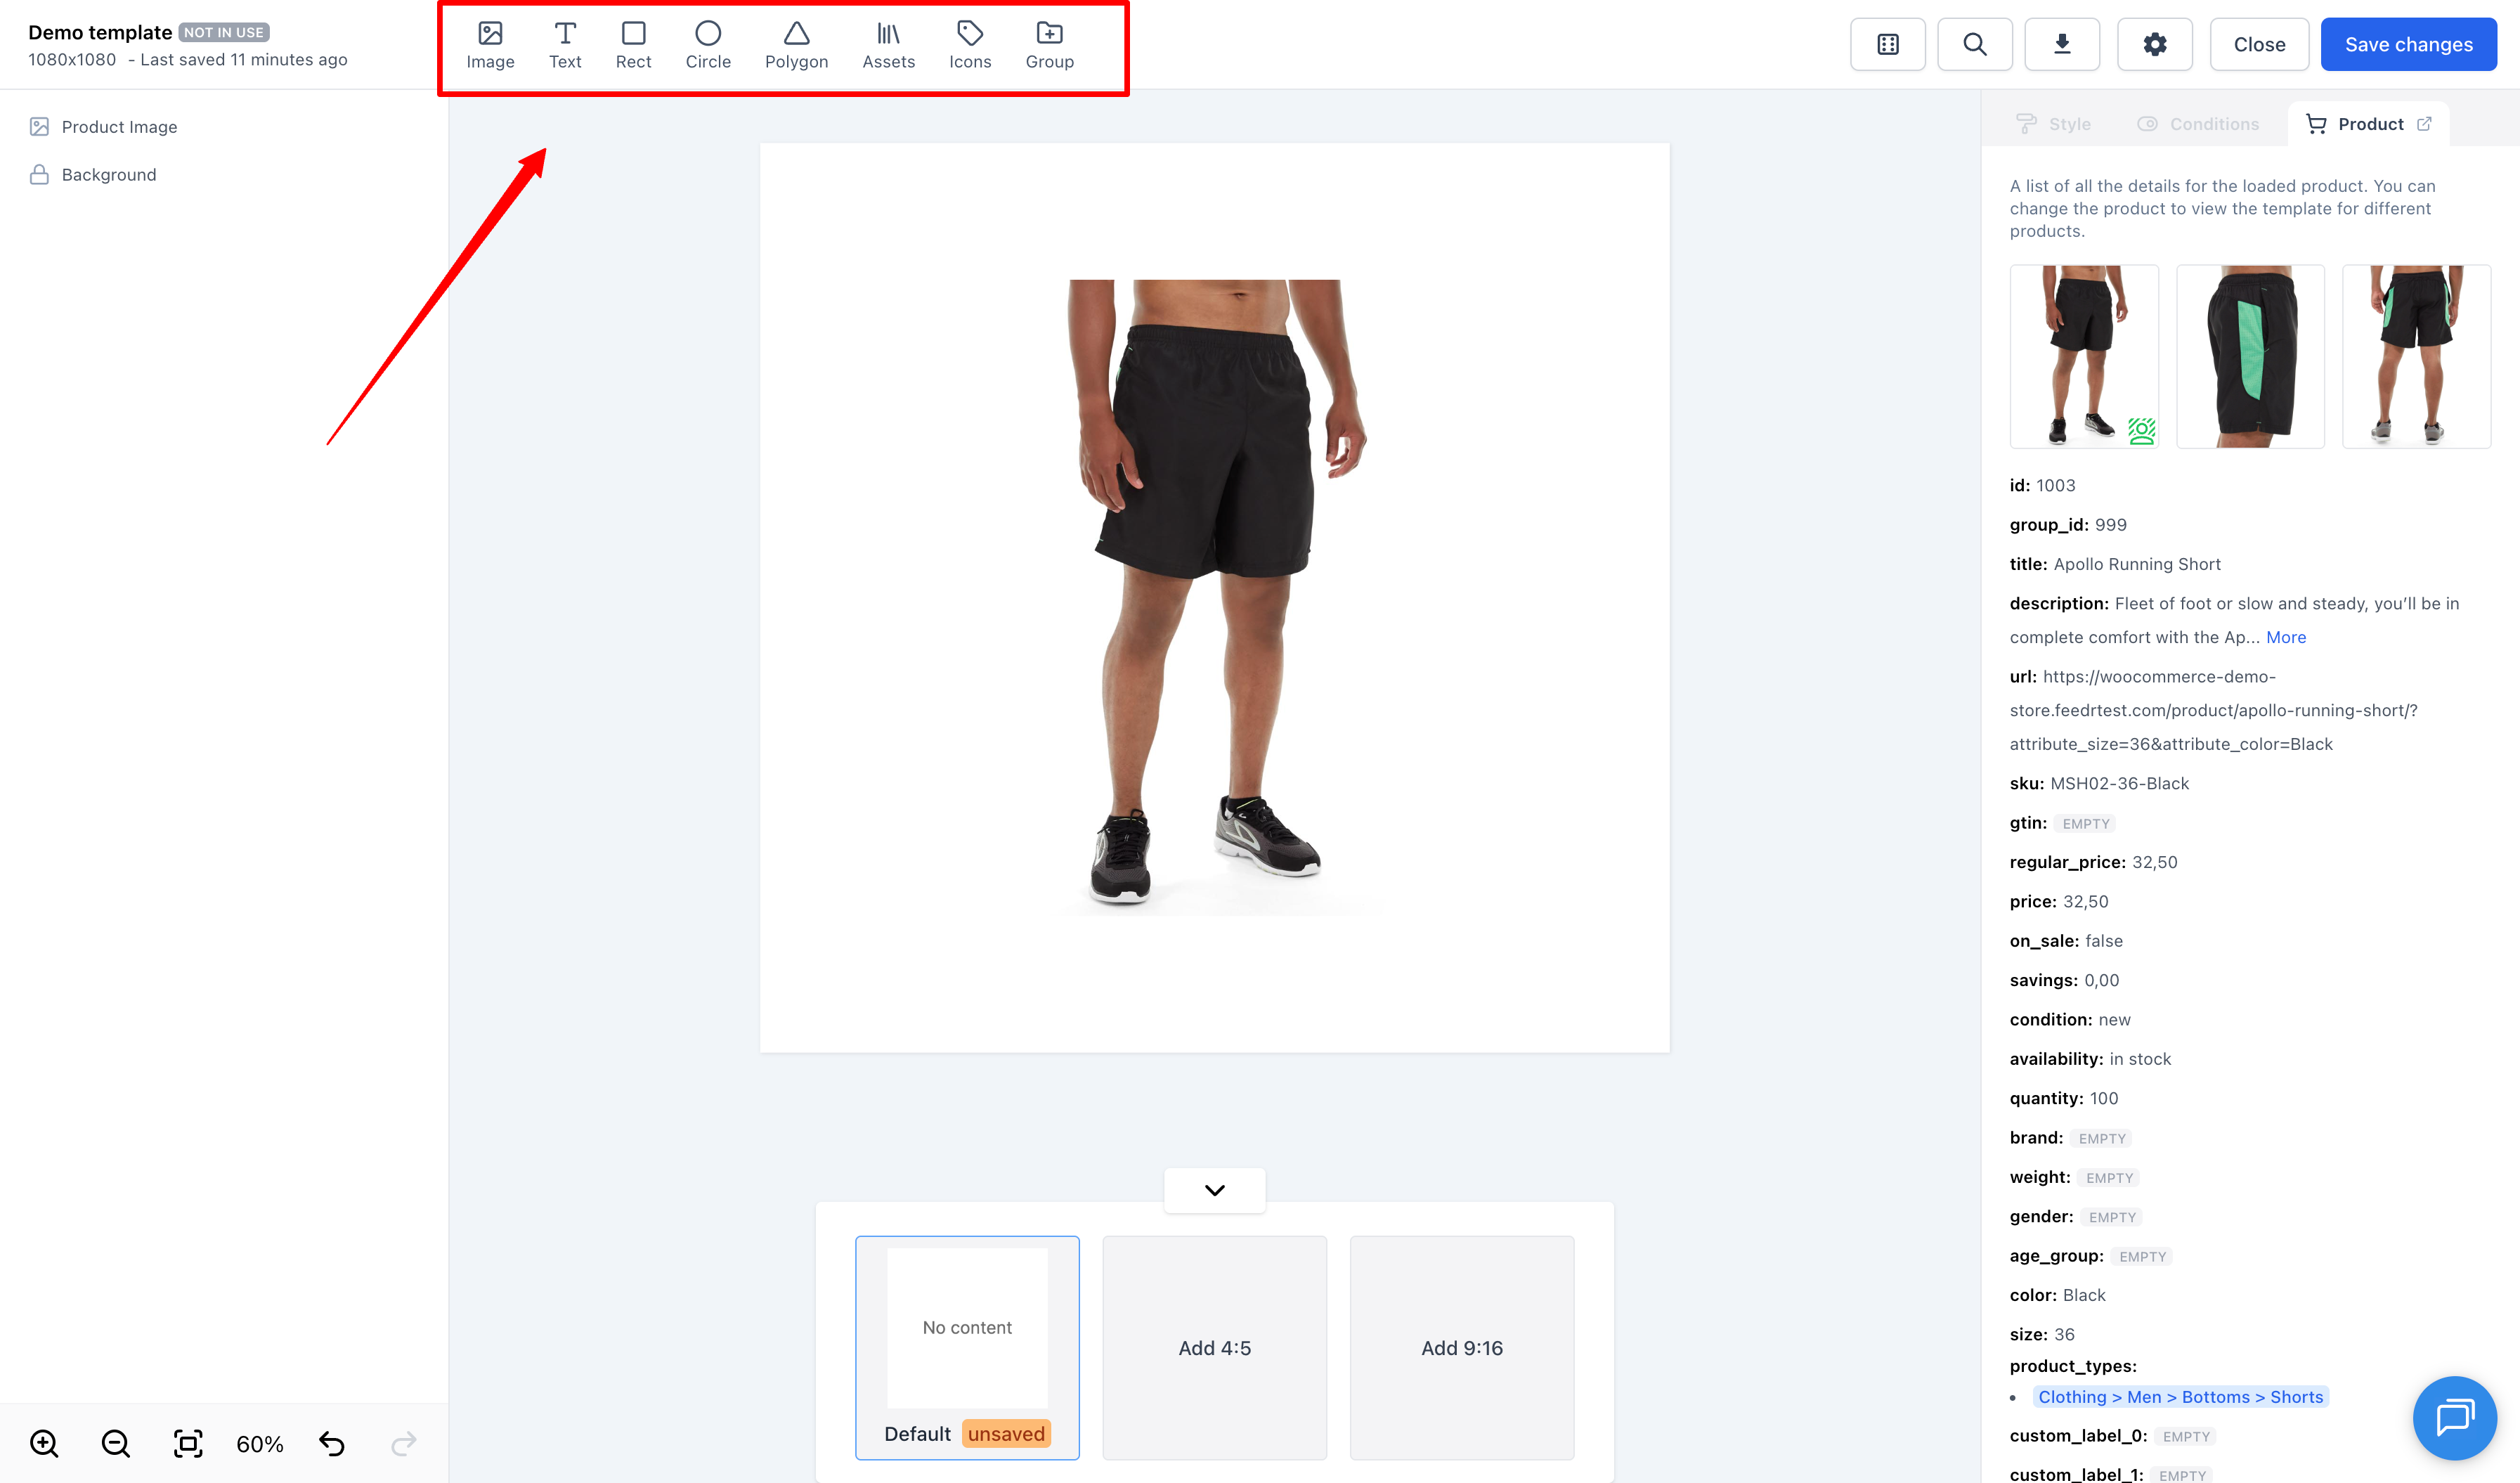
- Elements bar - This is where you can add elements to the canvas
- Layers panel - This is where you can see all the elements on the canvas and select them
- Attributes panel - This is where you can edit the properties of the selected element
- Topbar - This is where you can do various actions like saving, downloading, and exiting the editor
- Formats - Section in the middle below the canvas where you can switch between different formats
Adding Elements
You can add elements to the canvas by clicking on them in the elements bar.
To add a dynamic product image, click on the "Image" button in the elements bar and then select "Dynamic Product Image".
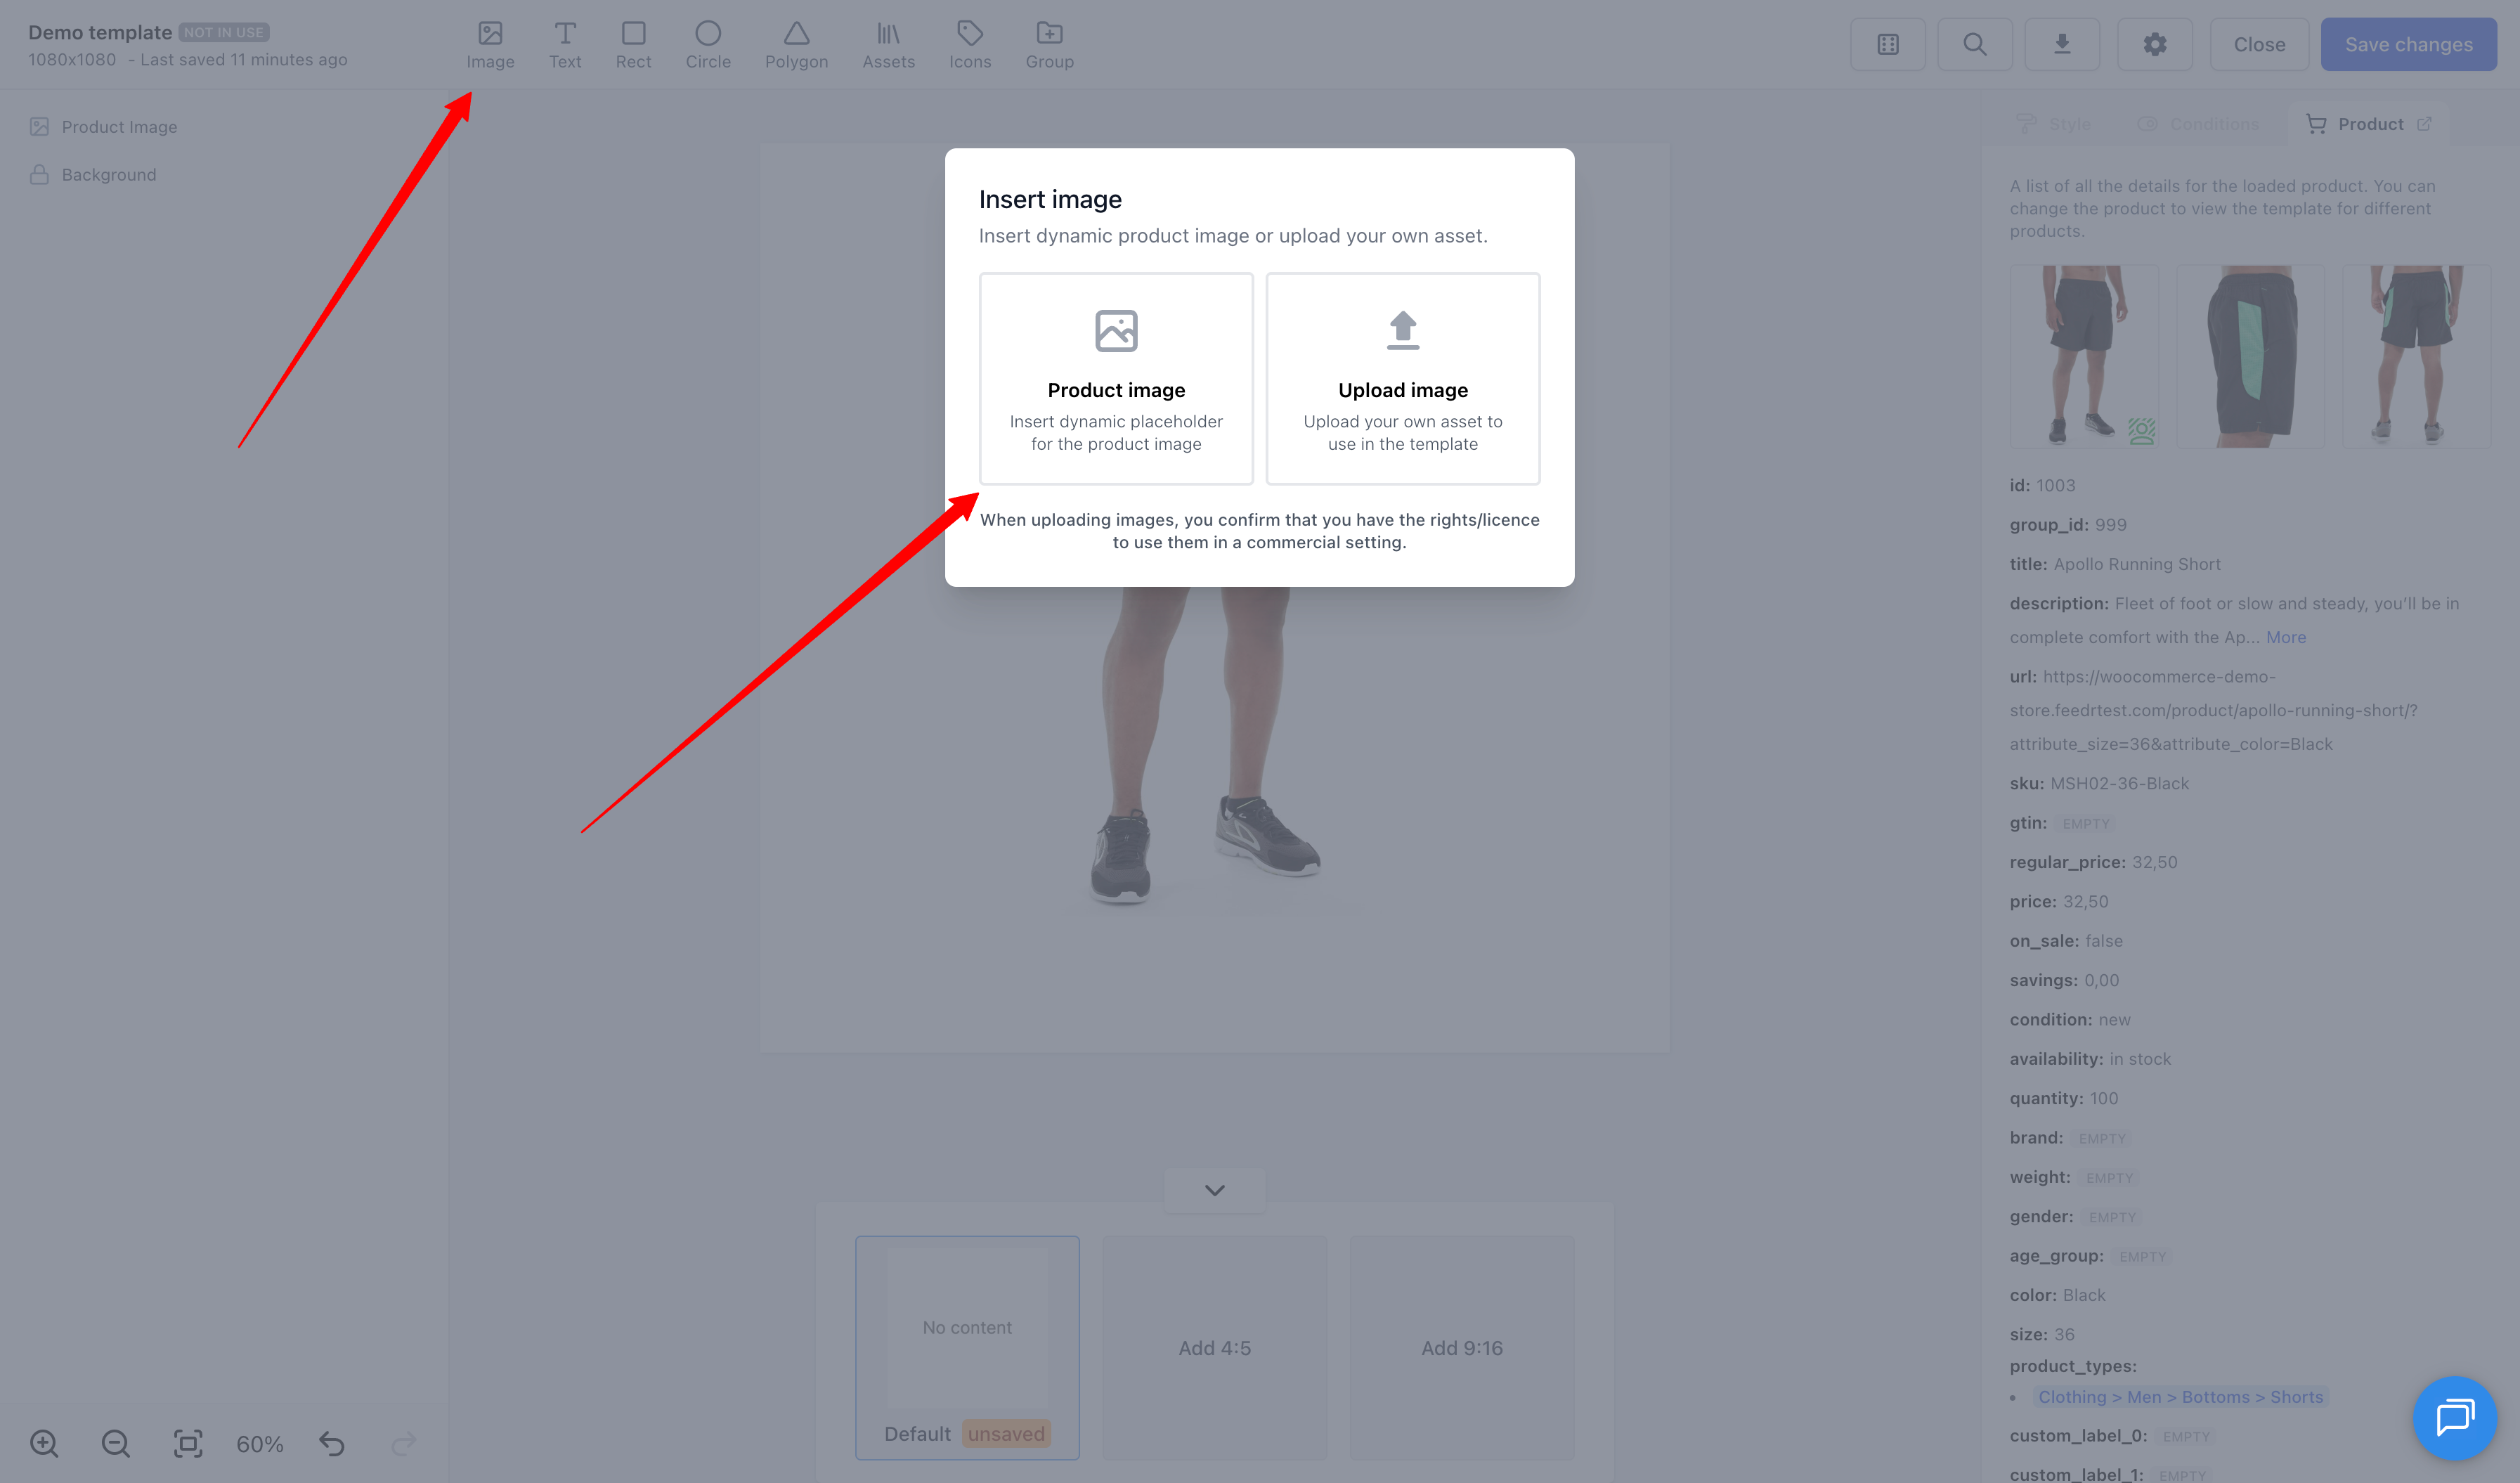
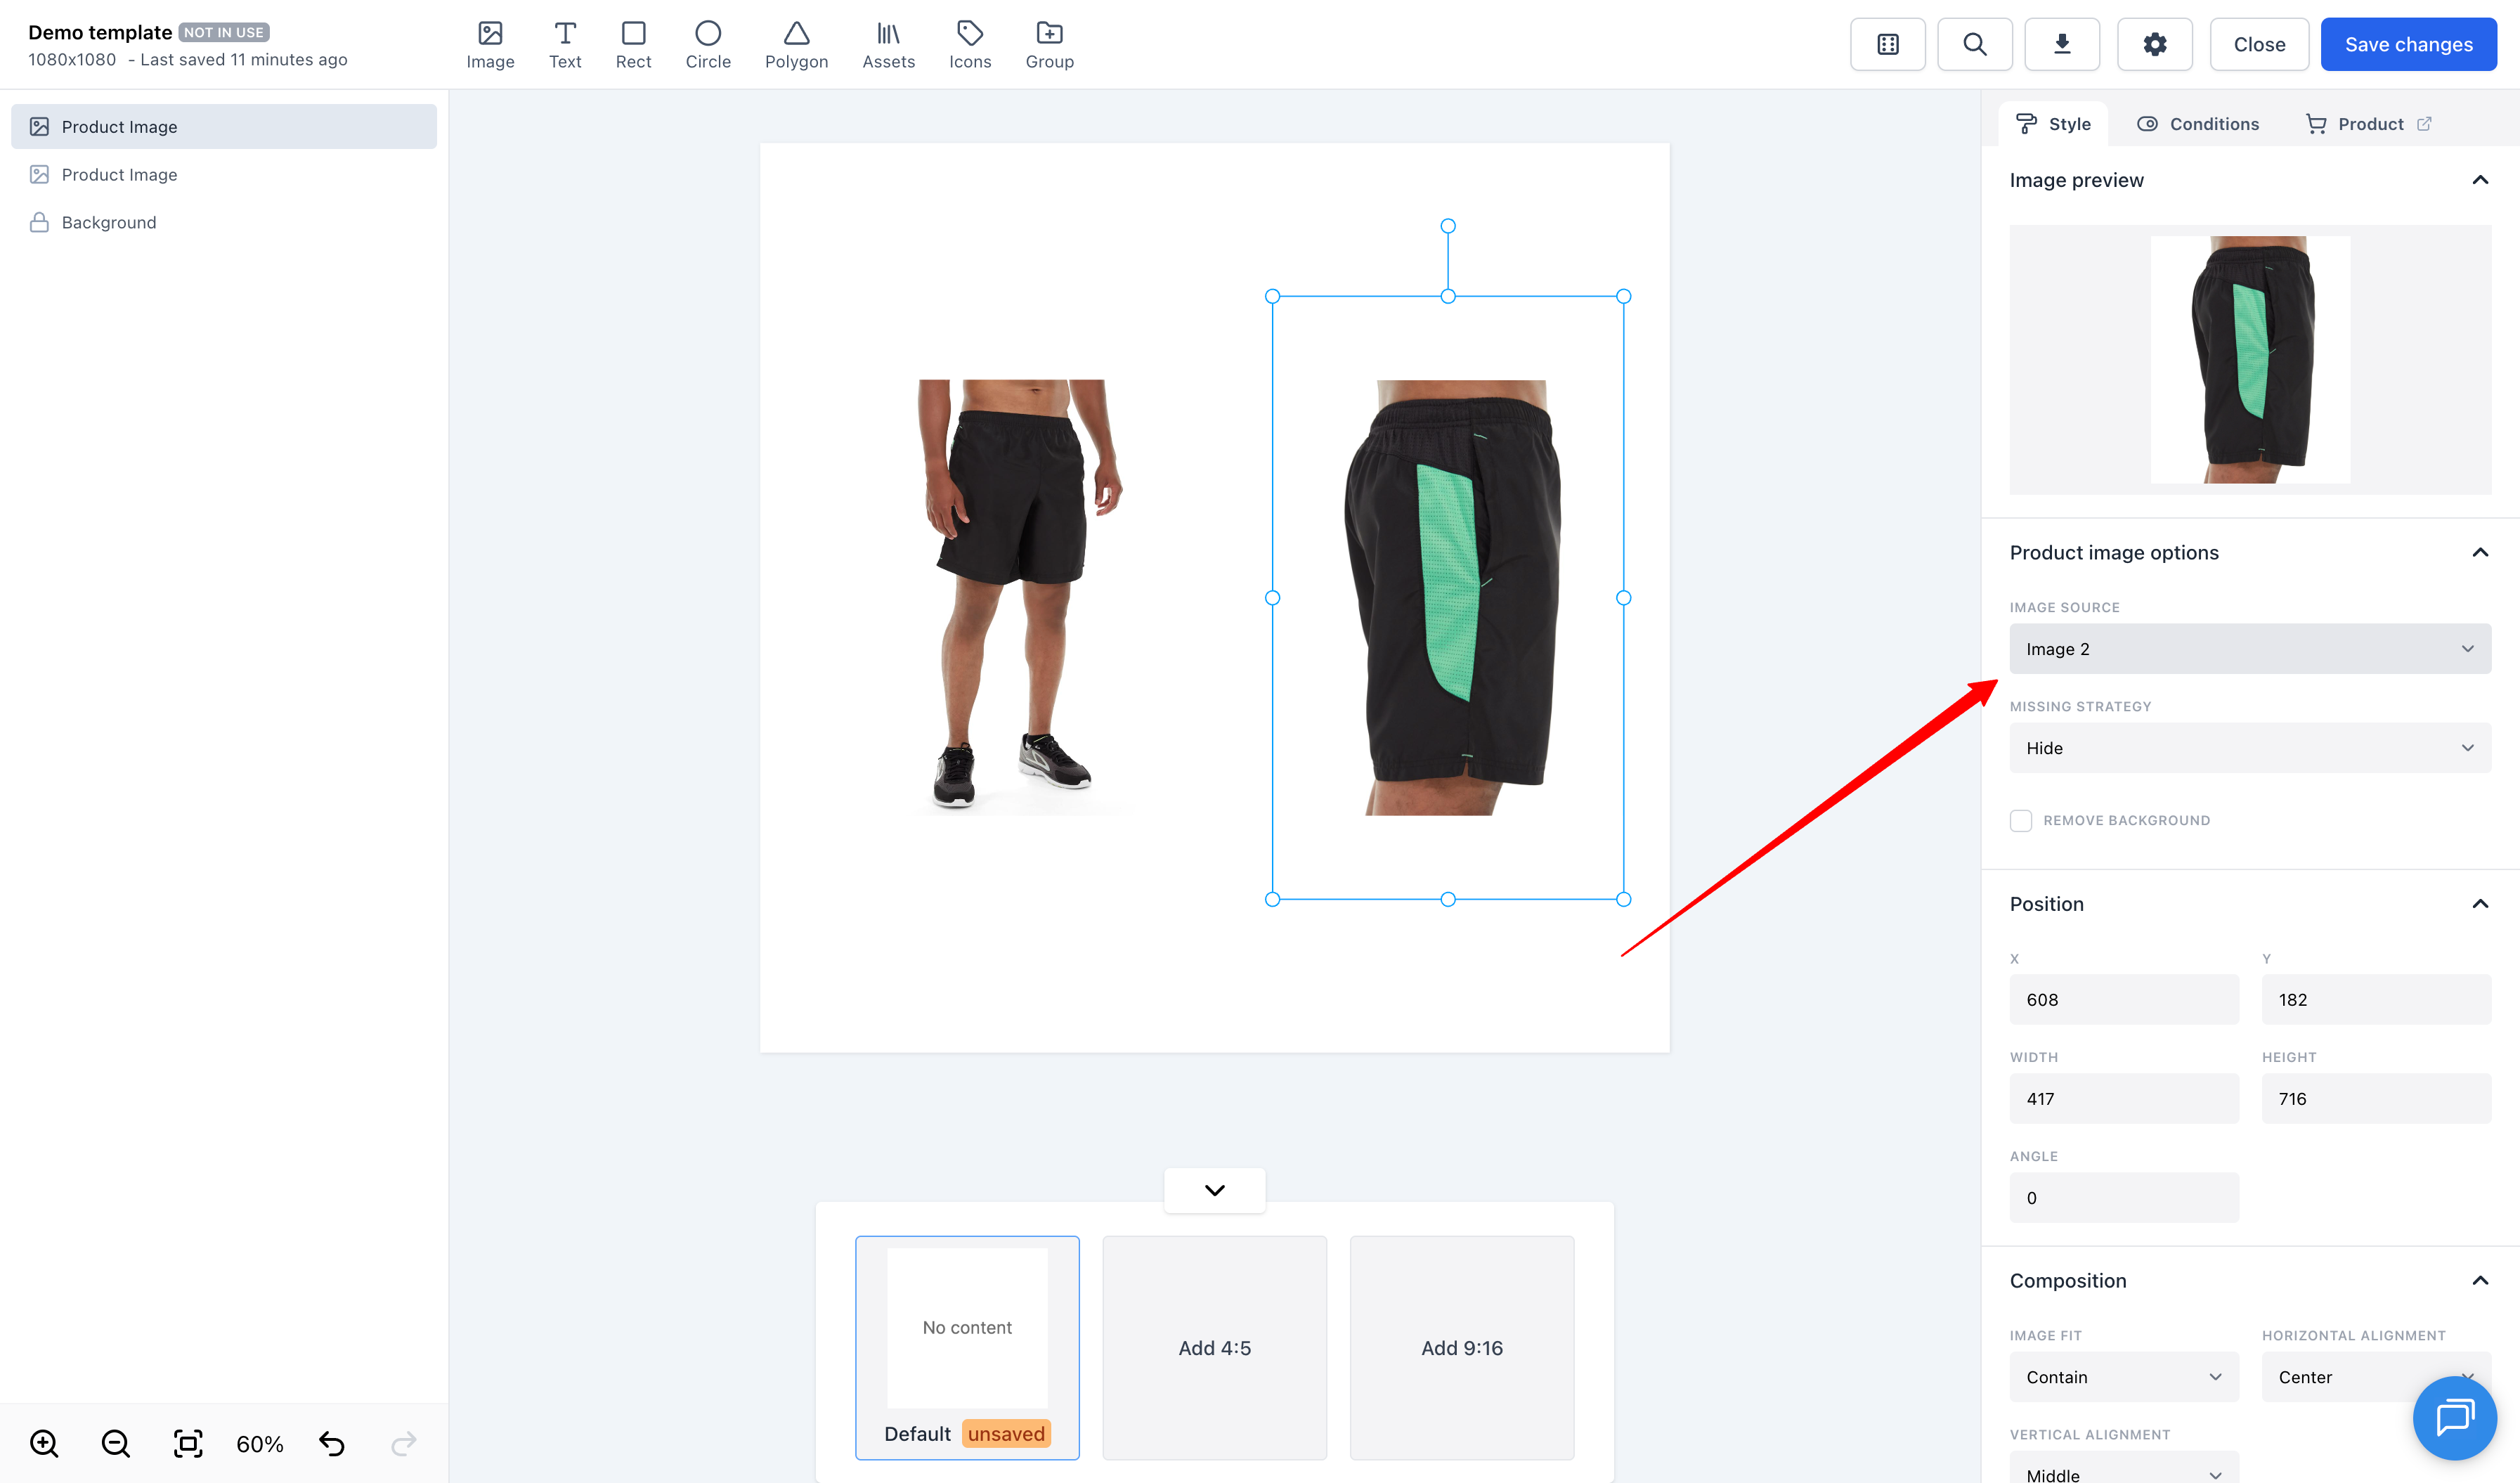
We support having multiple dynamic product images within the same template. This is useful if you want to show more than one of the product's images. Once you've added a dynamic product image, you can select which image, from the product, you want to display by clicking on the image and then selecting the image from the dropdown menu in the attributes panel.
Editing Elements
To edit an element simply click on it on the canvas or in the layers panel. This will bring up the attributes panel on the right side of the screen. In this panel you can edit the properties of the element. The properties available will depend on the type of element you have selected.
Moving and Resizing Elements
To move an element simply click and drag it on the canvas. To resize an element click and drag the resize handles on the corners of the element. If you want to resize the element without changing the aspect ratio hold the shift key while dragging the resize handles. If you want to resize it from the center hold the option (macOS) or alt (Windows) key while dragging the resize handles.
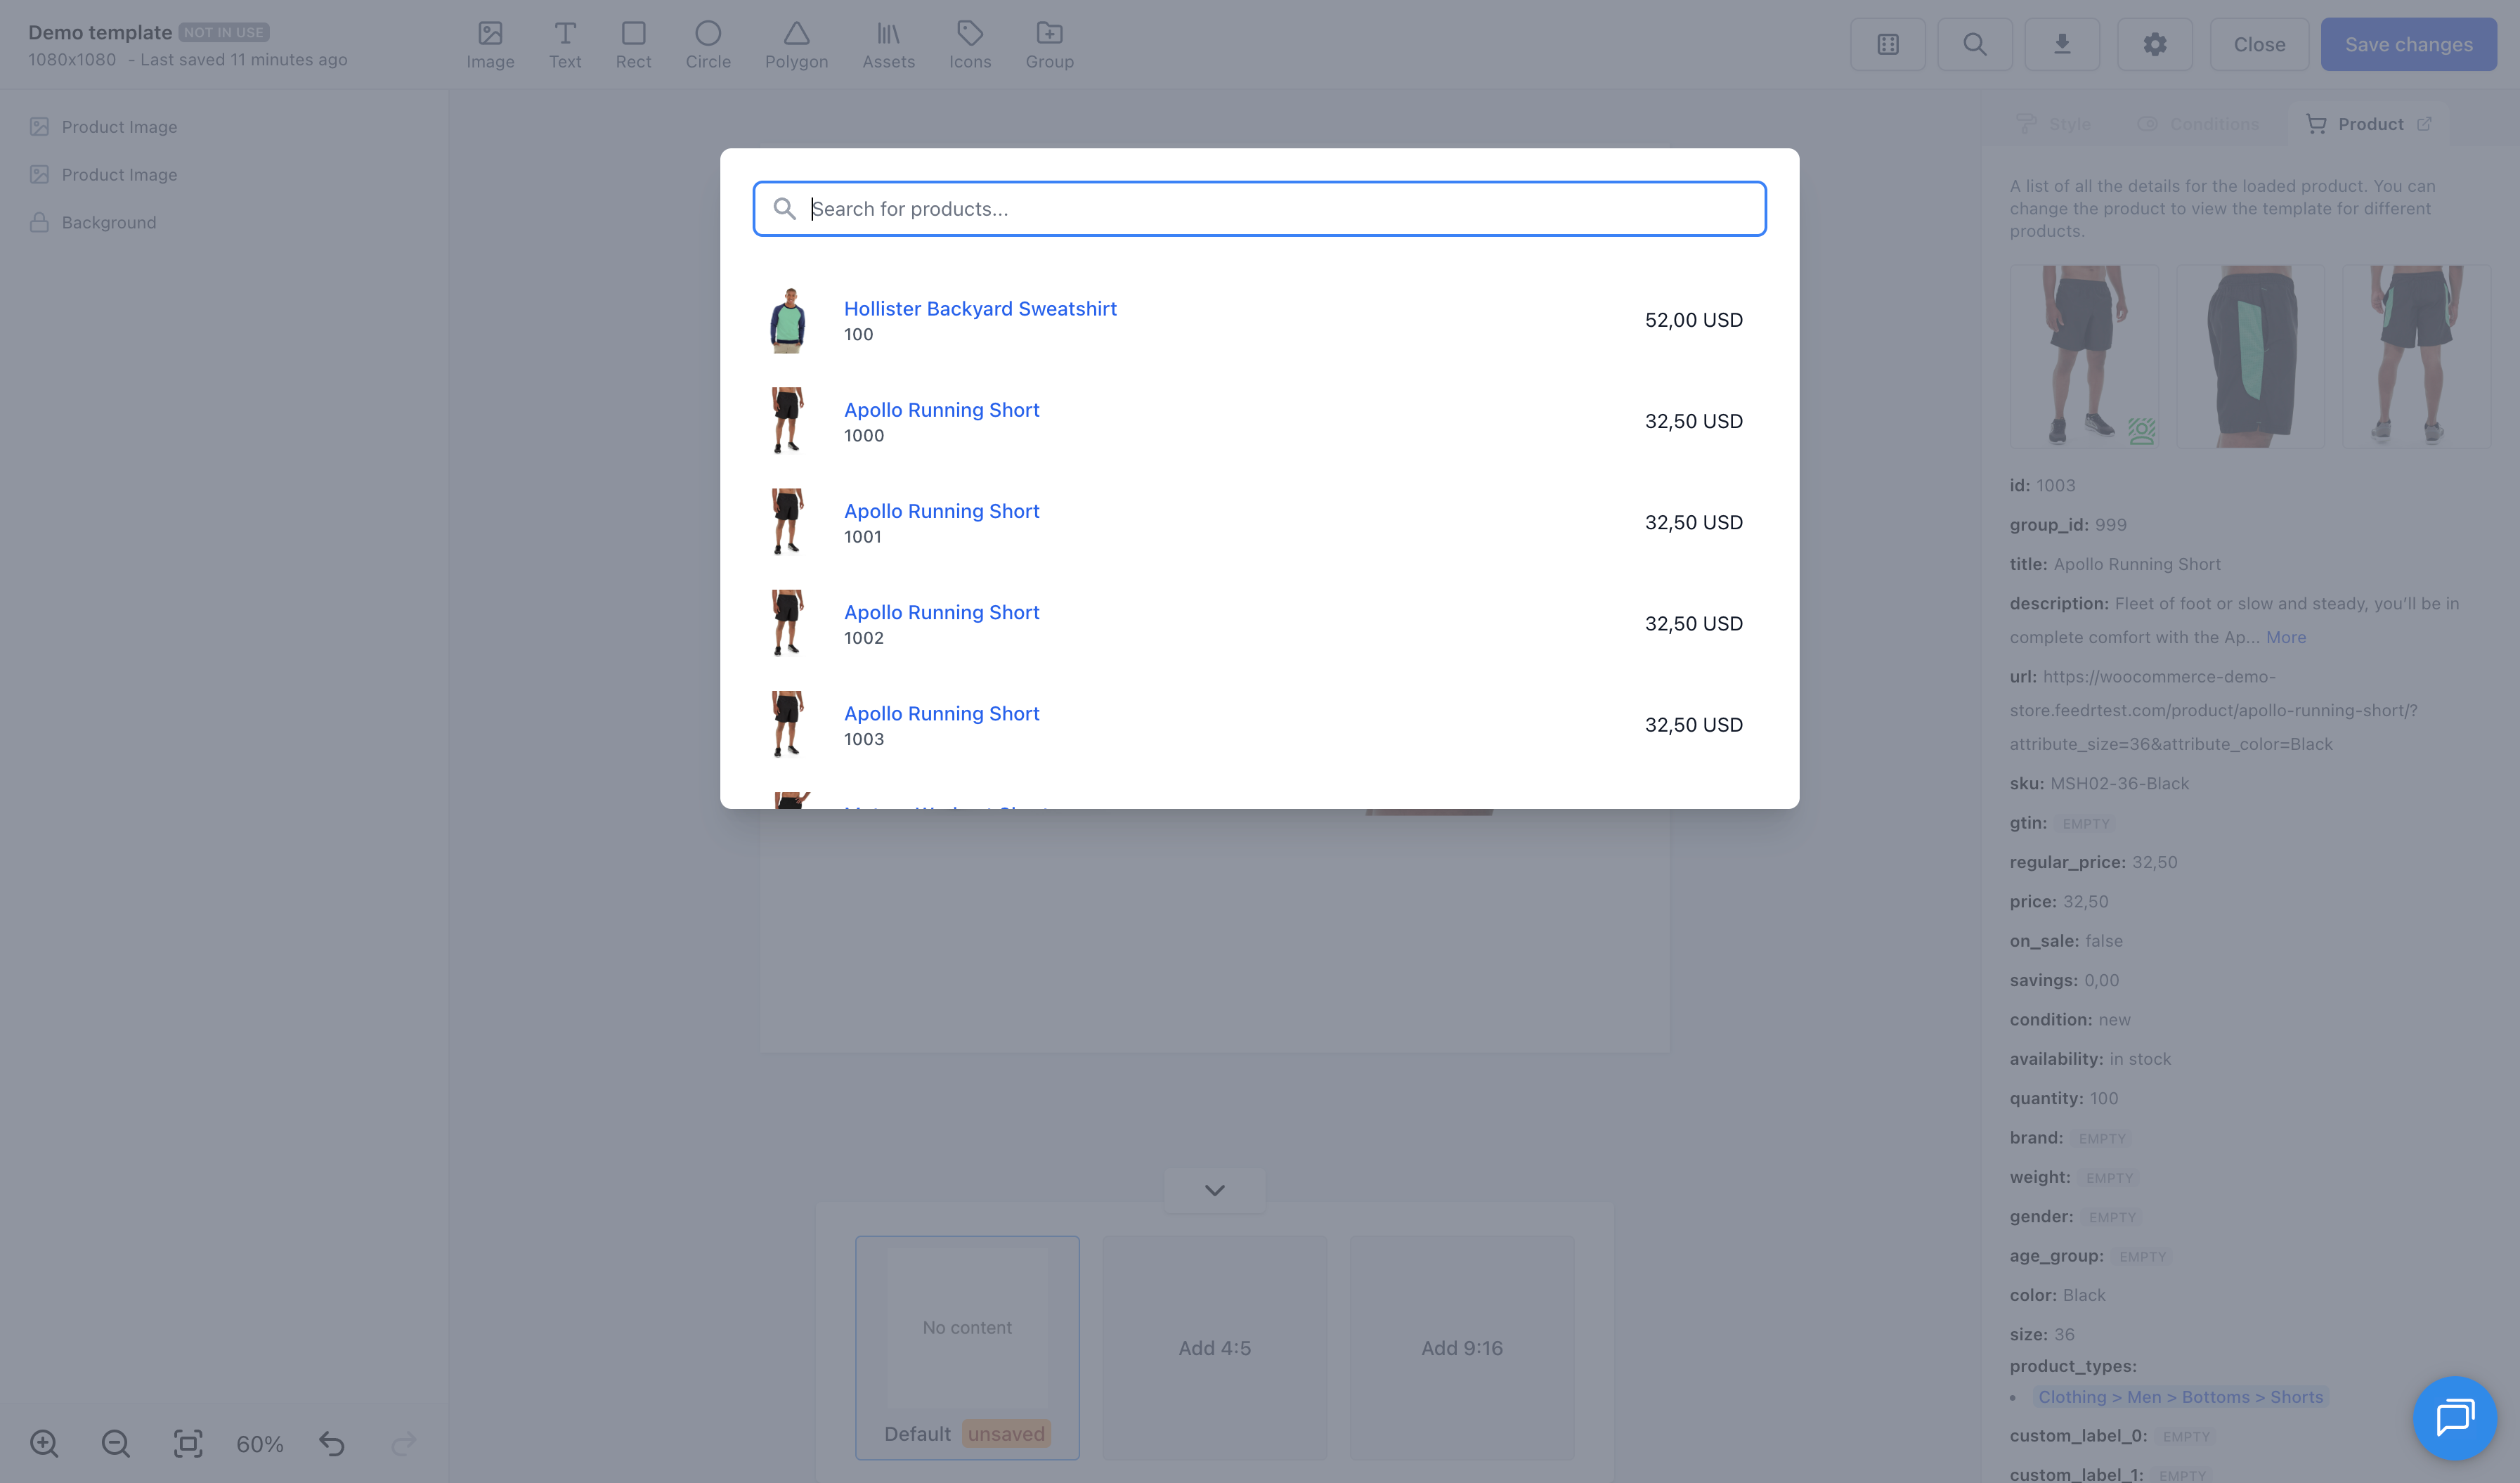
Preview products
We automatically load a random product into the editor. However, you can always change which product to use by clicking the "Search for product" button in the top right corner of the editor.
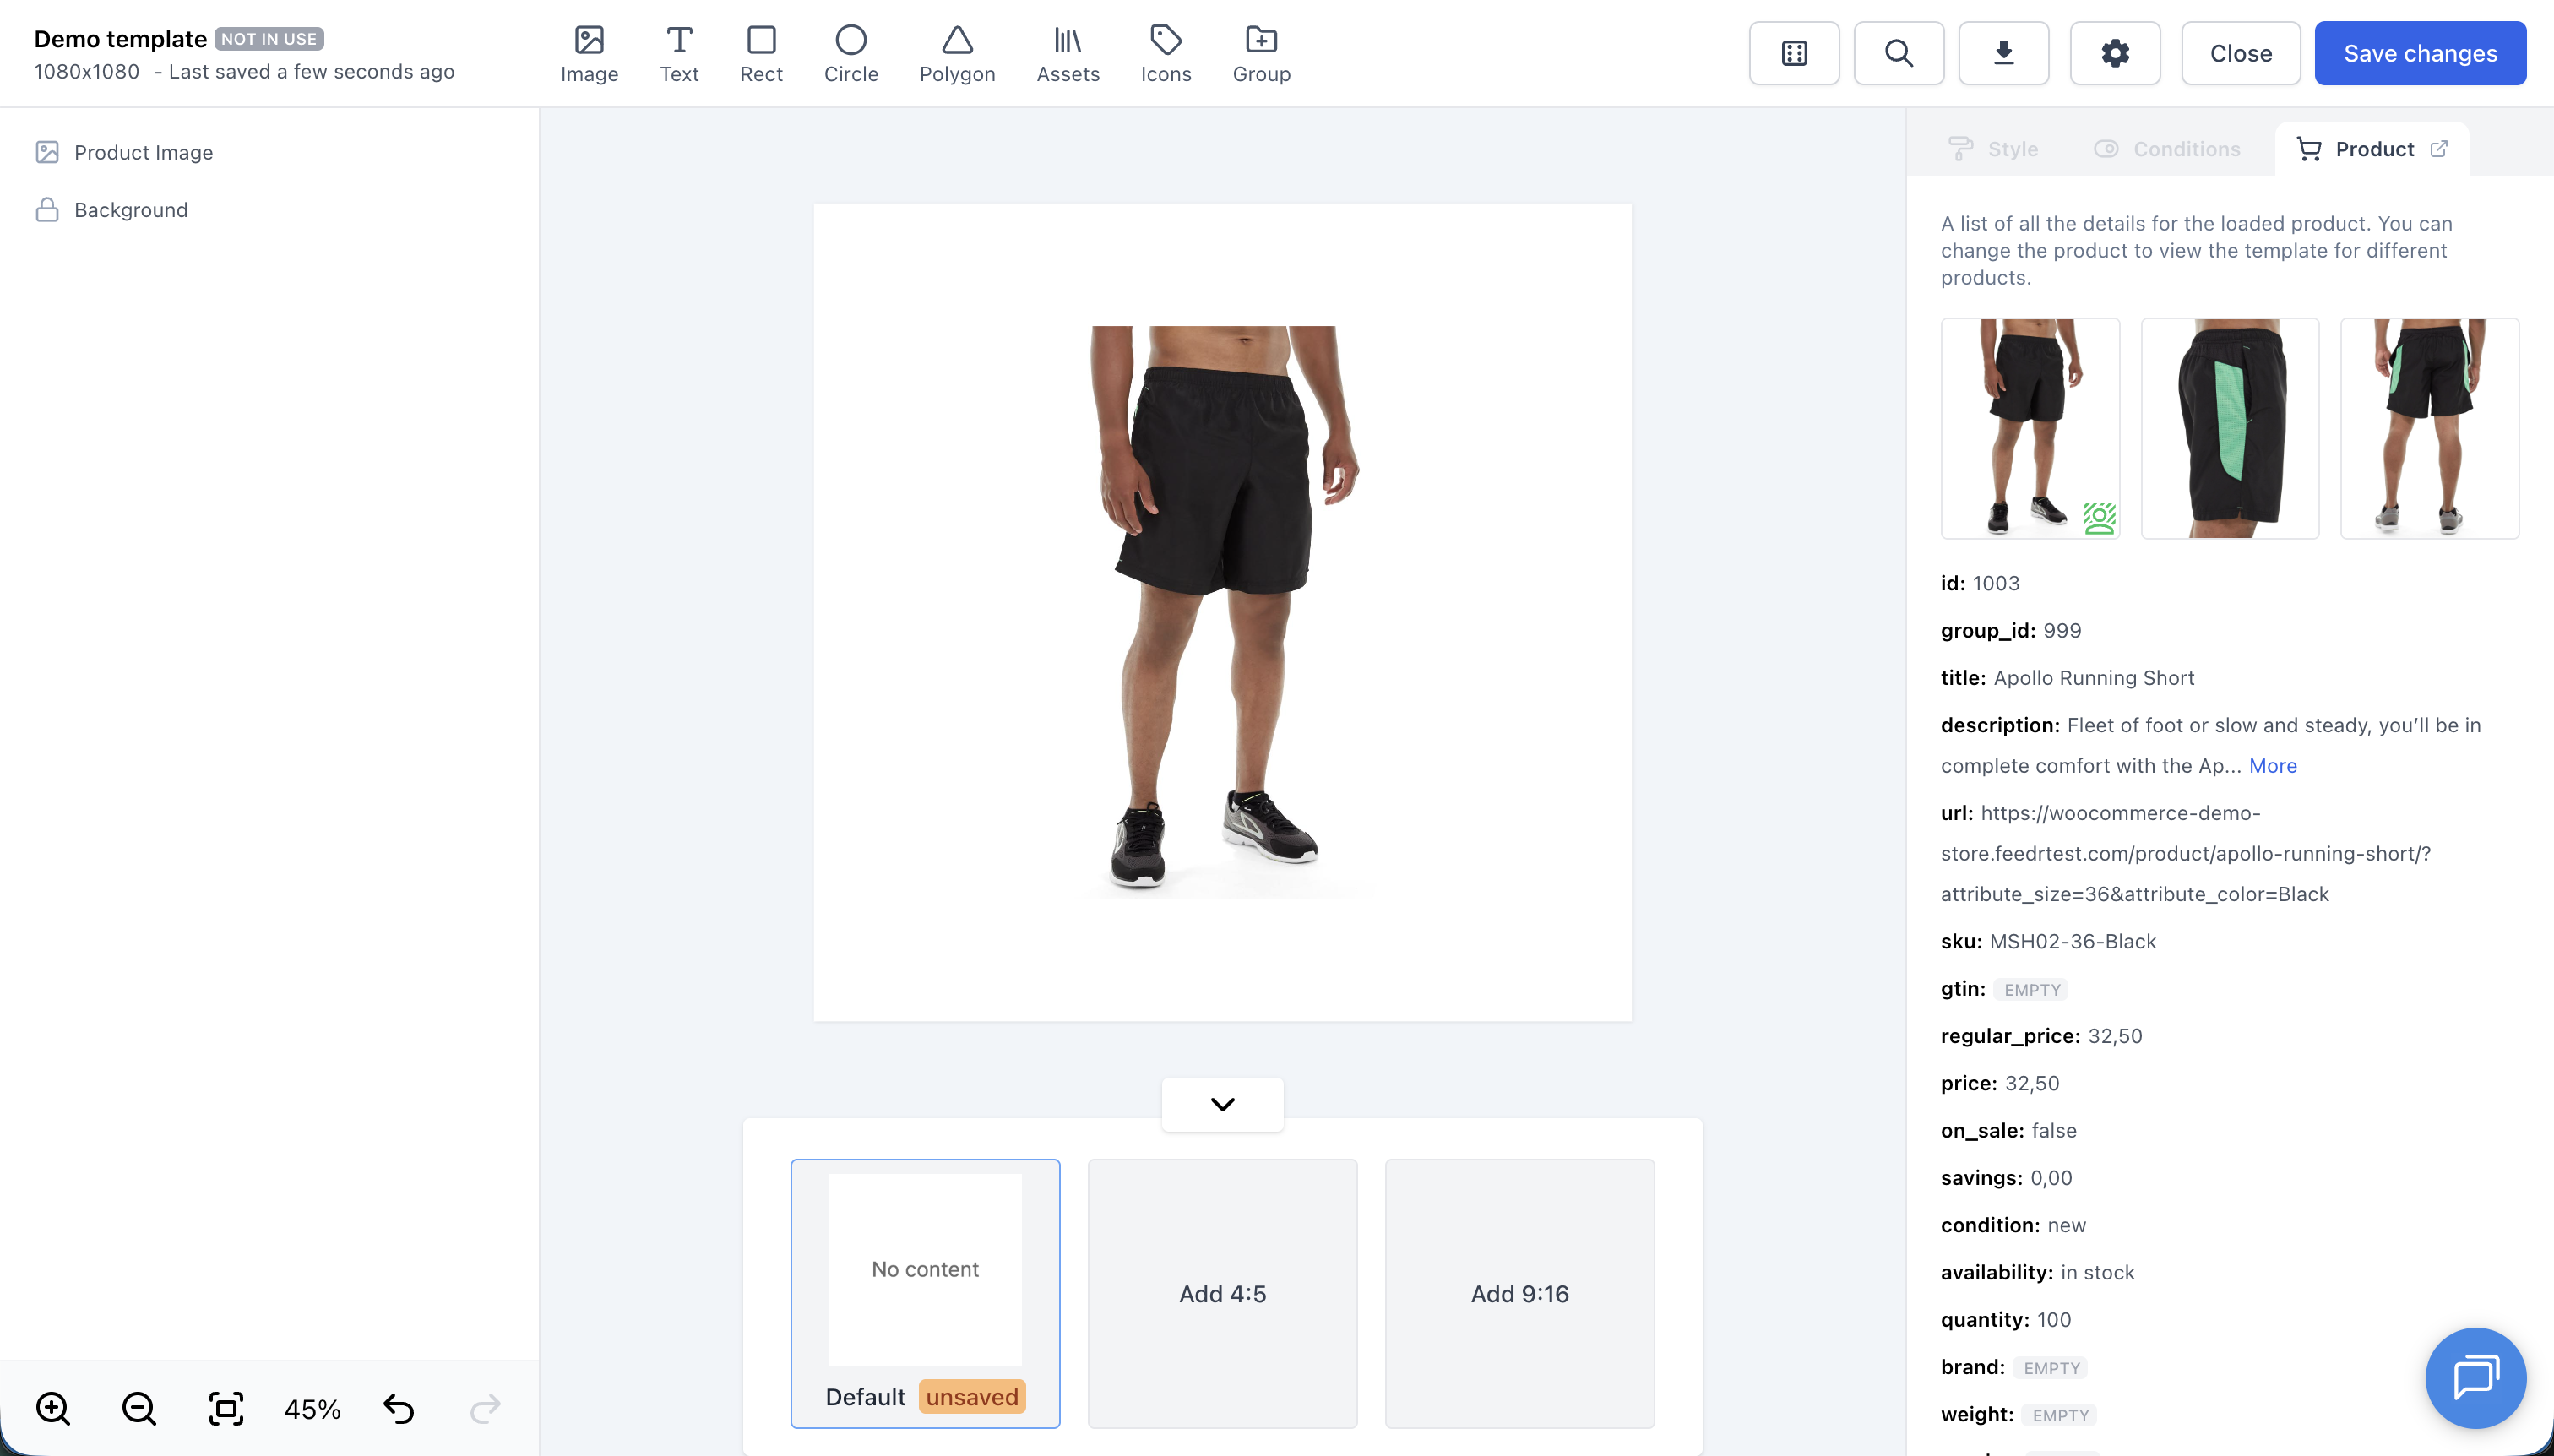
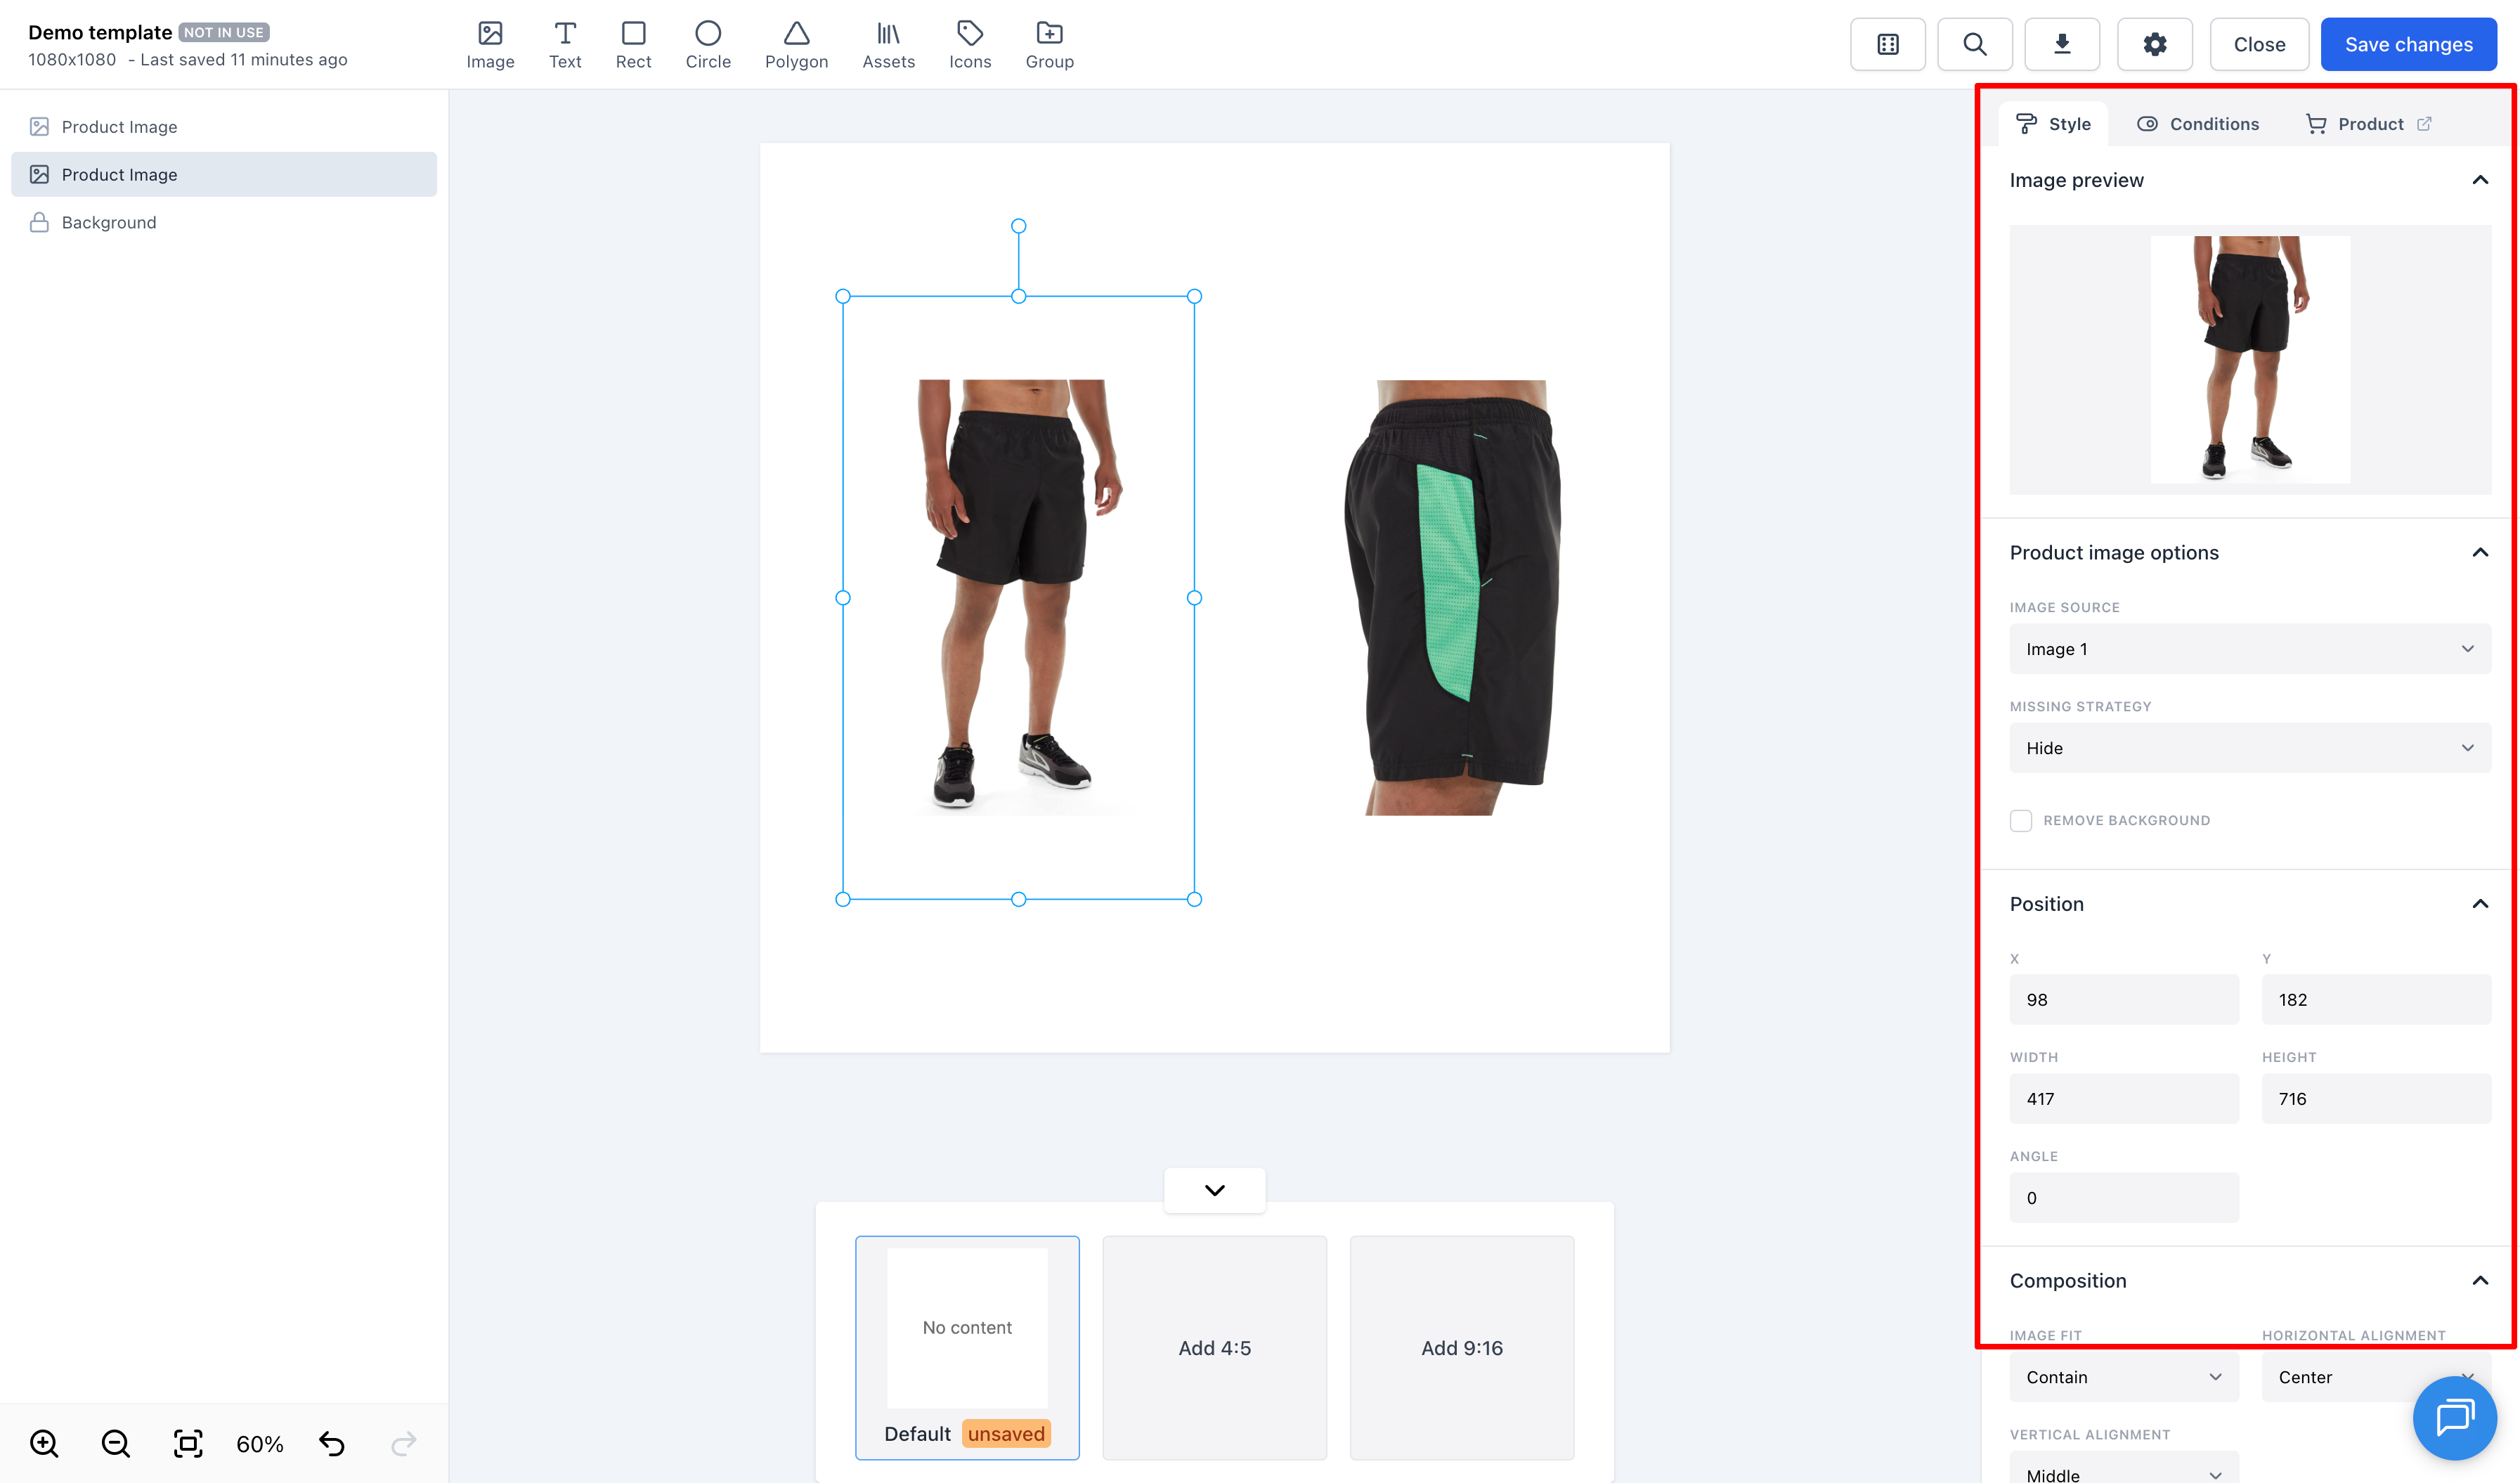
Properties Panel
When a layer is selected, the properties panel on the right side will show the properties for that layer. The panel is seperated into three tabs (Style, Conditions, and Product).
- Style - The style tab allows you to edit the visual properties of the selected element.
- Conditions - The conditions tab allows you to set conditions for the selected element. For example, you can set a condition that the element should only be visible if the product is on sale. Read more about conditions here.
- View product - The product tab allows you to view all available product data.
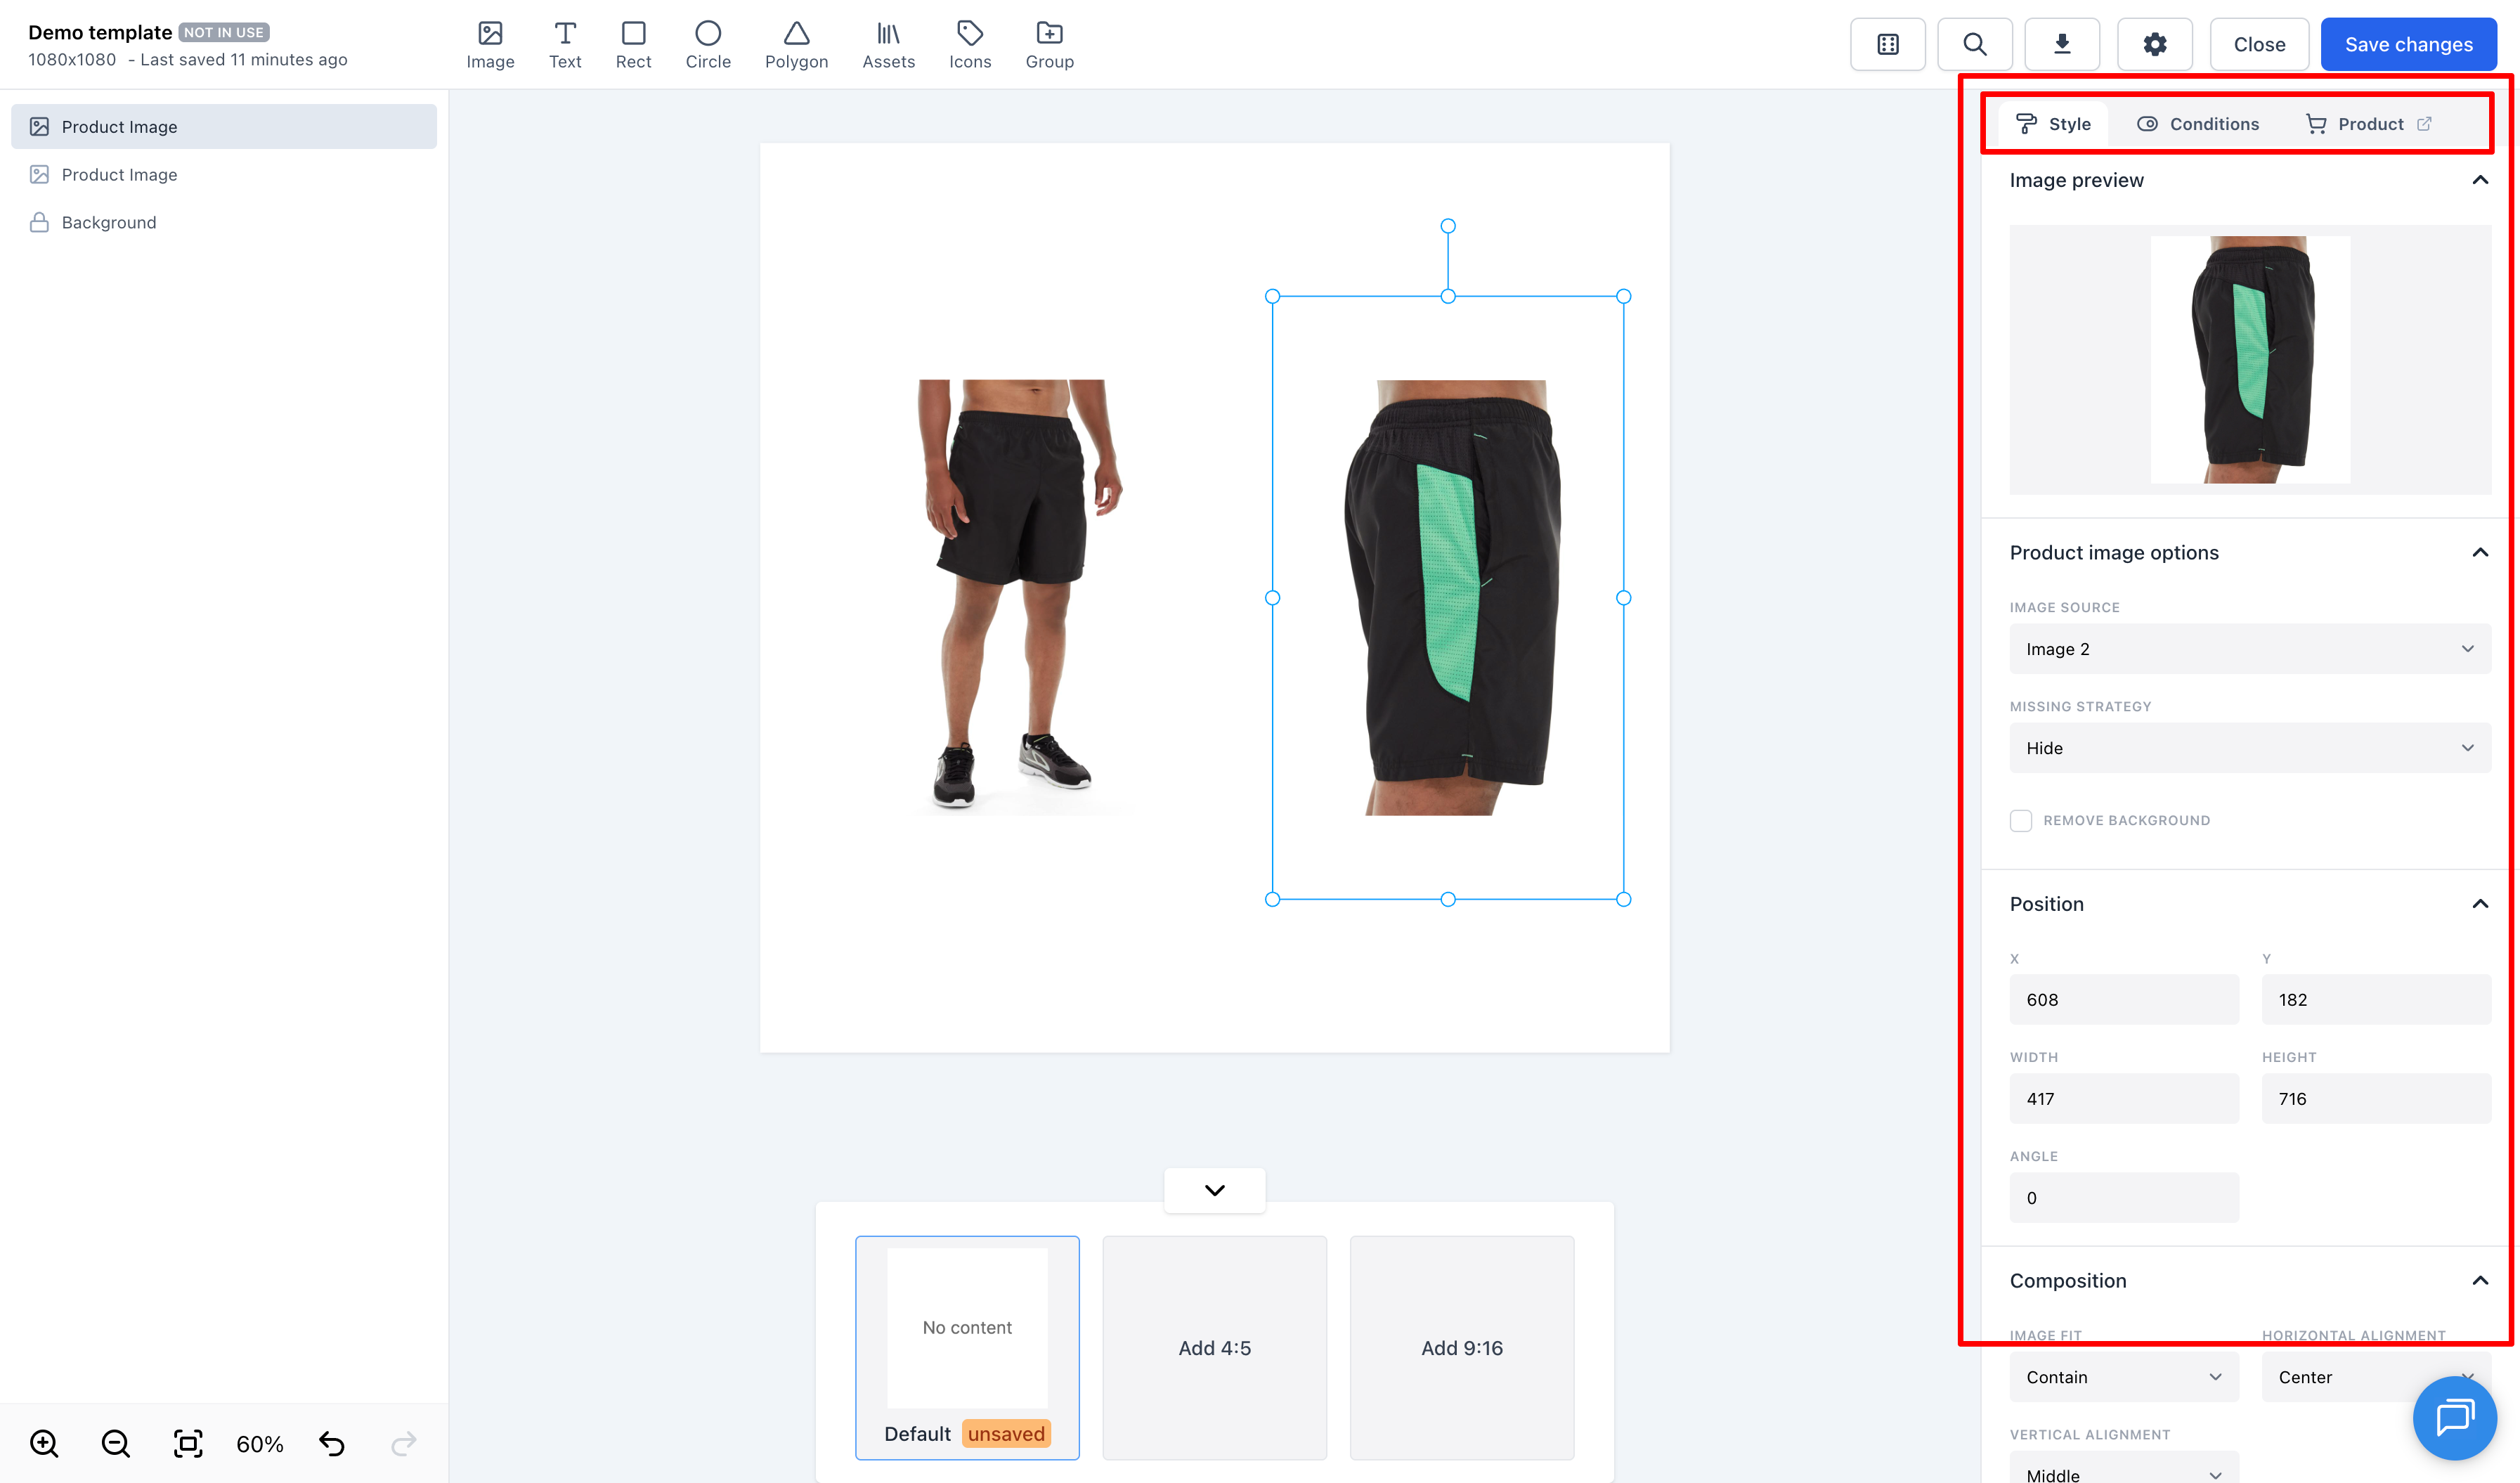
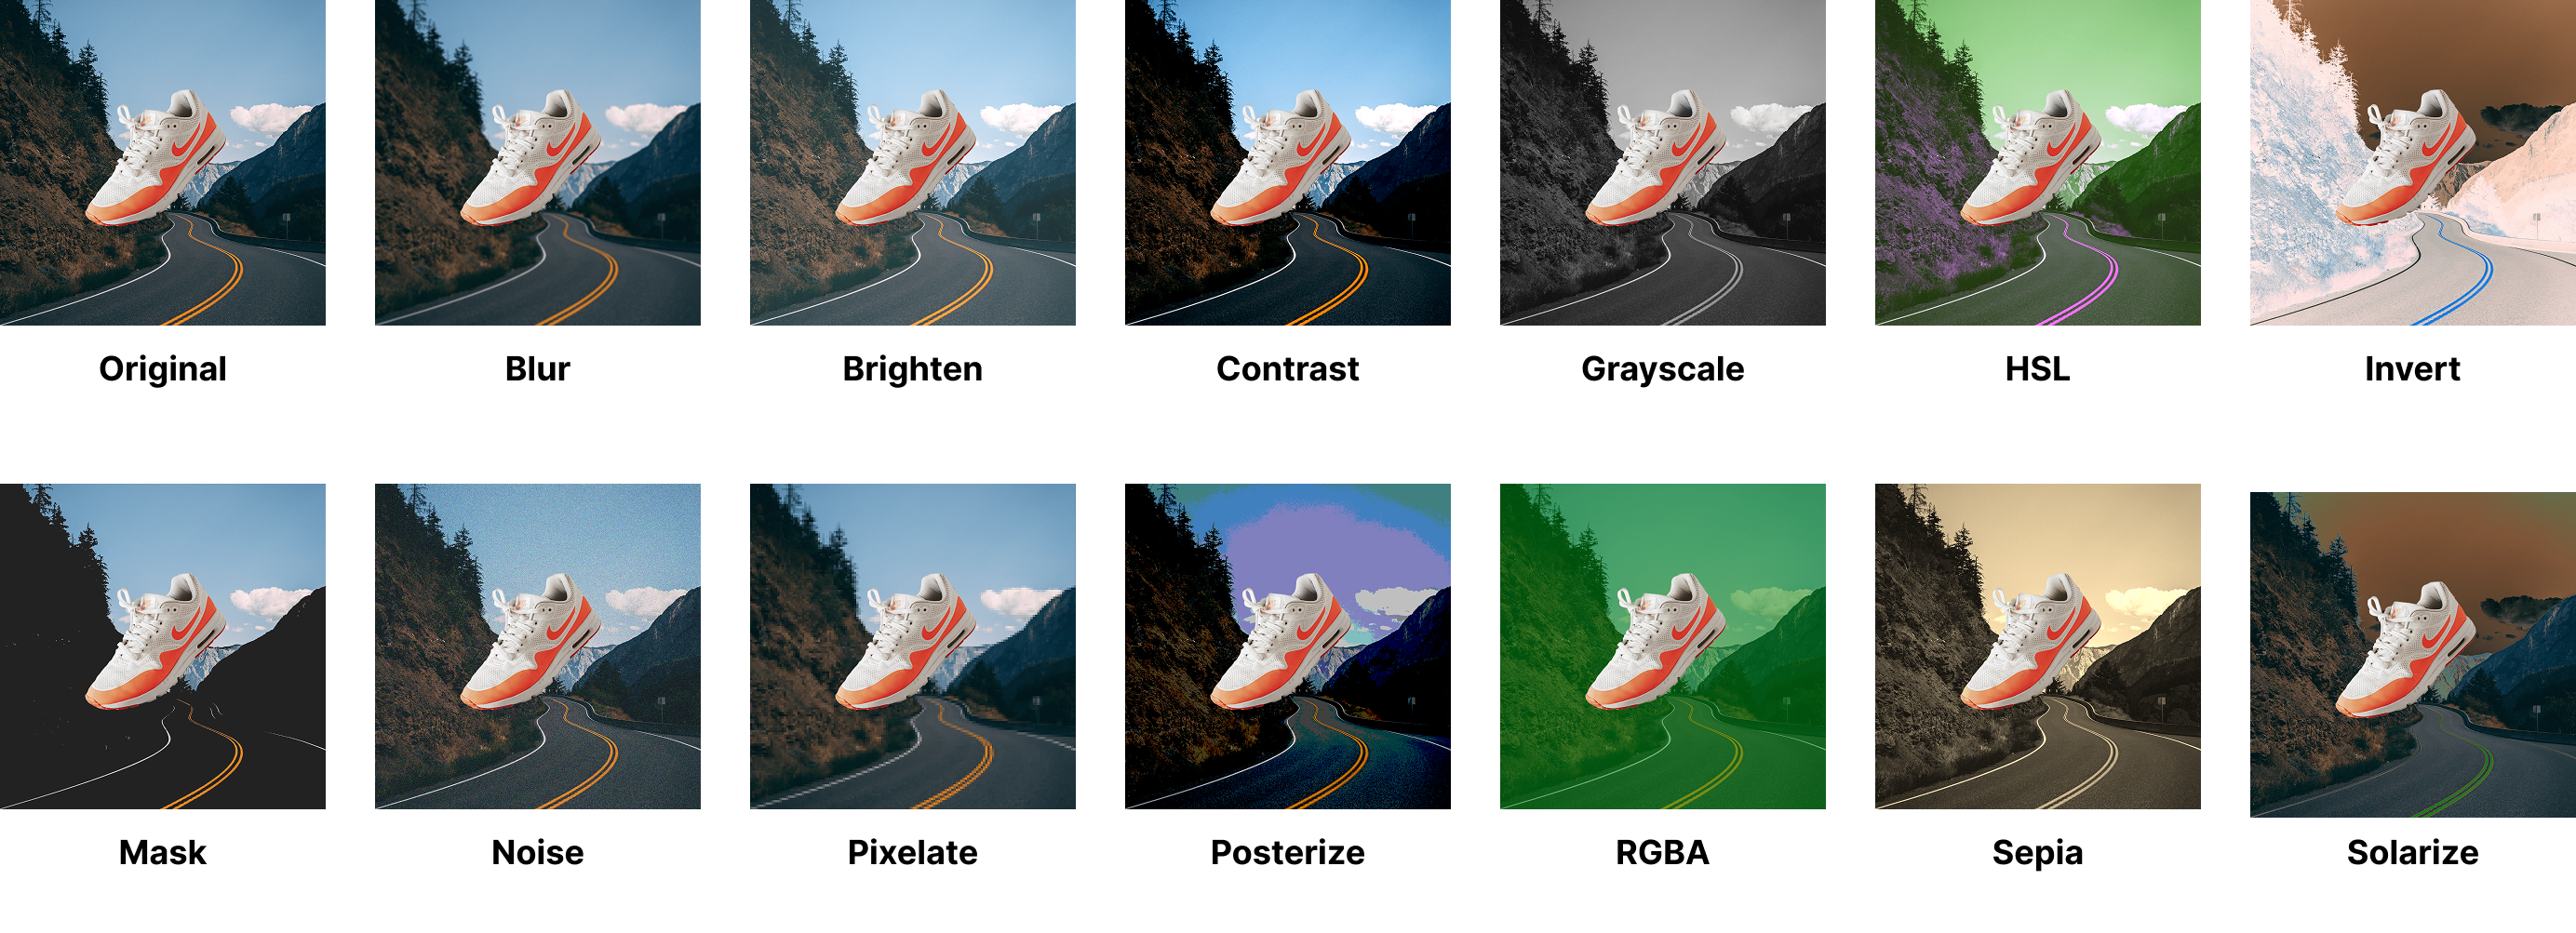
Image filters
Filters are a powerful tool that can transform the mood and tone of an image in just a few clicks. Whether you're looking to add a vintage feel with sepia or solarize, make colors pop with HSL or HSV, or give your image a grunge look with noise or blur, filters can help you achieve your vision with ease.
Here's a quick rundown of the filters you can choose from:
INFO
In the examples the filter is only applied to the background - not the sneaker.