Appearance
How to manually connect feed to Meta Catalog
This article will guide you through how to manually connect your Meta feed to your Meta Catalog. This is not the recommended way to connect to Meta as it will limit supported features.
WARNING
We highly recommend that you connect your Meta feed to your Meta Catalog using this guide: How to connect feed to Meta catalog
This guide assumes you already have a Meta Catalog. If you don't, start by following this guide: How to create a new Meta Catalog.
There are a few different ways to set up a Meta feed. Skip to the section that matches your situation.
- My Meta Catalog already have a primary feed
- My Meta Catalog is connected to Shopify or WooCommerce app
- I'm using a new Meta Catalog
1. My Meta Catalog already have a primary feed
If you already have a Meta catalog with an existing primary feed you need to decide if you want to replace the existing primary feed or add the Feedr feed as a supplementary feed.
Replace the existing primary feed
If you decide to replace the existing primary feed, you need to make sure that the product IDs have the same format in both feeds. Otherwise Meta will see all the products as new products and your tracking will might stop working properly.
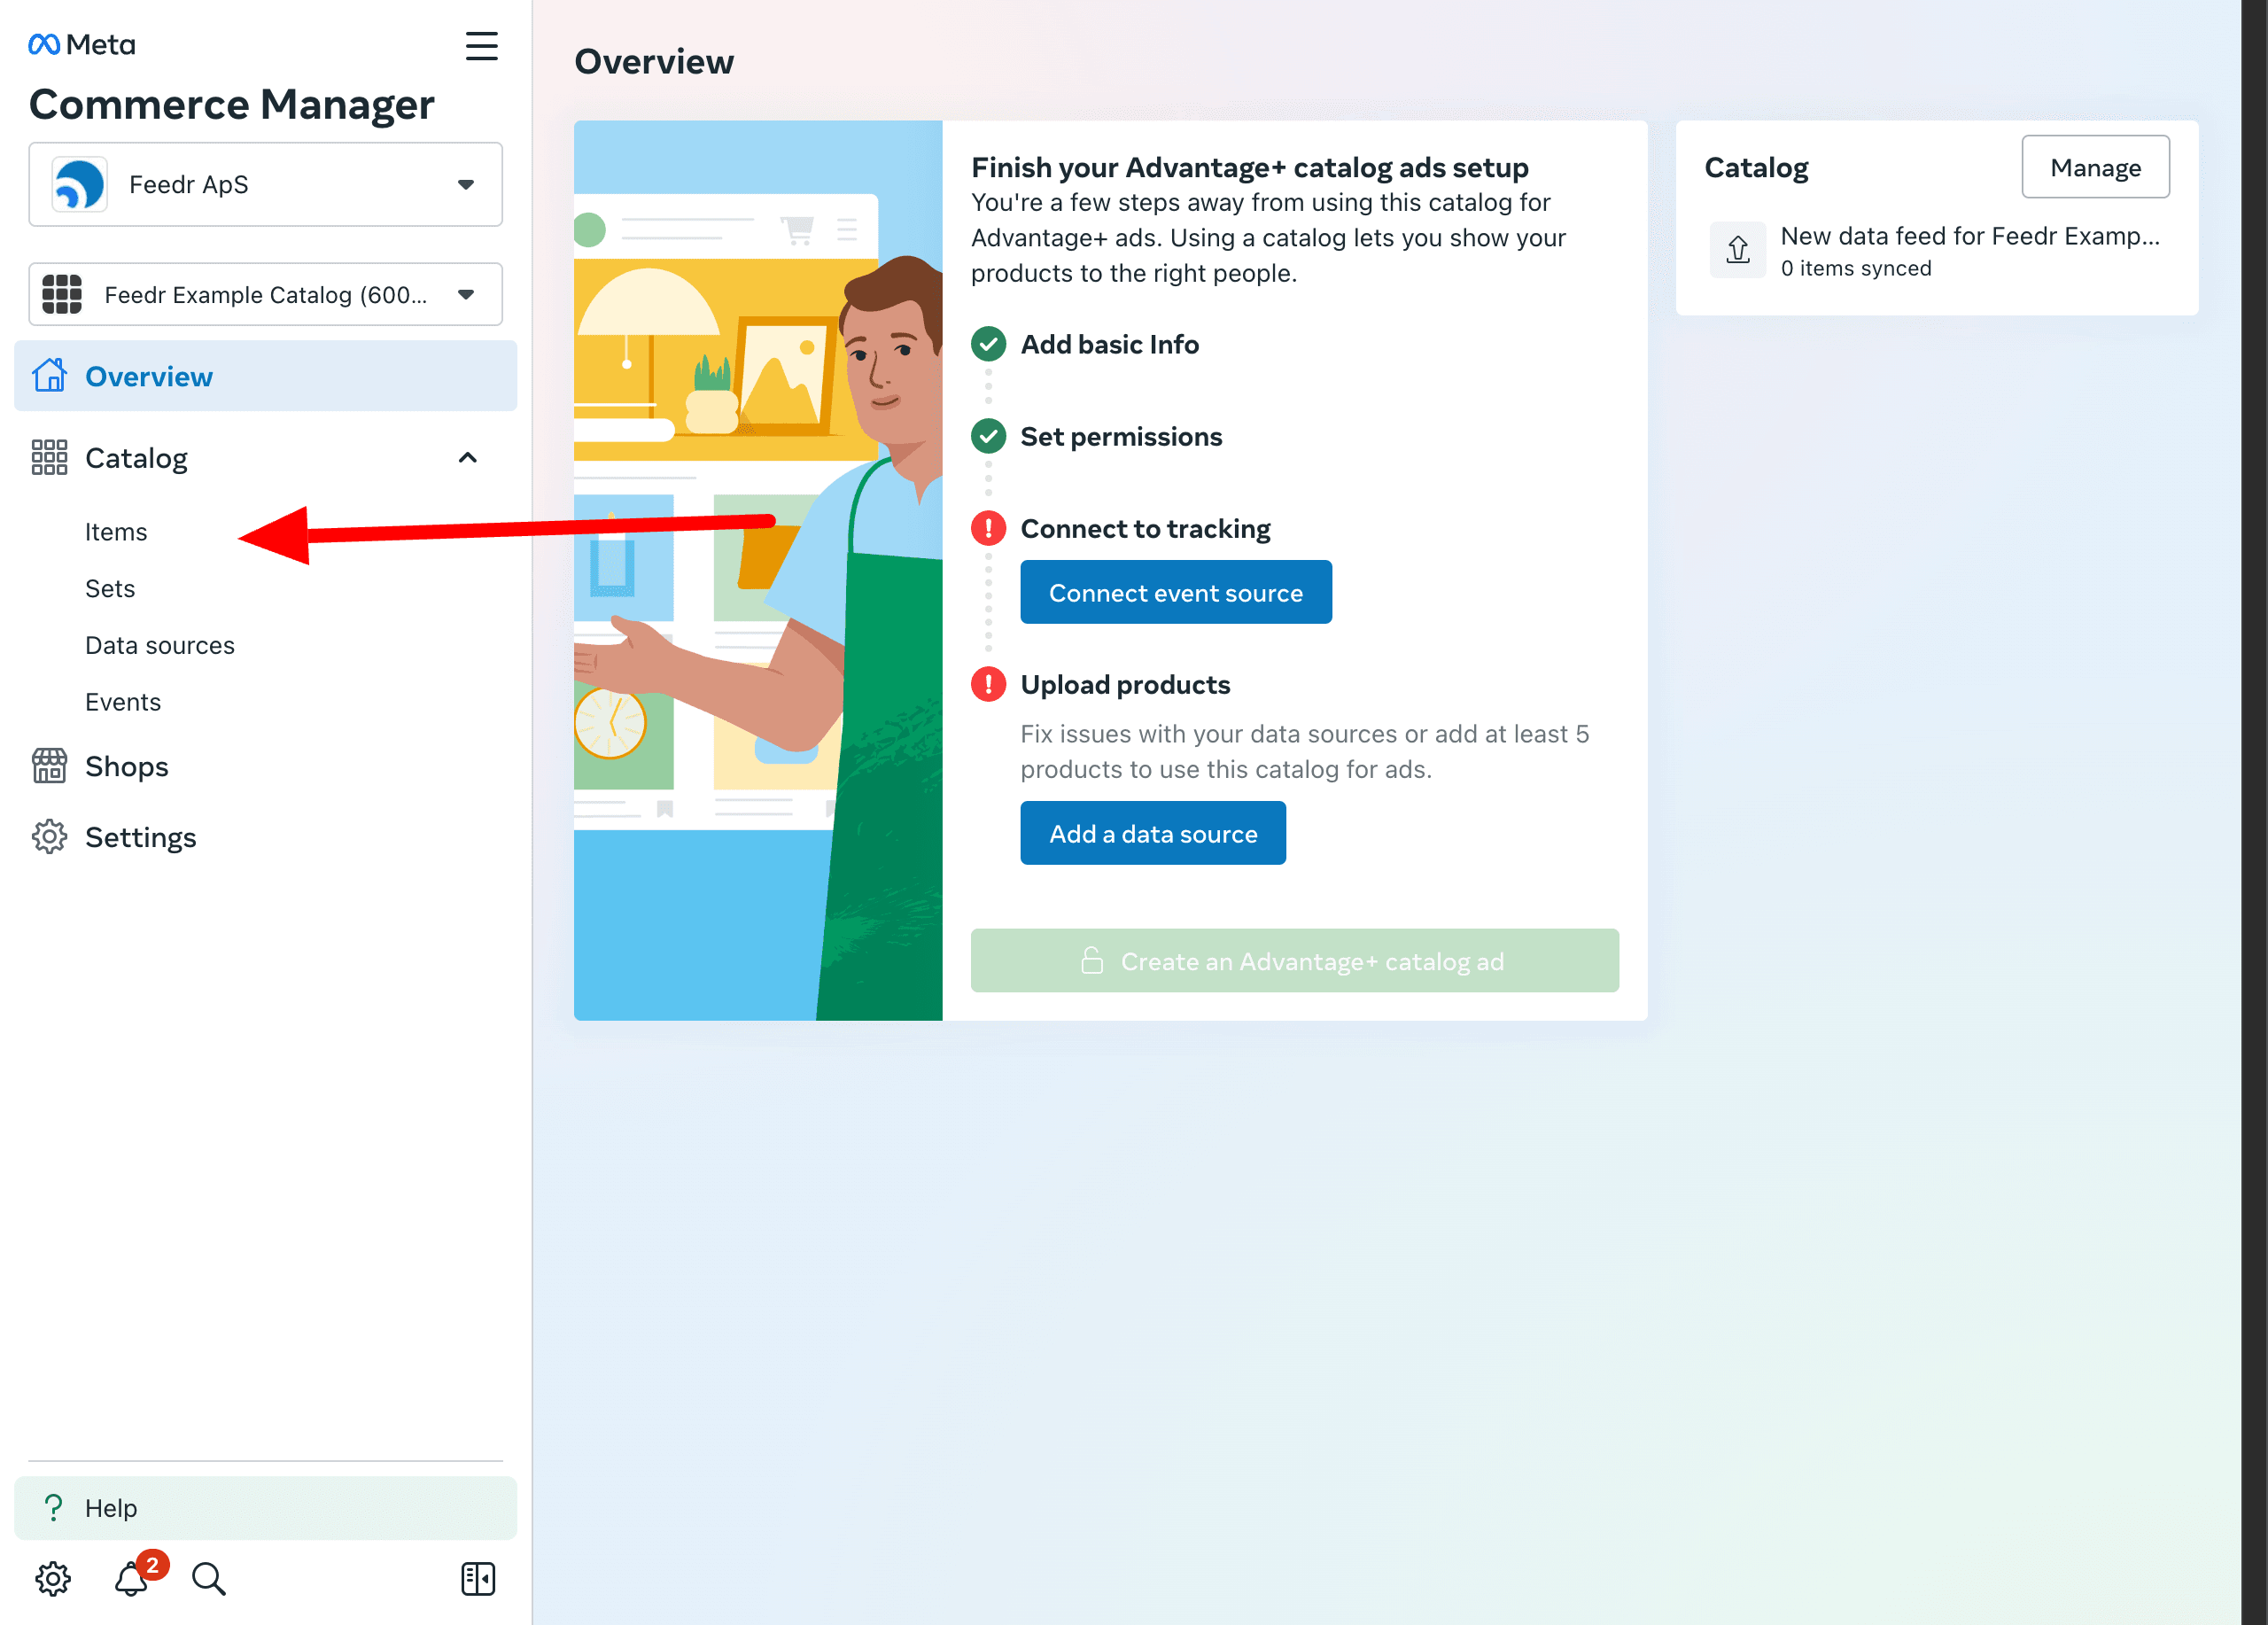
You can check that the IDs have the same format by going to the Items tab and comparing the product IDs of the two feeds.
Example:

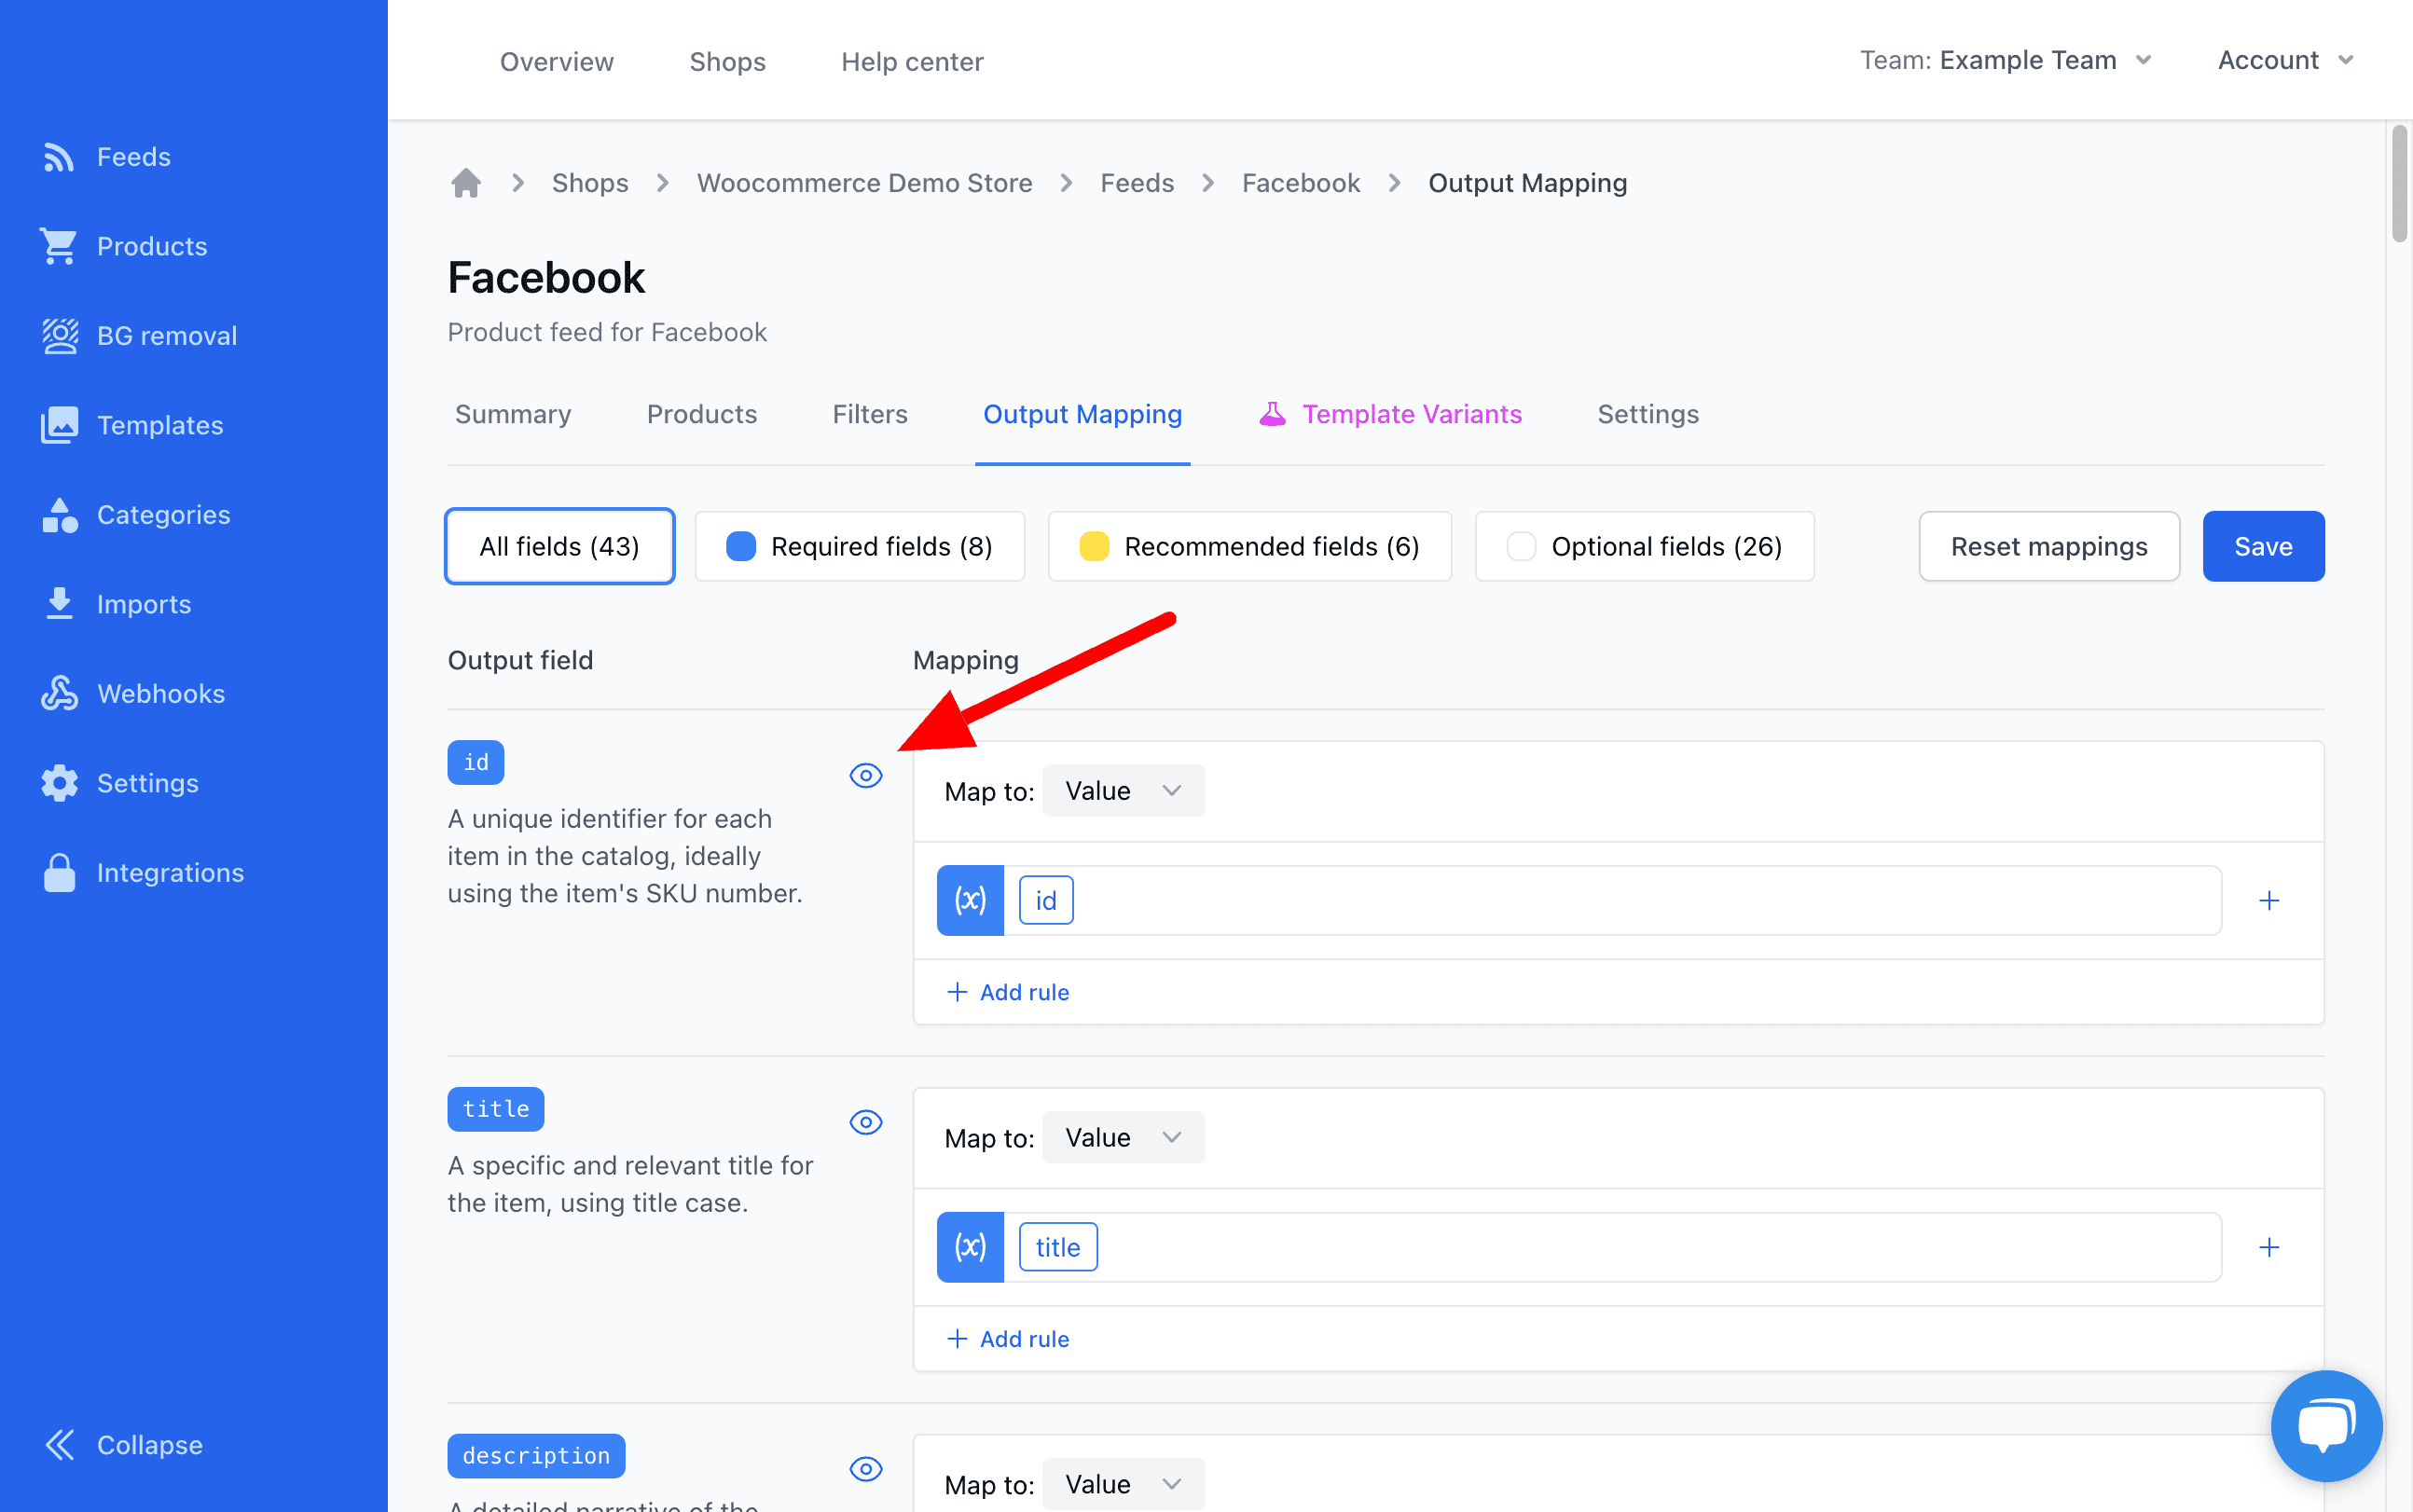
To compare them we can go to the Output mapping tab. Here you can click on the Quick look button next to the id mapping, to see the contents.
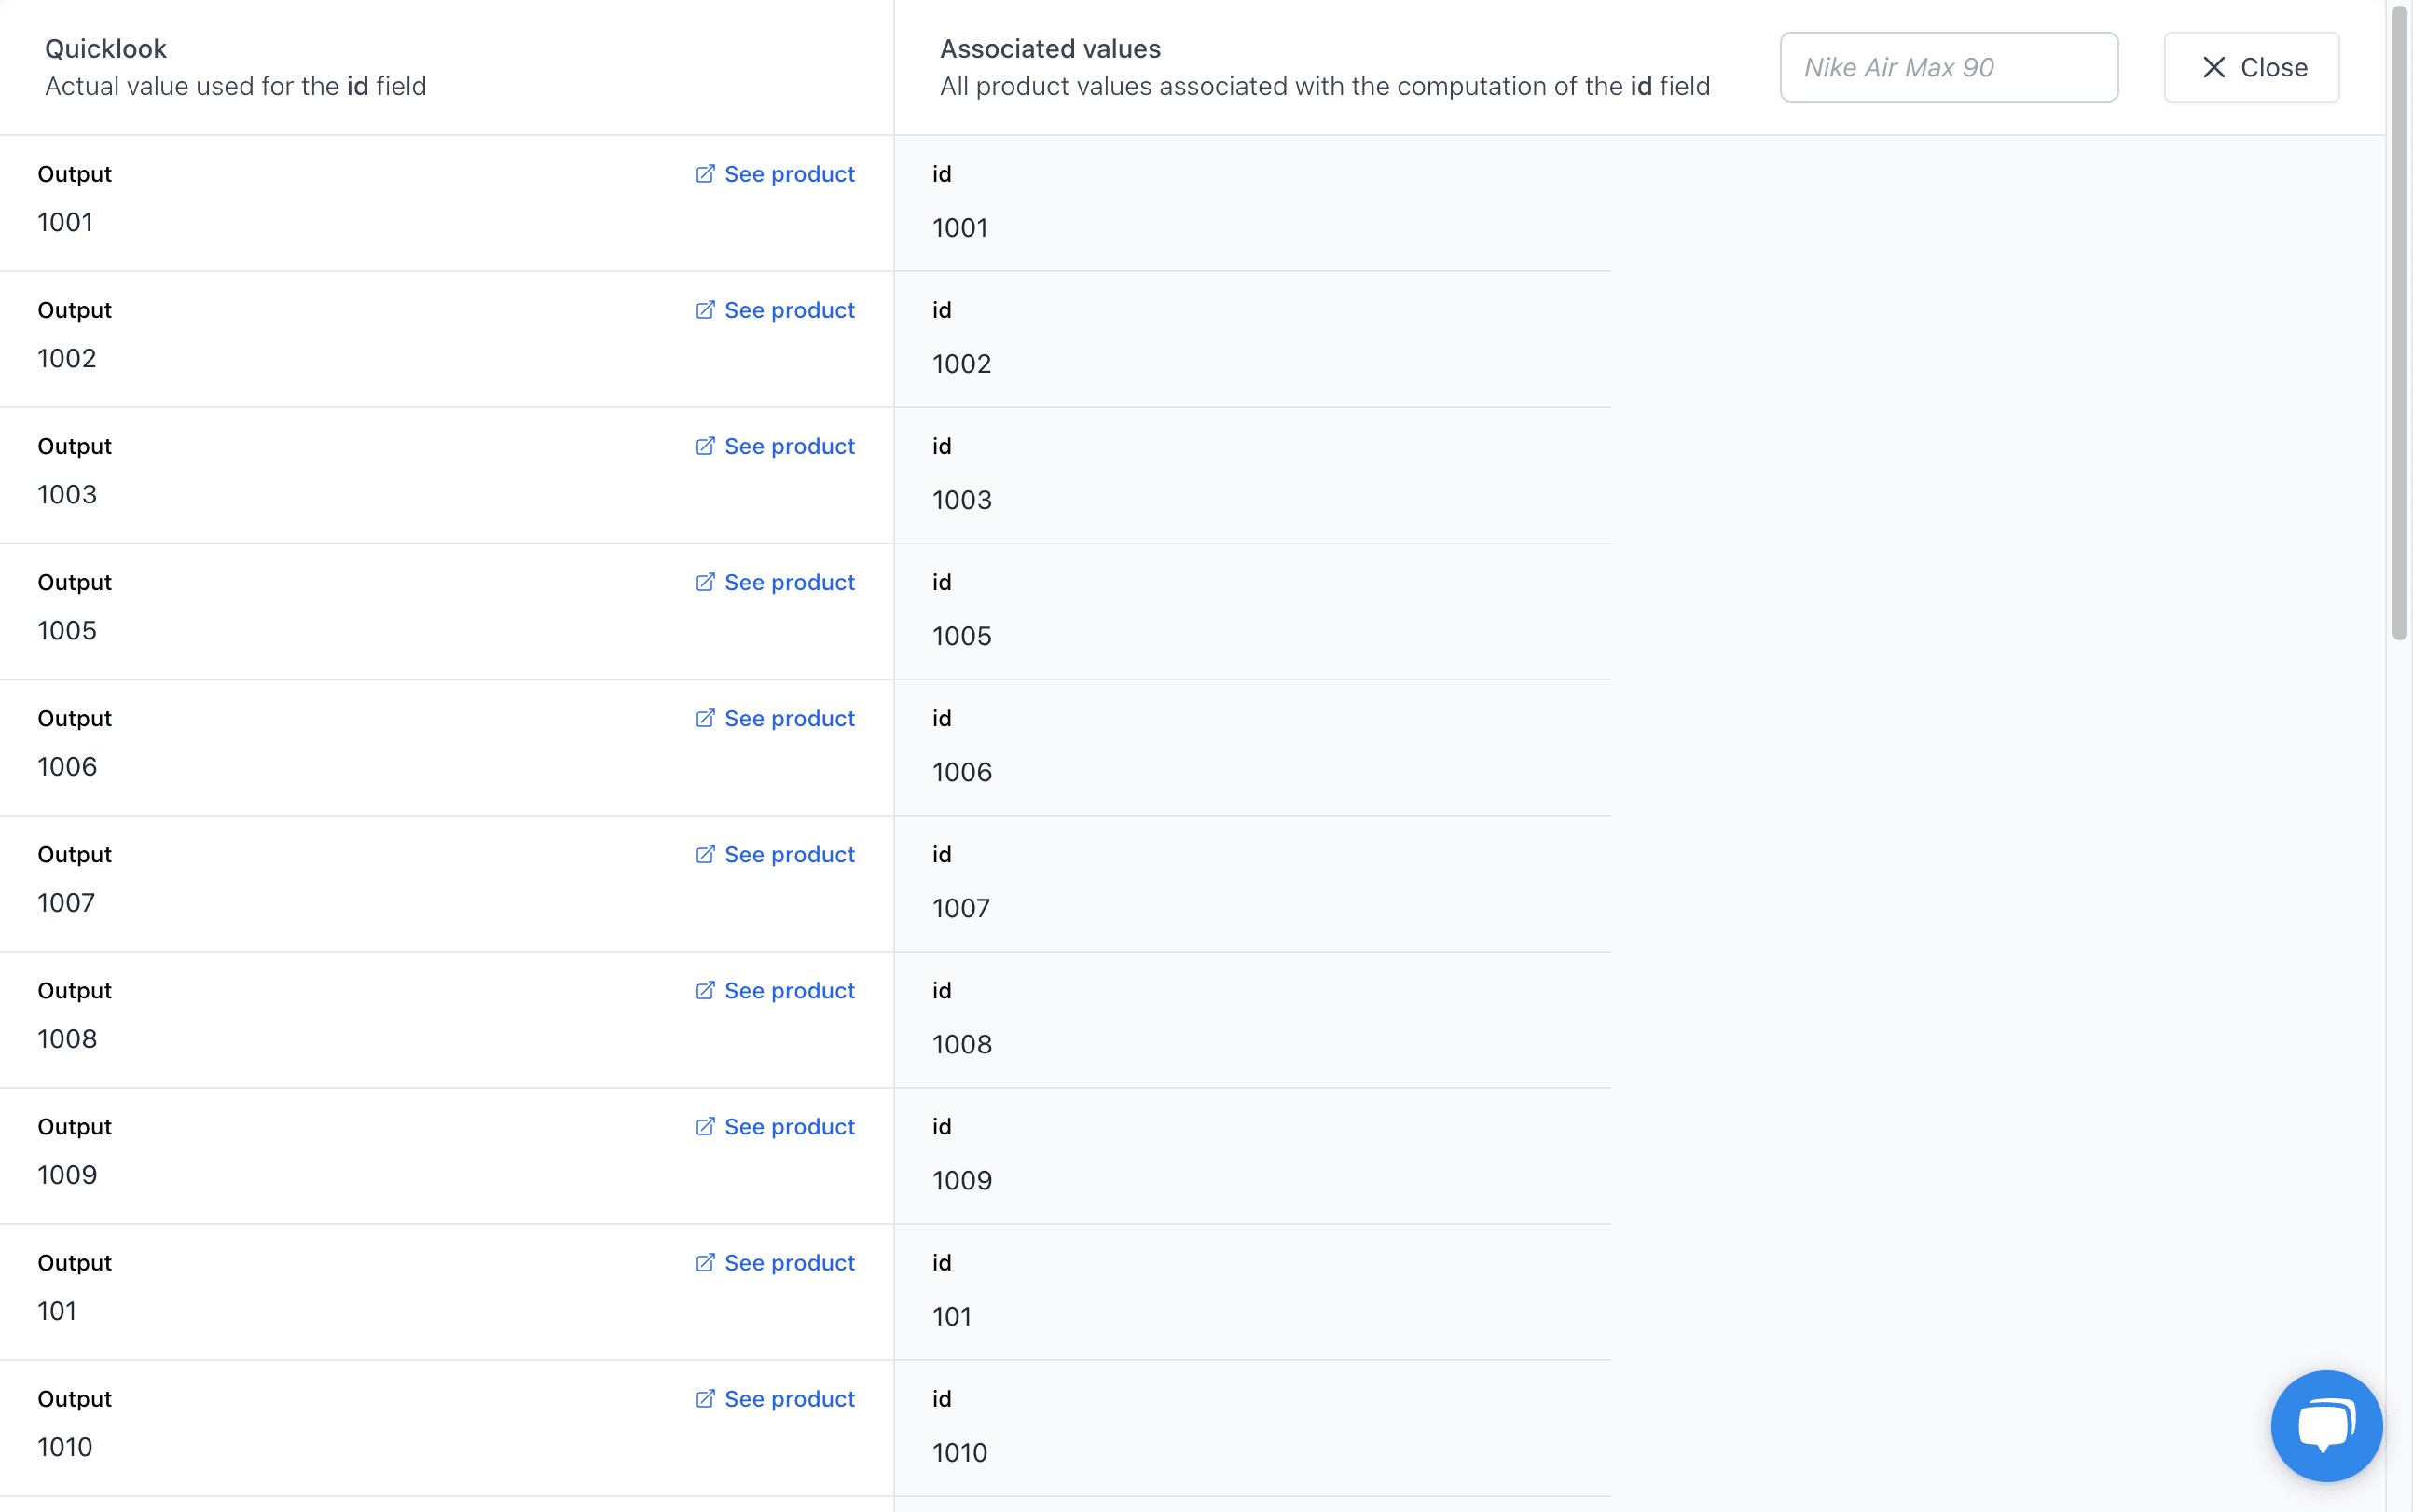
As you can see here the product IDs are the same as the Content ID in Meta. You also need to check the item_group_id mapping to make sure it is the same as the Group ID in Meta.
If there is a difference between the format of the IDs in Meta and Feedr you will need to adjust the mapping. If you're in doubt about what to do, please reach out to our support and we will be happy to help you.
When you have made sure the IDs are the same you can replace the existing primary feed with the Feedr feed.
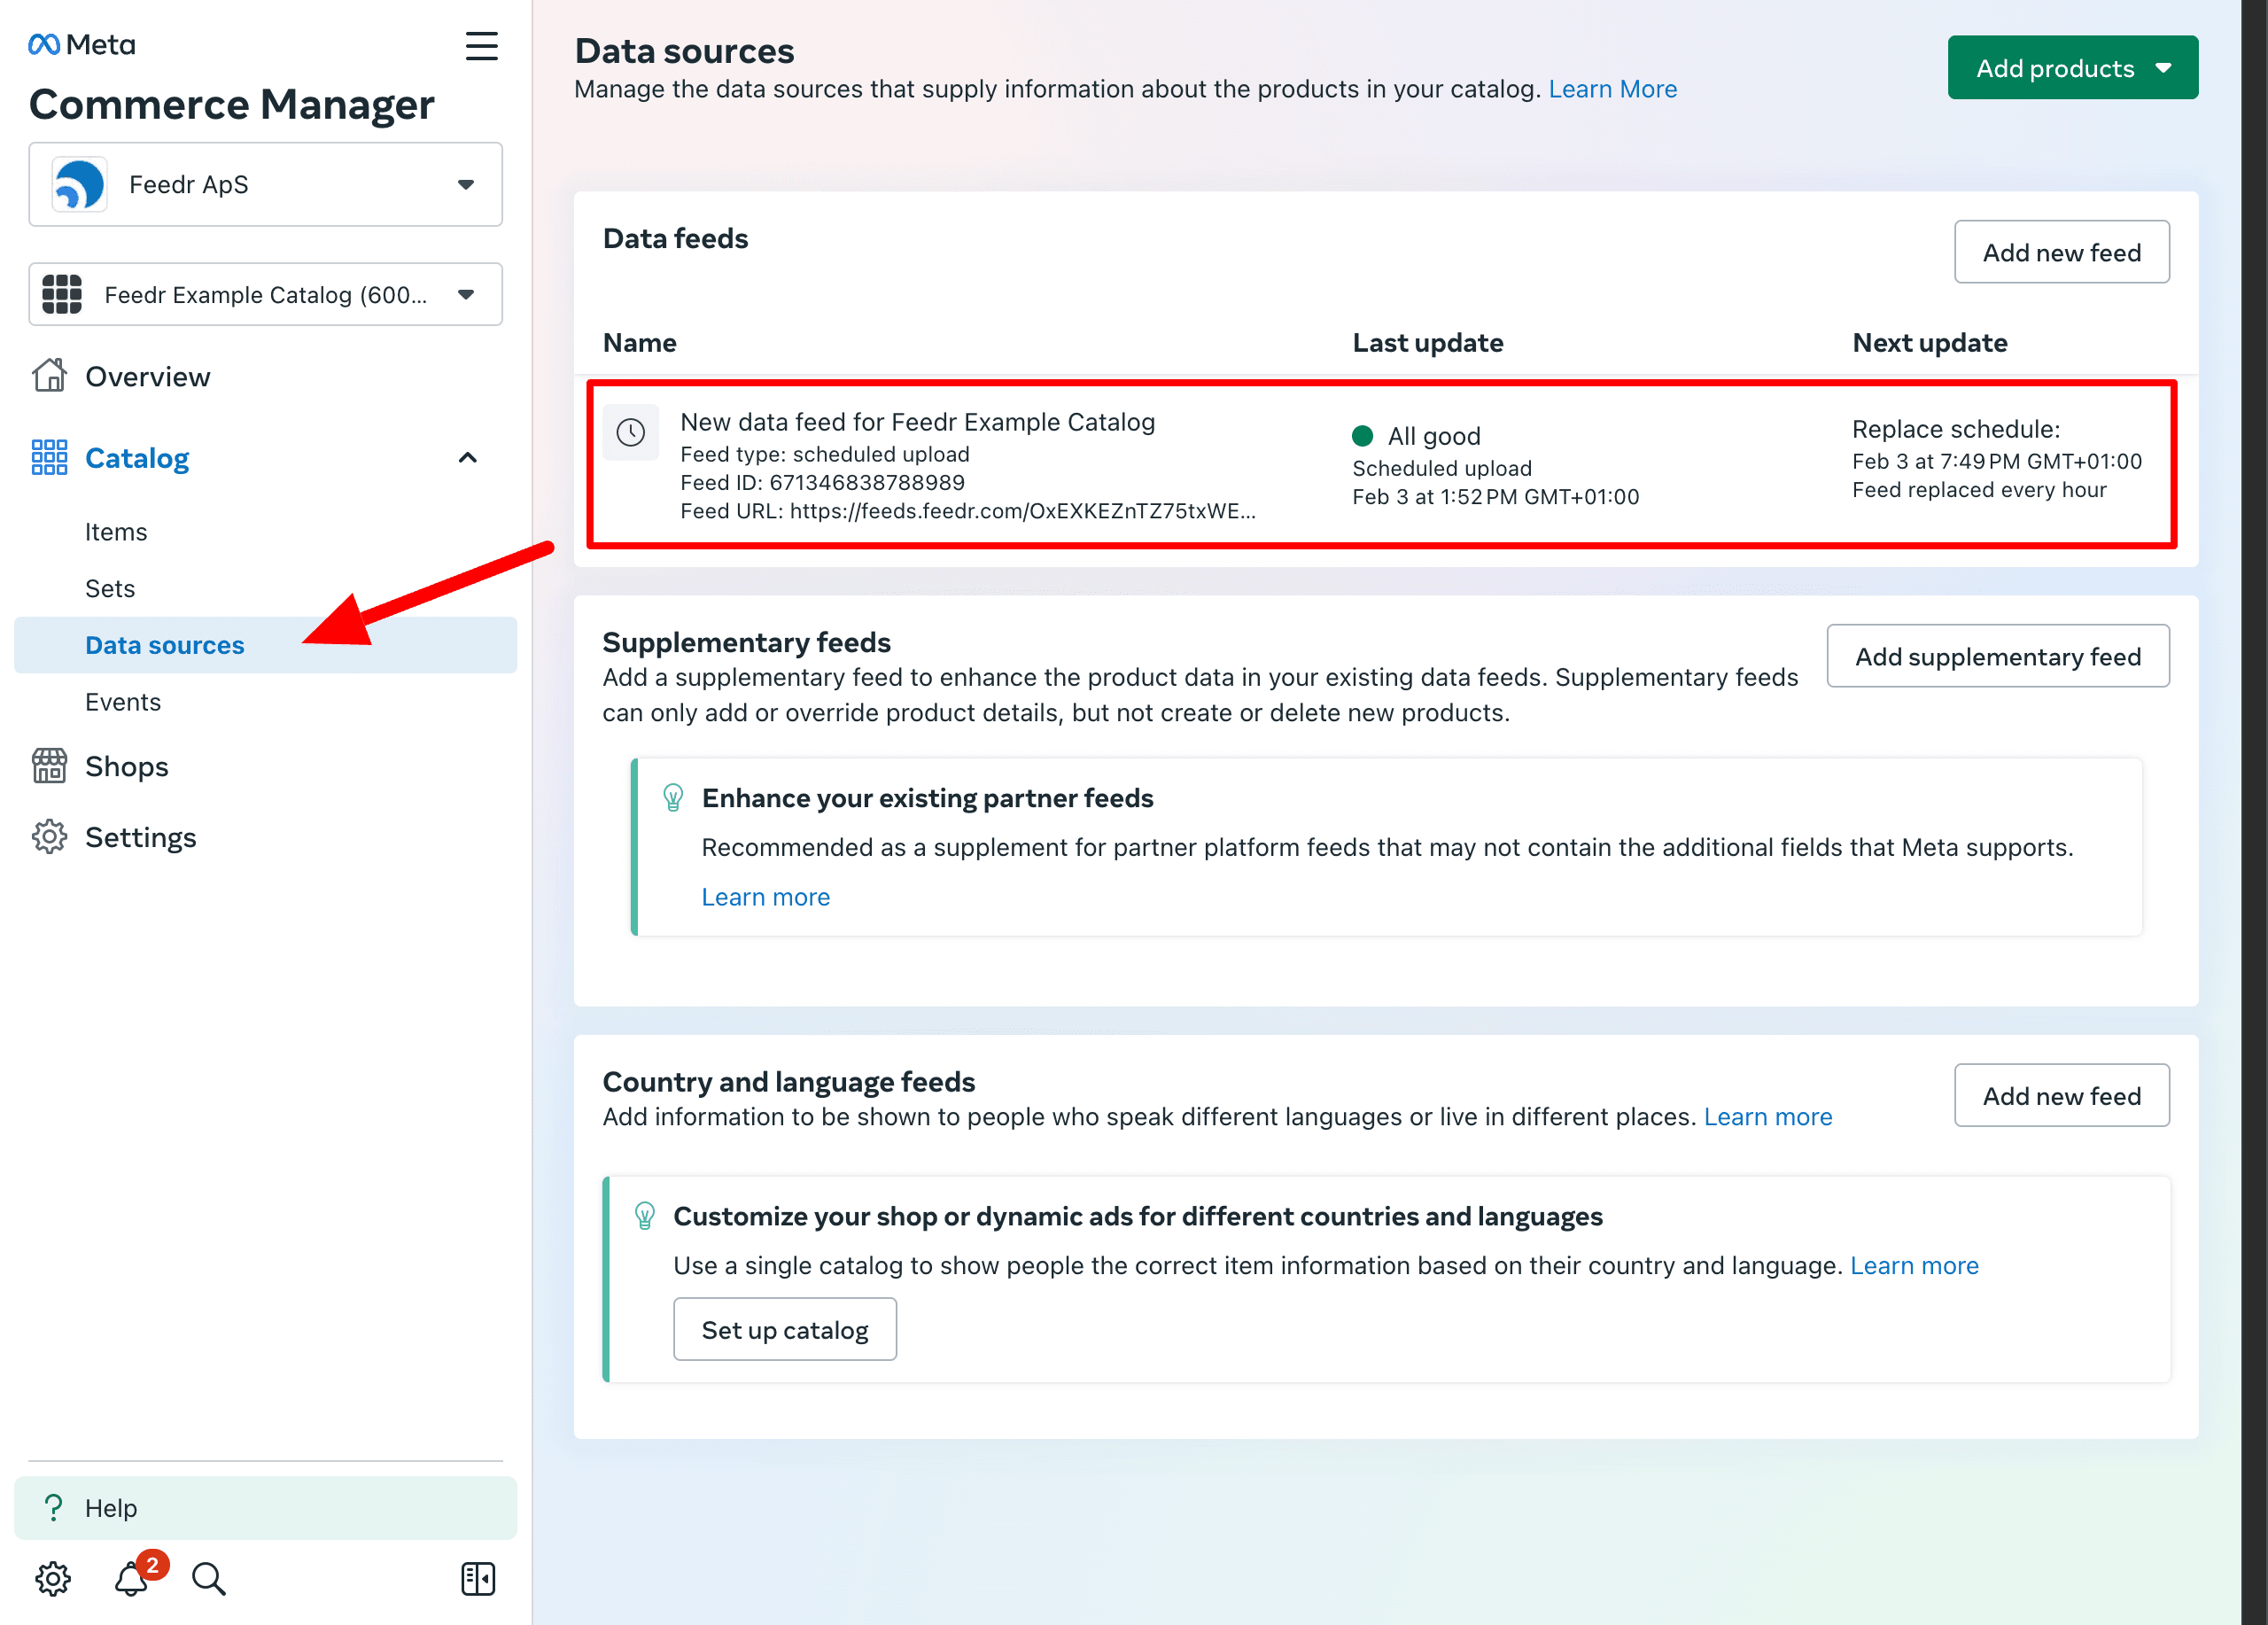
To do that go to the Data sources tab and click on your existing data source.
Now you should go the Settings tab and click on the Edit button.
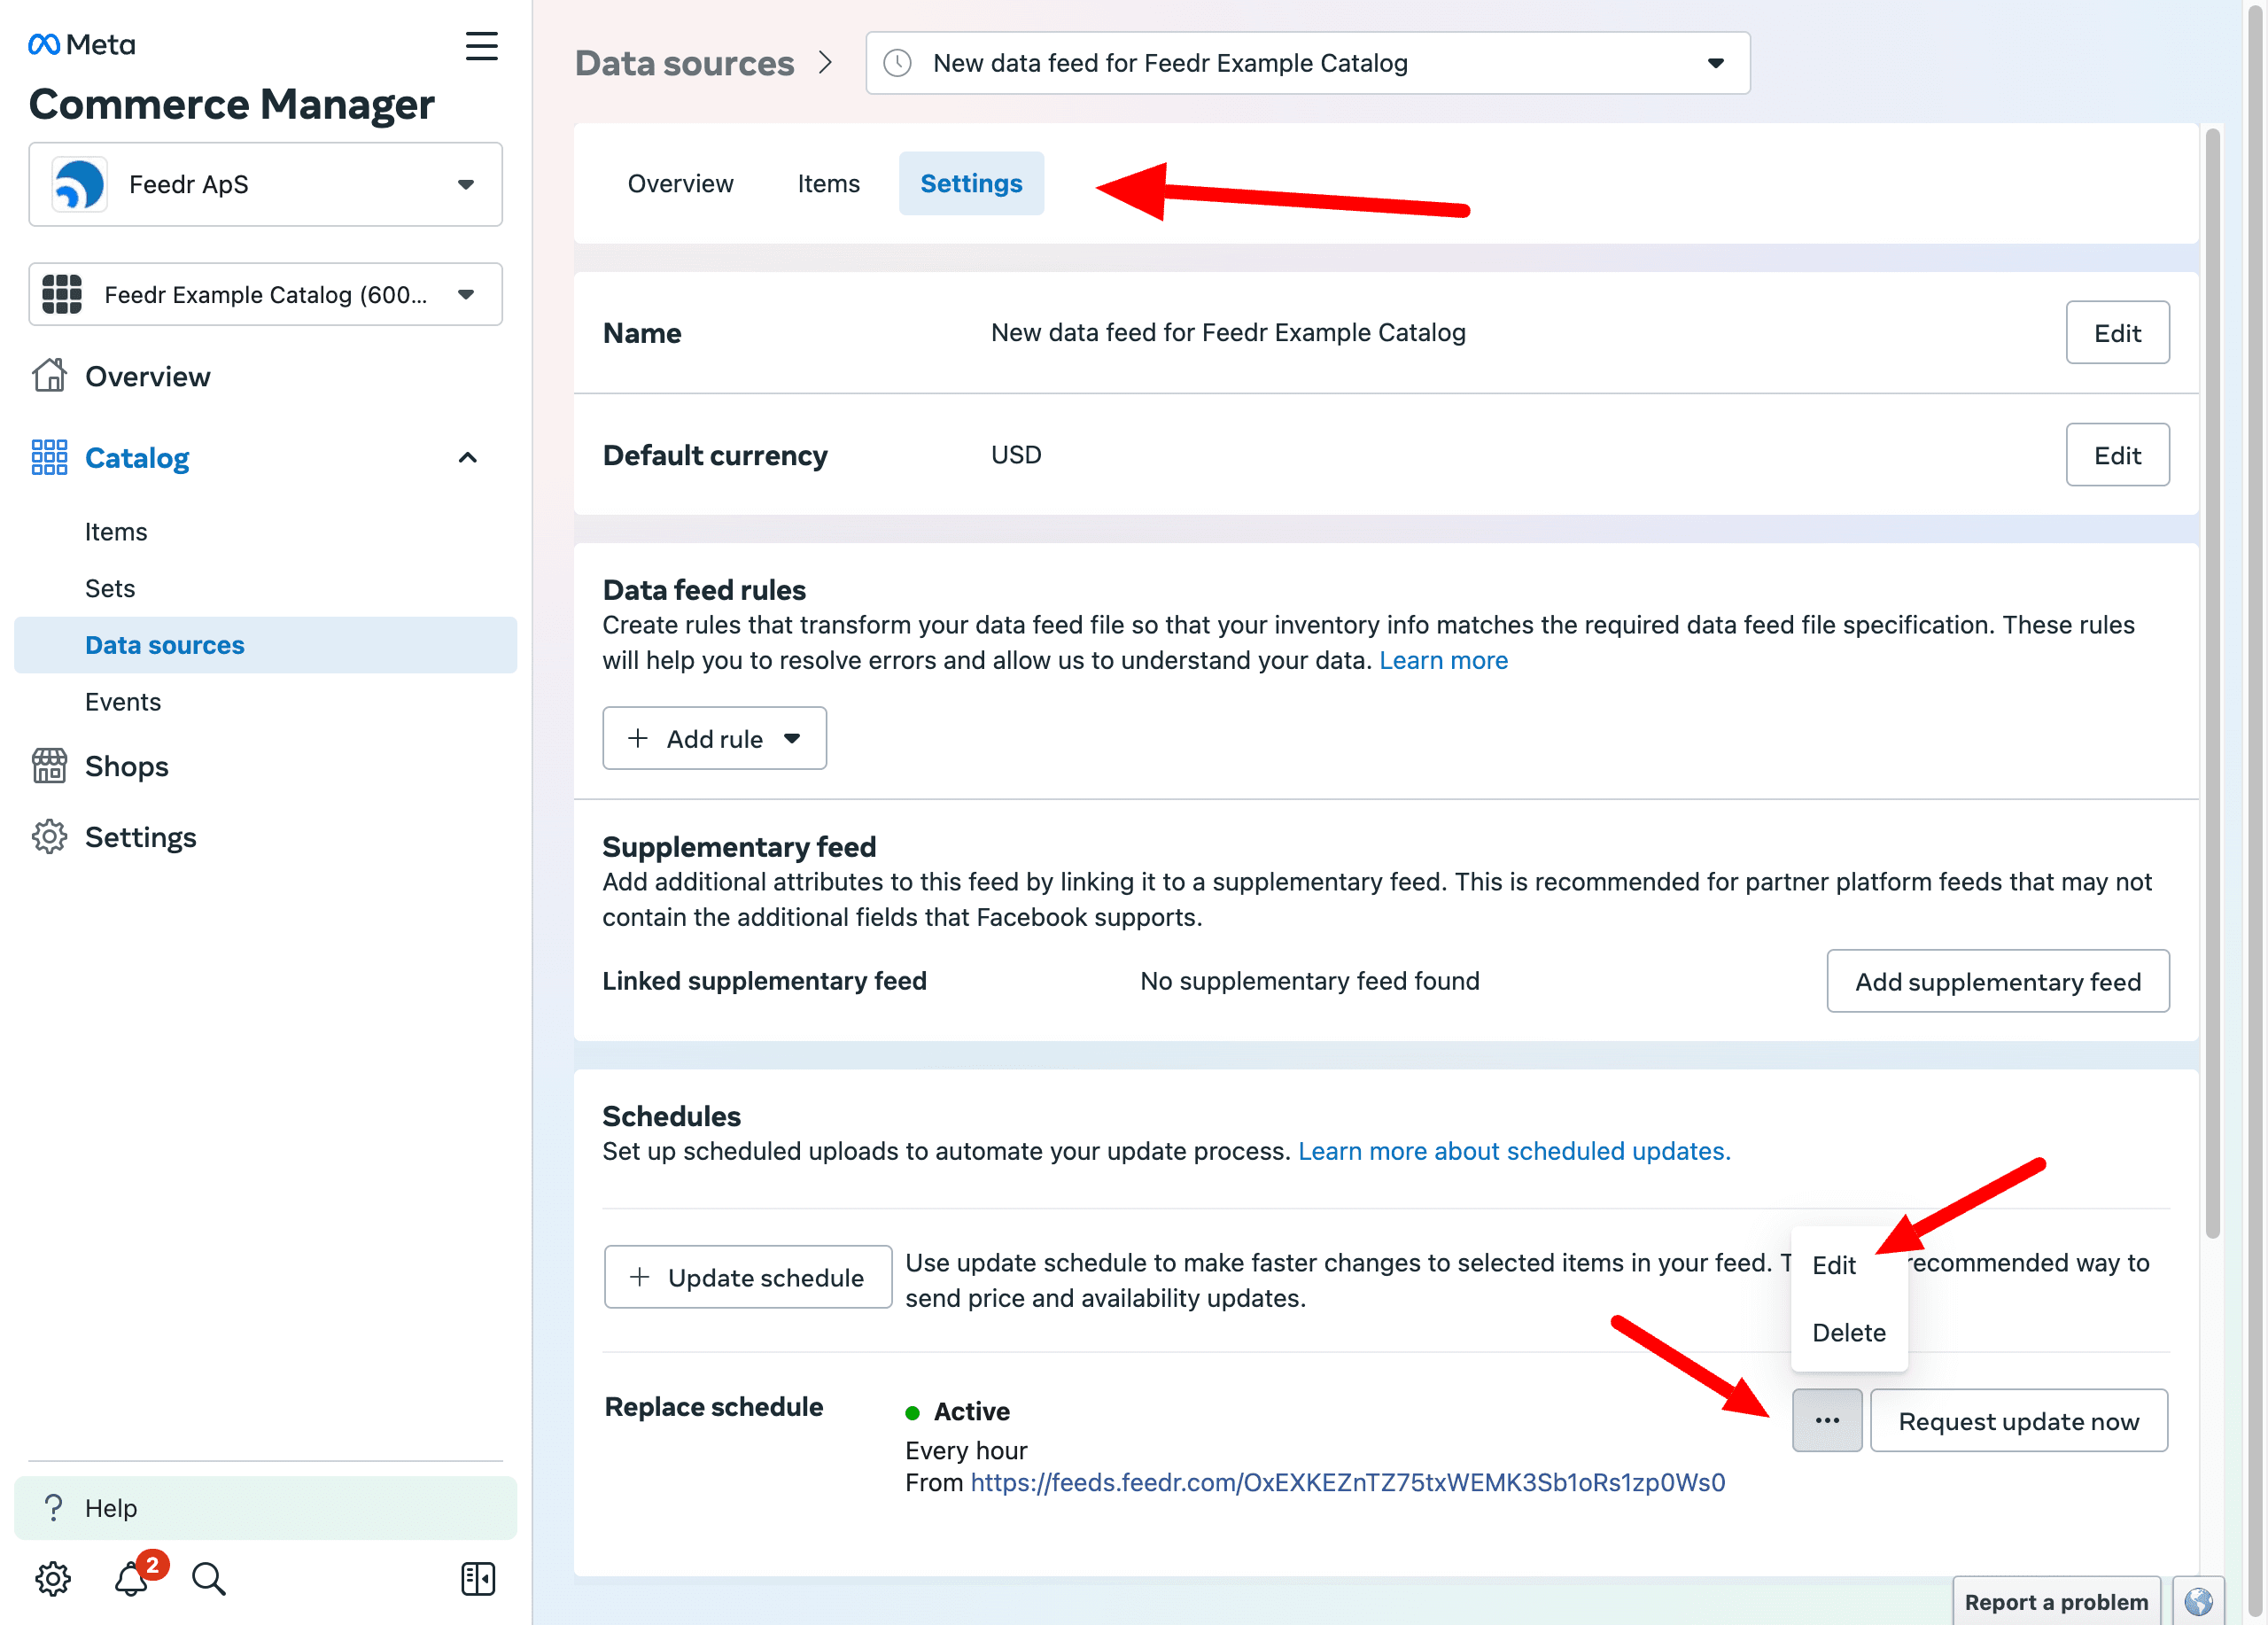
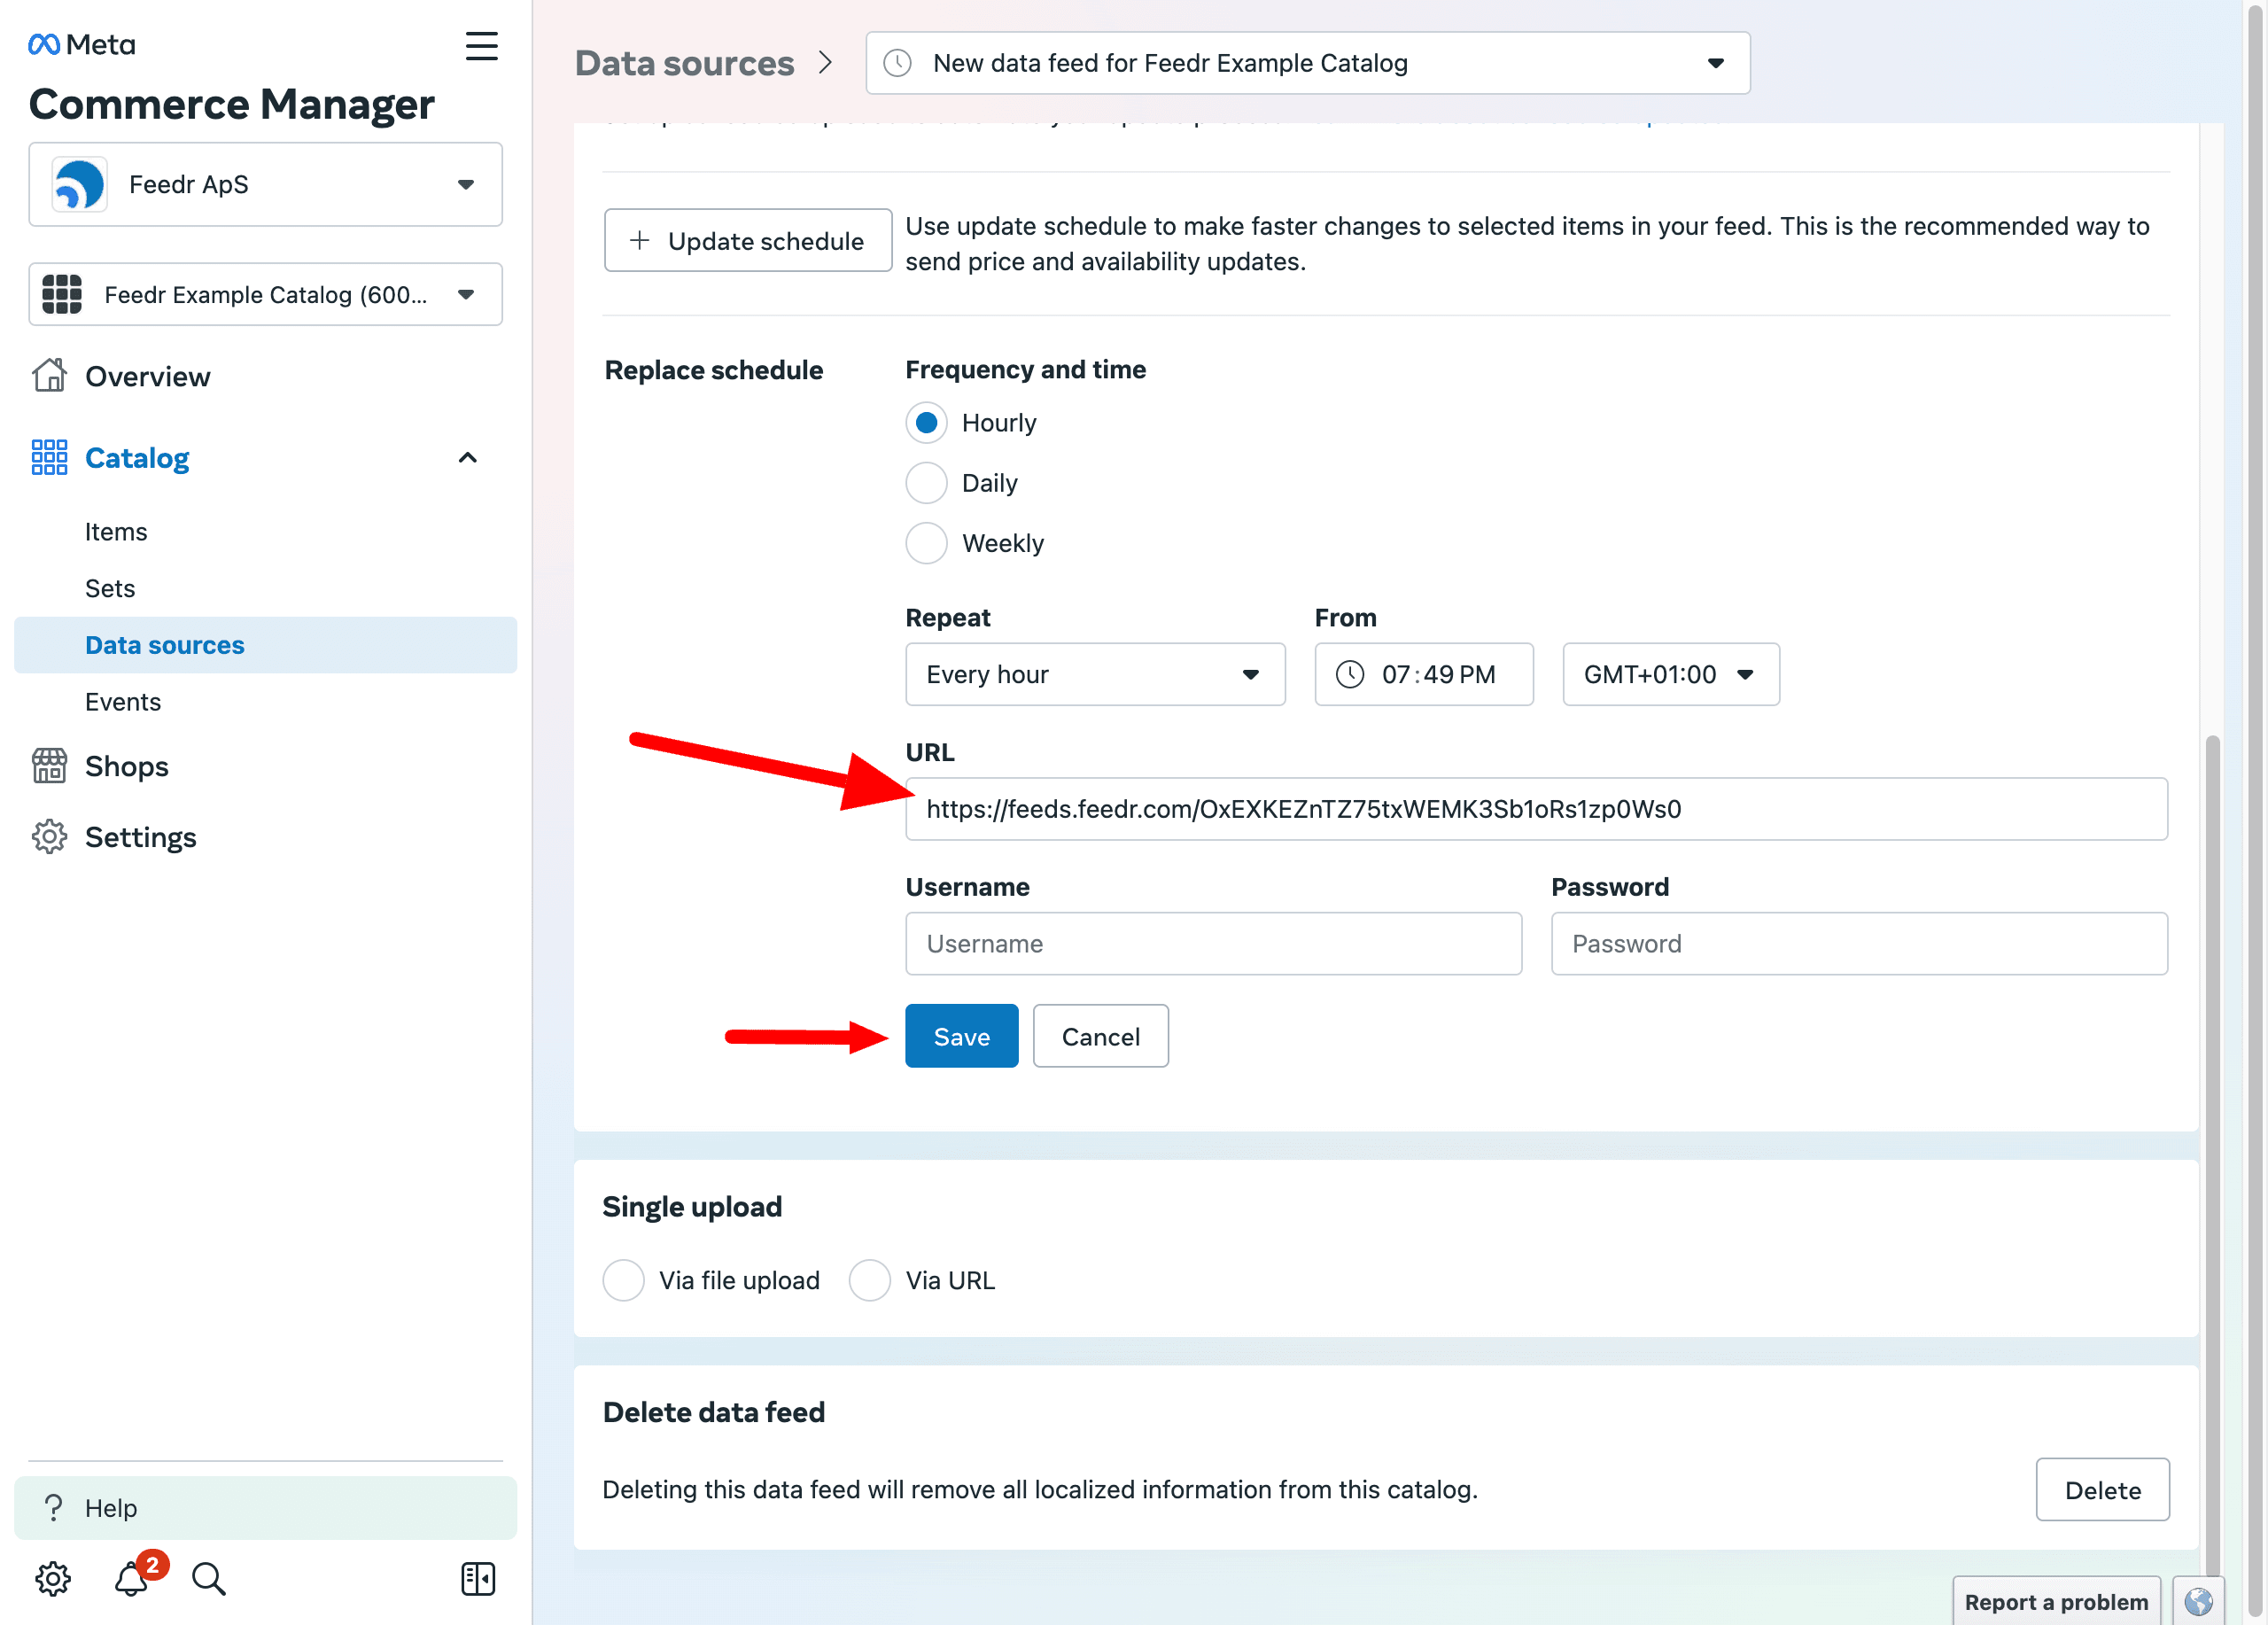
Here you can enter the Feedr feed url and click on the Save button.
Add the Feedr feed as a supplementary feed
WARNING
Adding the Feedr feed as a supplementary means that feed filtering won't work as expected. If the products are in the primary feed, they will still exist inside Commerce Manager, just without your Feedr specific data (templates for instance).
If you still want to use filtering in Feedr see controlling catalog items.
You also need to make sure that the values from the Feedr feed has priority over the values from the primary feed/app. See configure data sources.
Compare IDs
If you decide to add the Feedr feed as a supplementary feed, you need to make sure that the product IDs are the same as the Content ID in Meta.
To compare them we can go to the Output mapping tab. Here you can click on the Quick look button next to the id mapping, to see the contents.
If the IDs are the same, you can add the Feedr feed as a supplementary feed. Otherwise you will need to adjust the mapping.
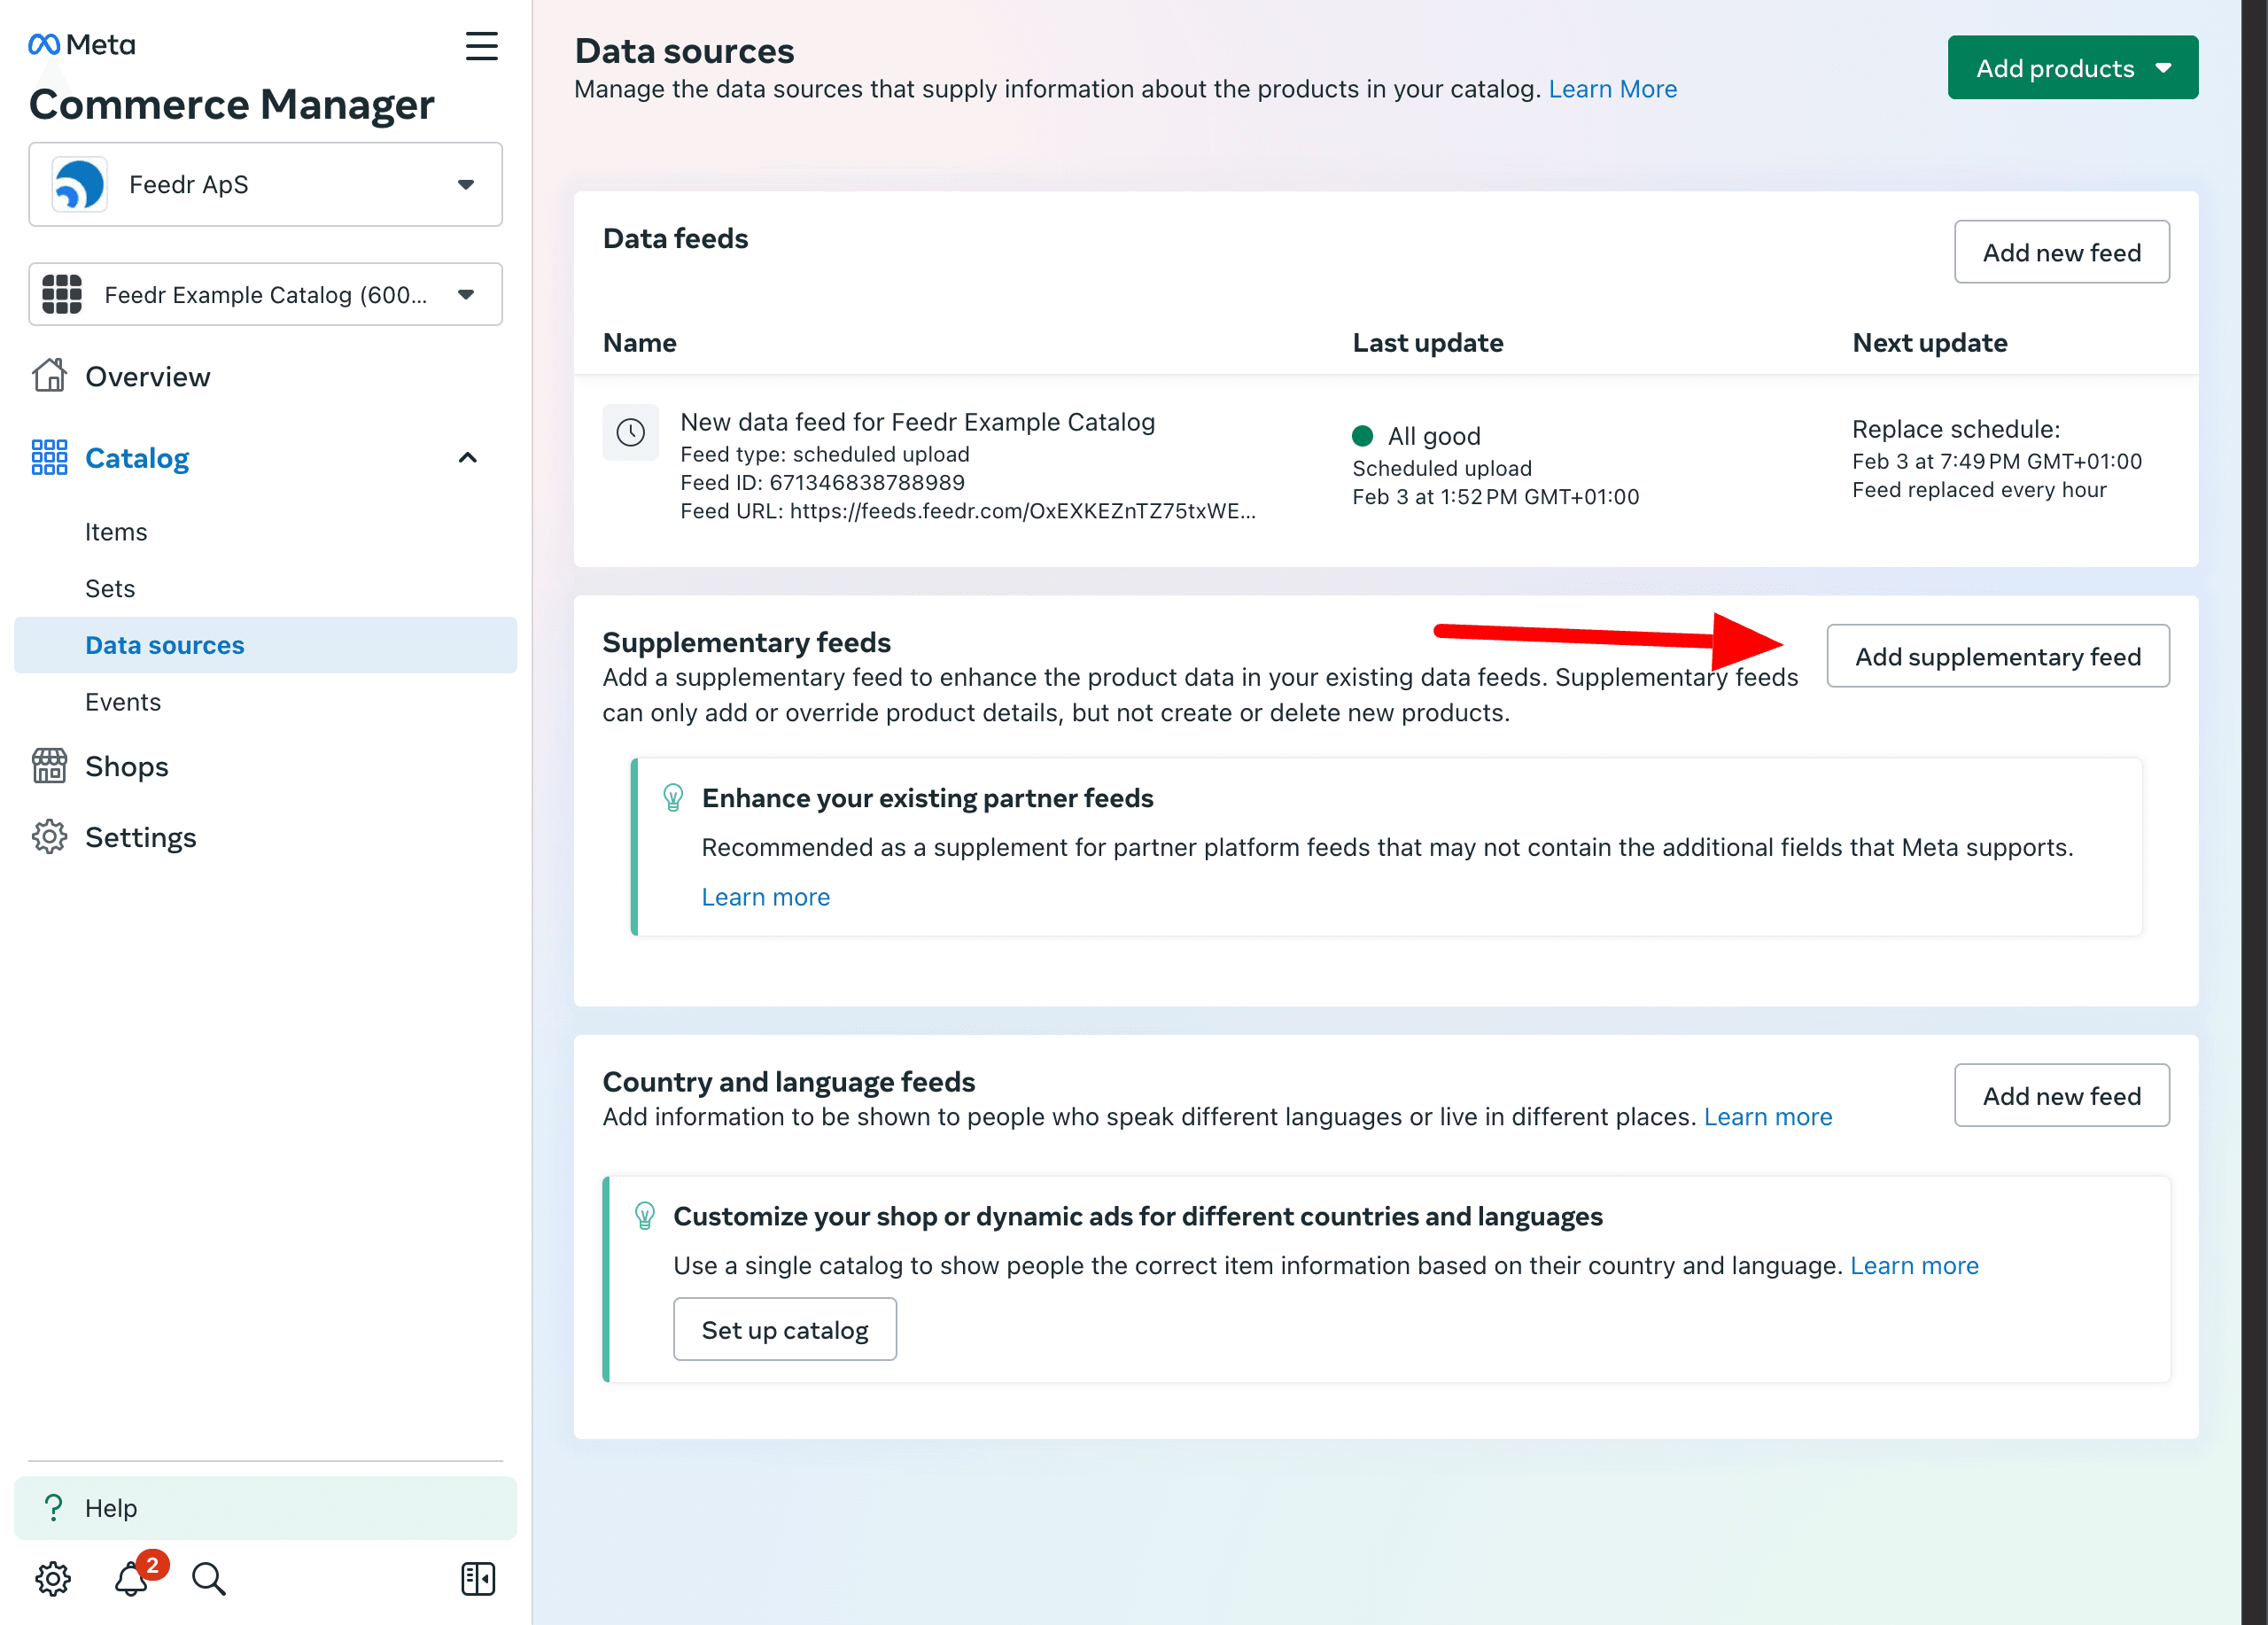
To add a new supplementary feed, you need to go to the Settings tab and click on the Add feed button.
On the next page you have to select which feed you want to supplement and enter the Feedr feed url.
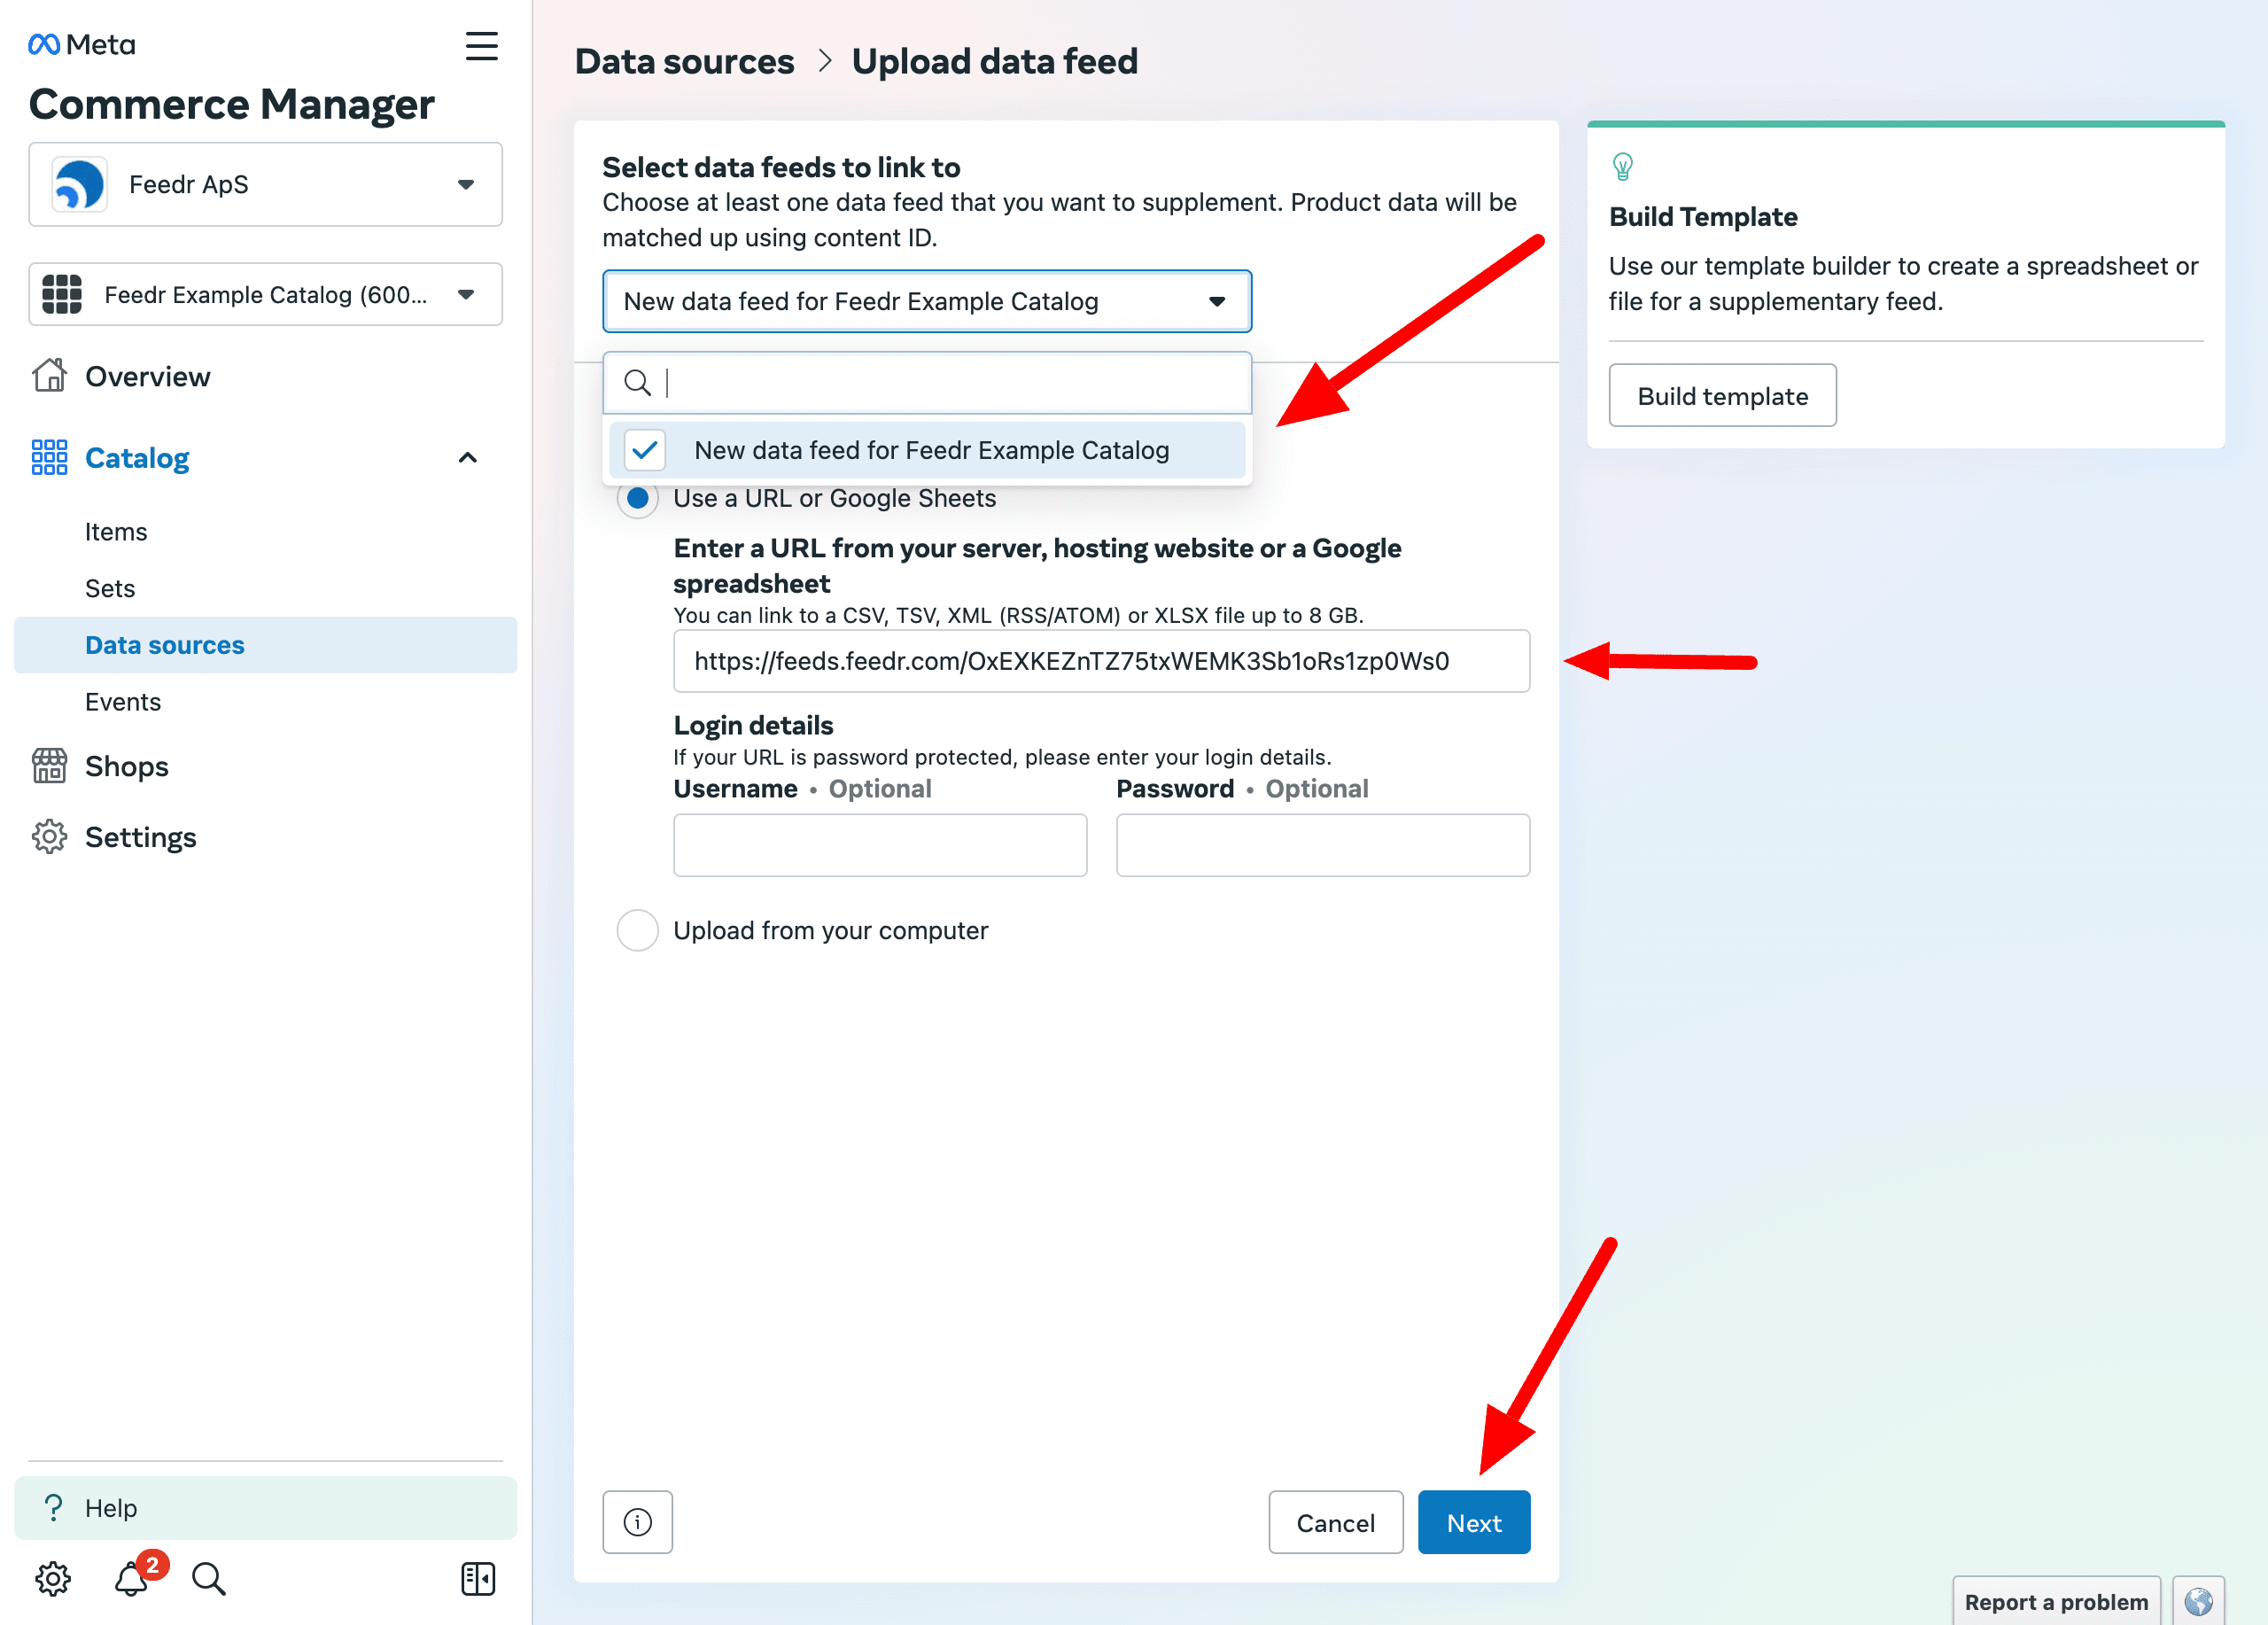
On the final screen you have to choose a default currency and confirm the settings.
2. My Meta Catalog is connected to Shopify or WooCommerce app
This is now only possible through Feedr
Meta has removed the option to add a supplementary feed on top of a Shopify or WooCommerce app source from Commerce Manager. Using the Feedr integration is the only way to do this today.
See Connecting your feed for instructions.
3. I'm using a new Meta Catalog
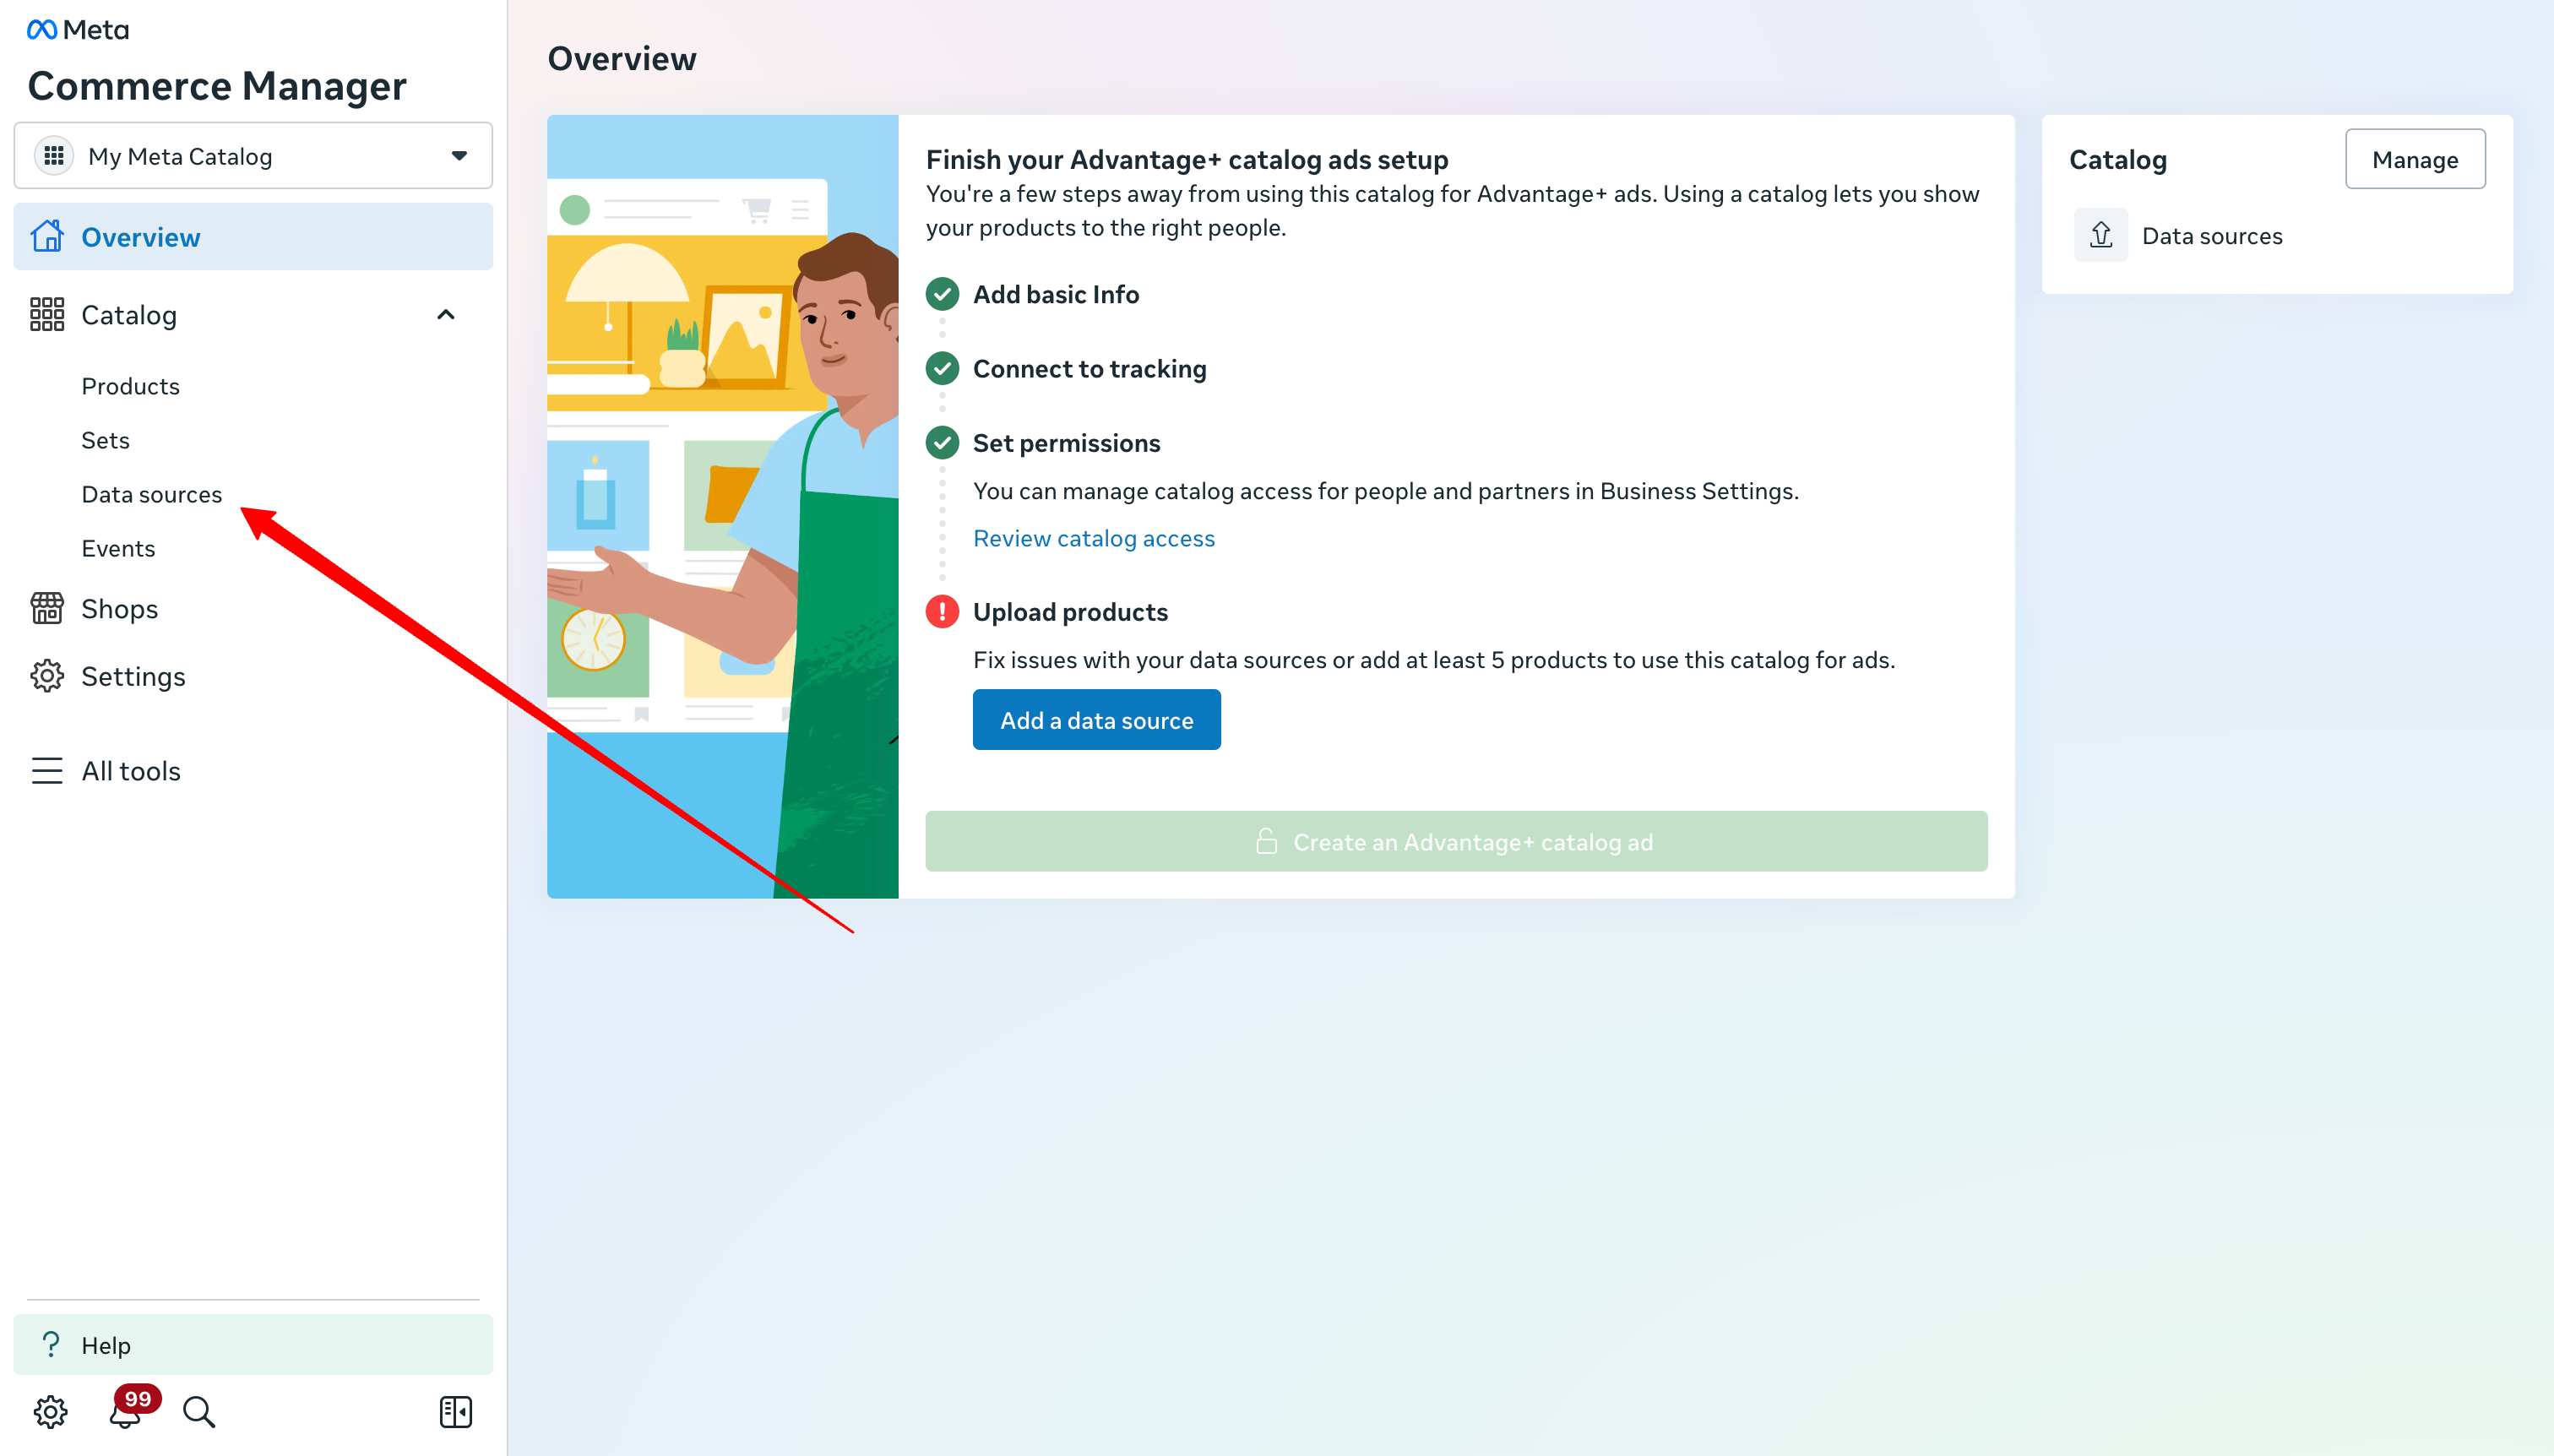
When working with a new Meta Catalog. We need to add your Meta Feed to your Meta Catalog. Start by clicking on data sources in the sidebar.
Now you have to select the option Connect to a data feed and press Connect data feed.
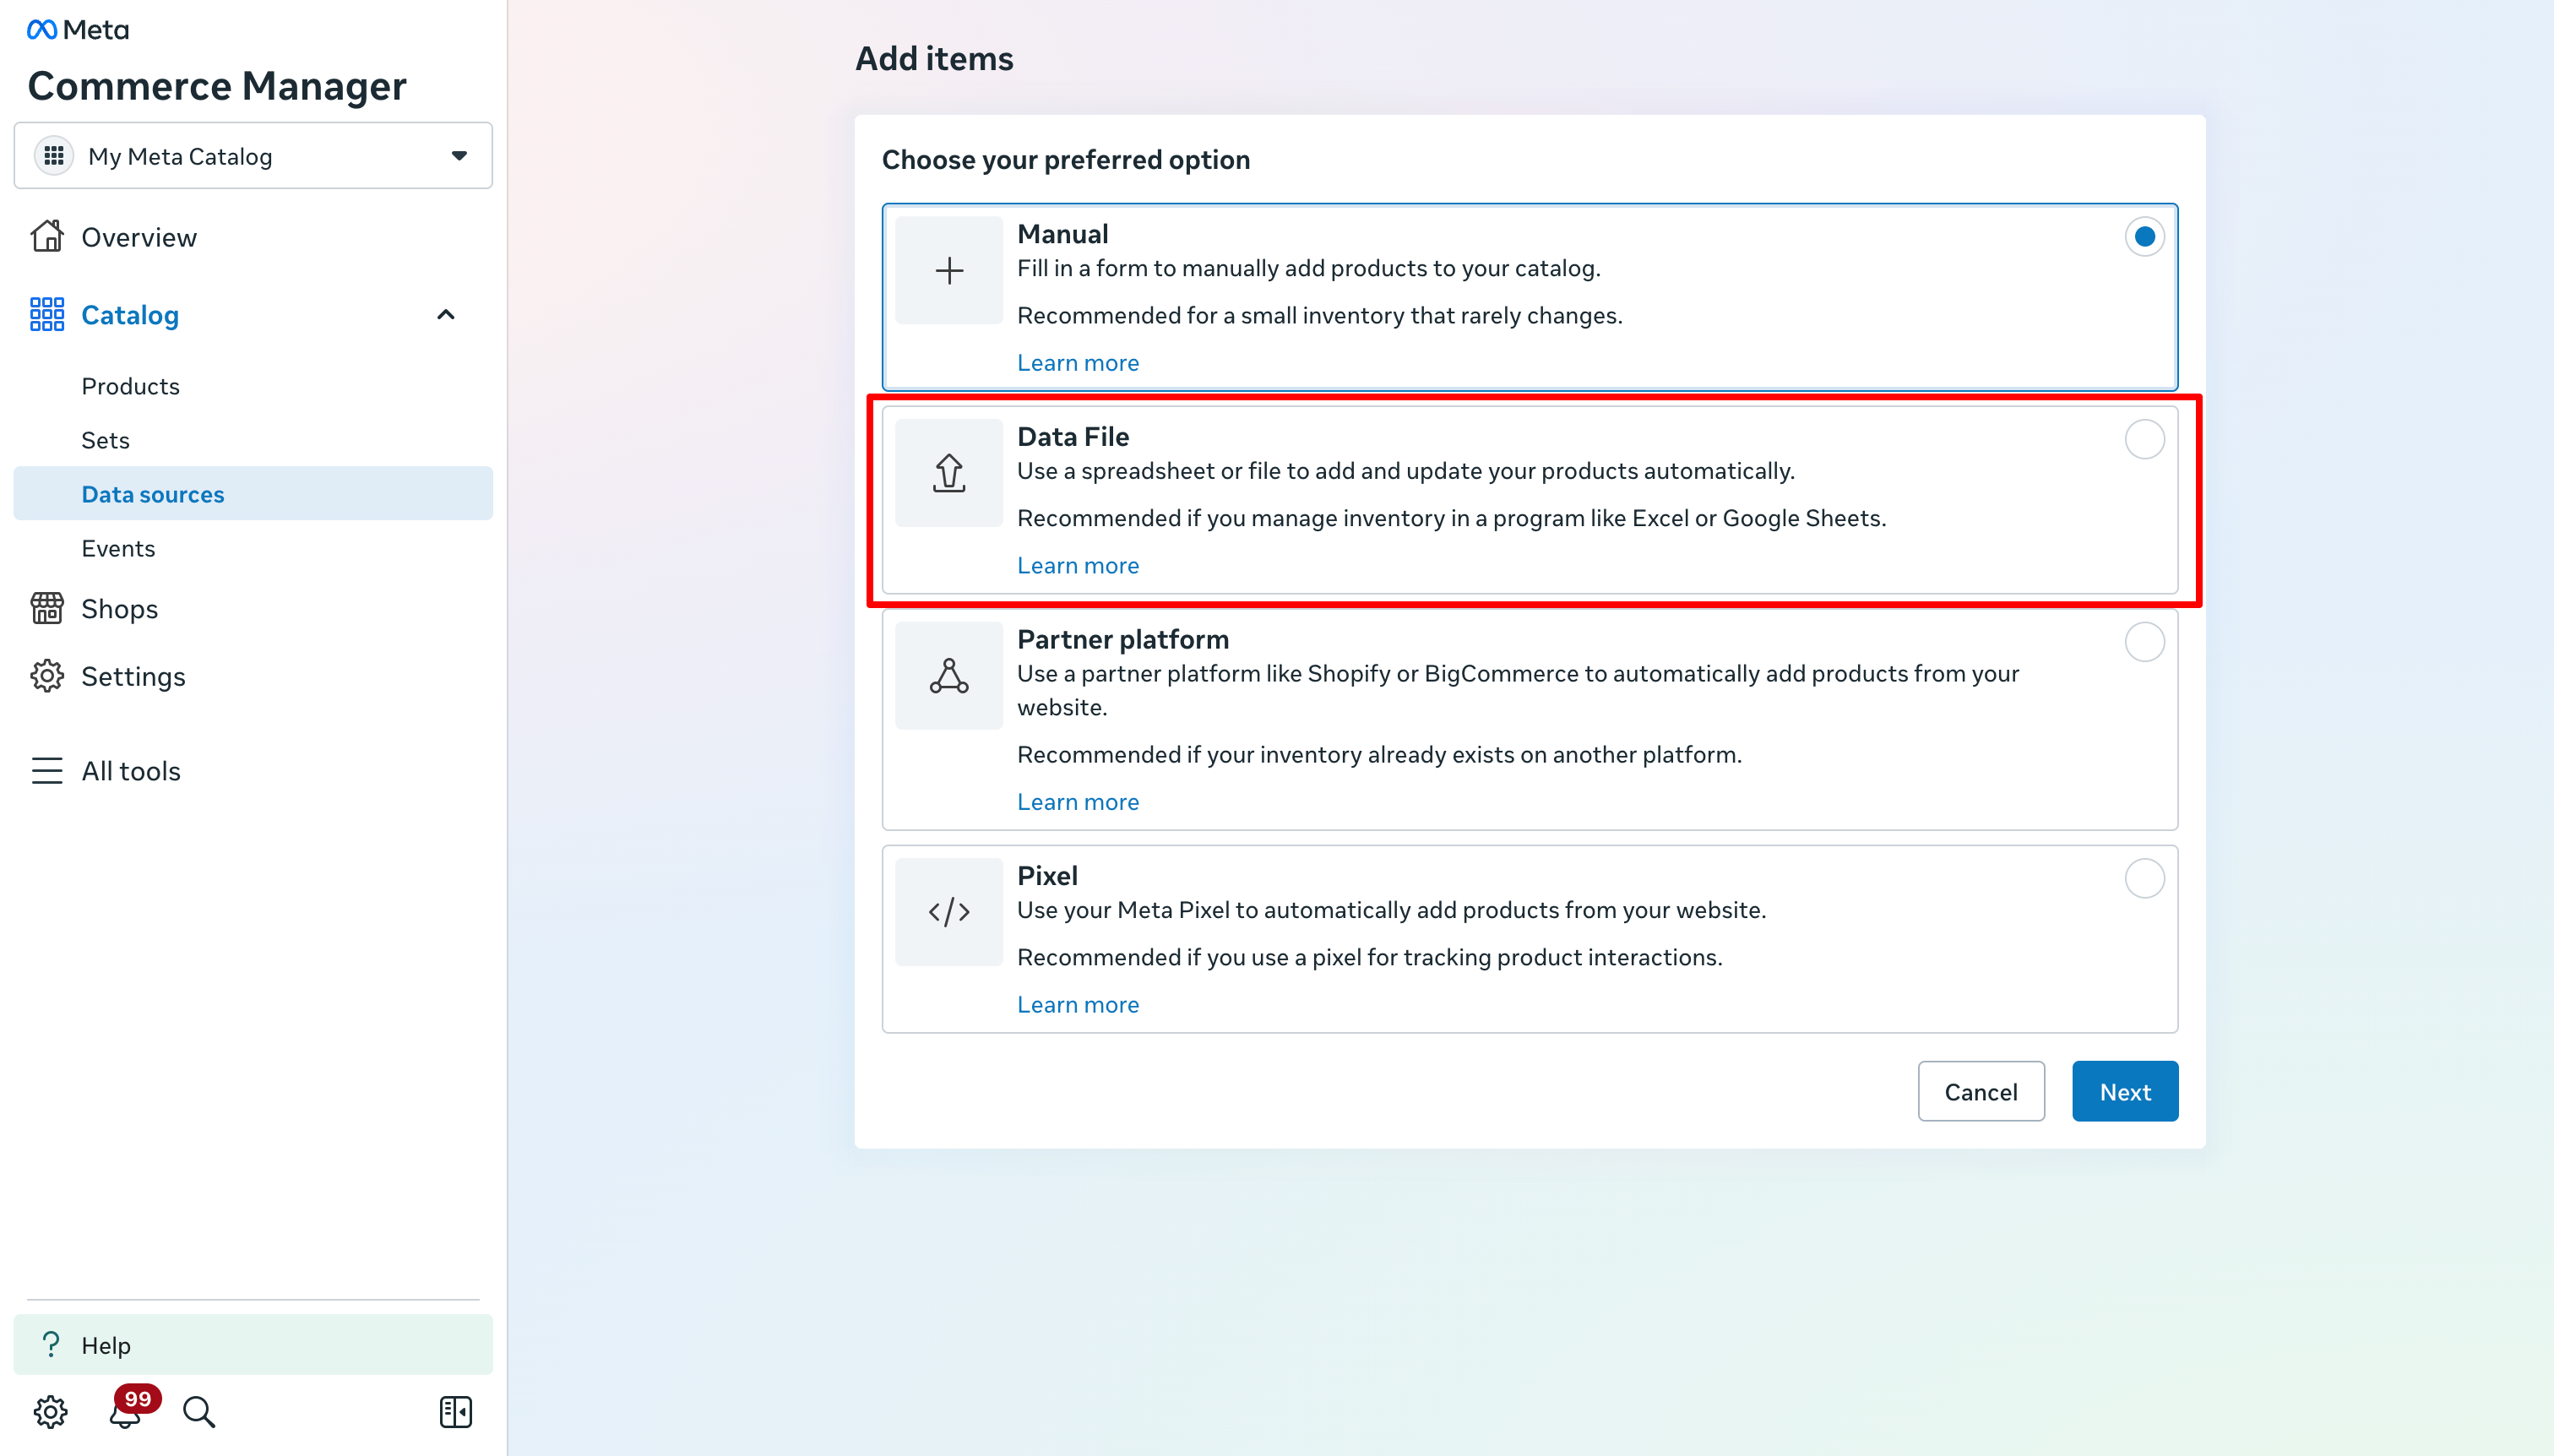
Click on Data File as shown below.
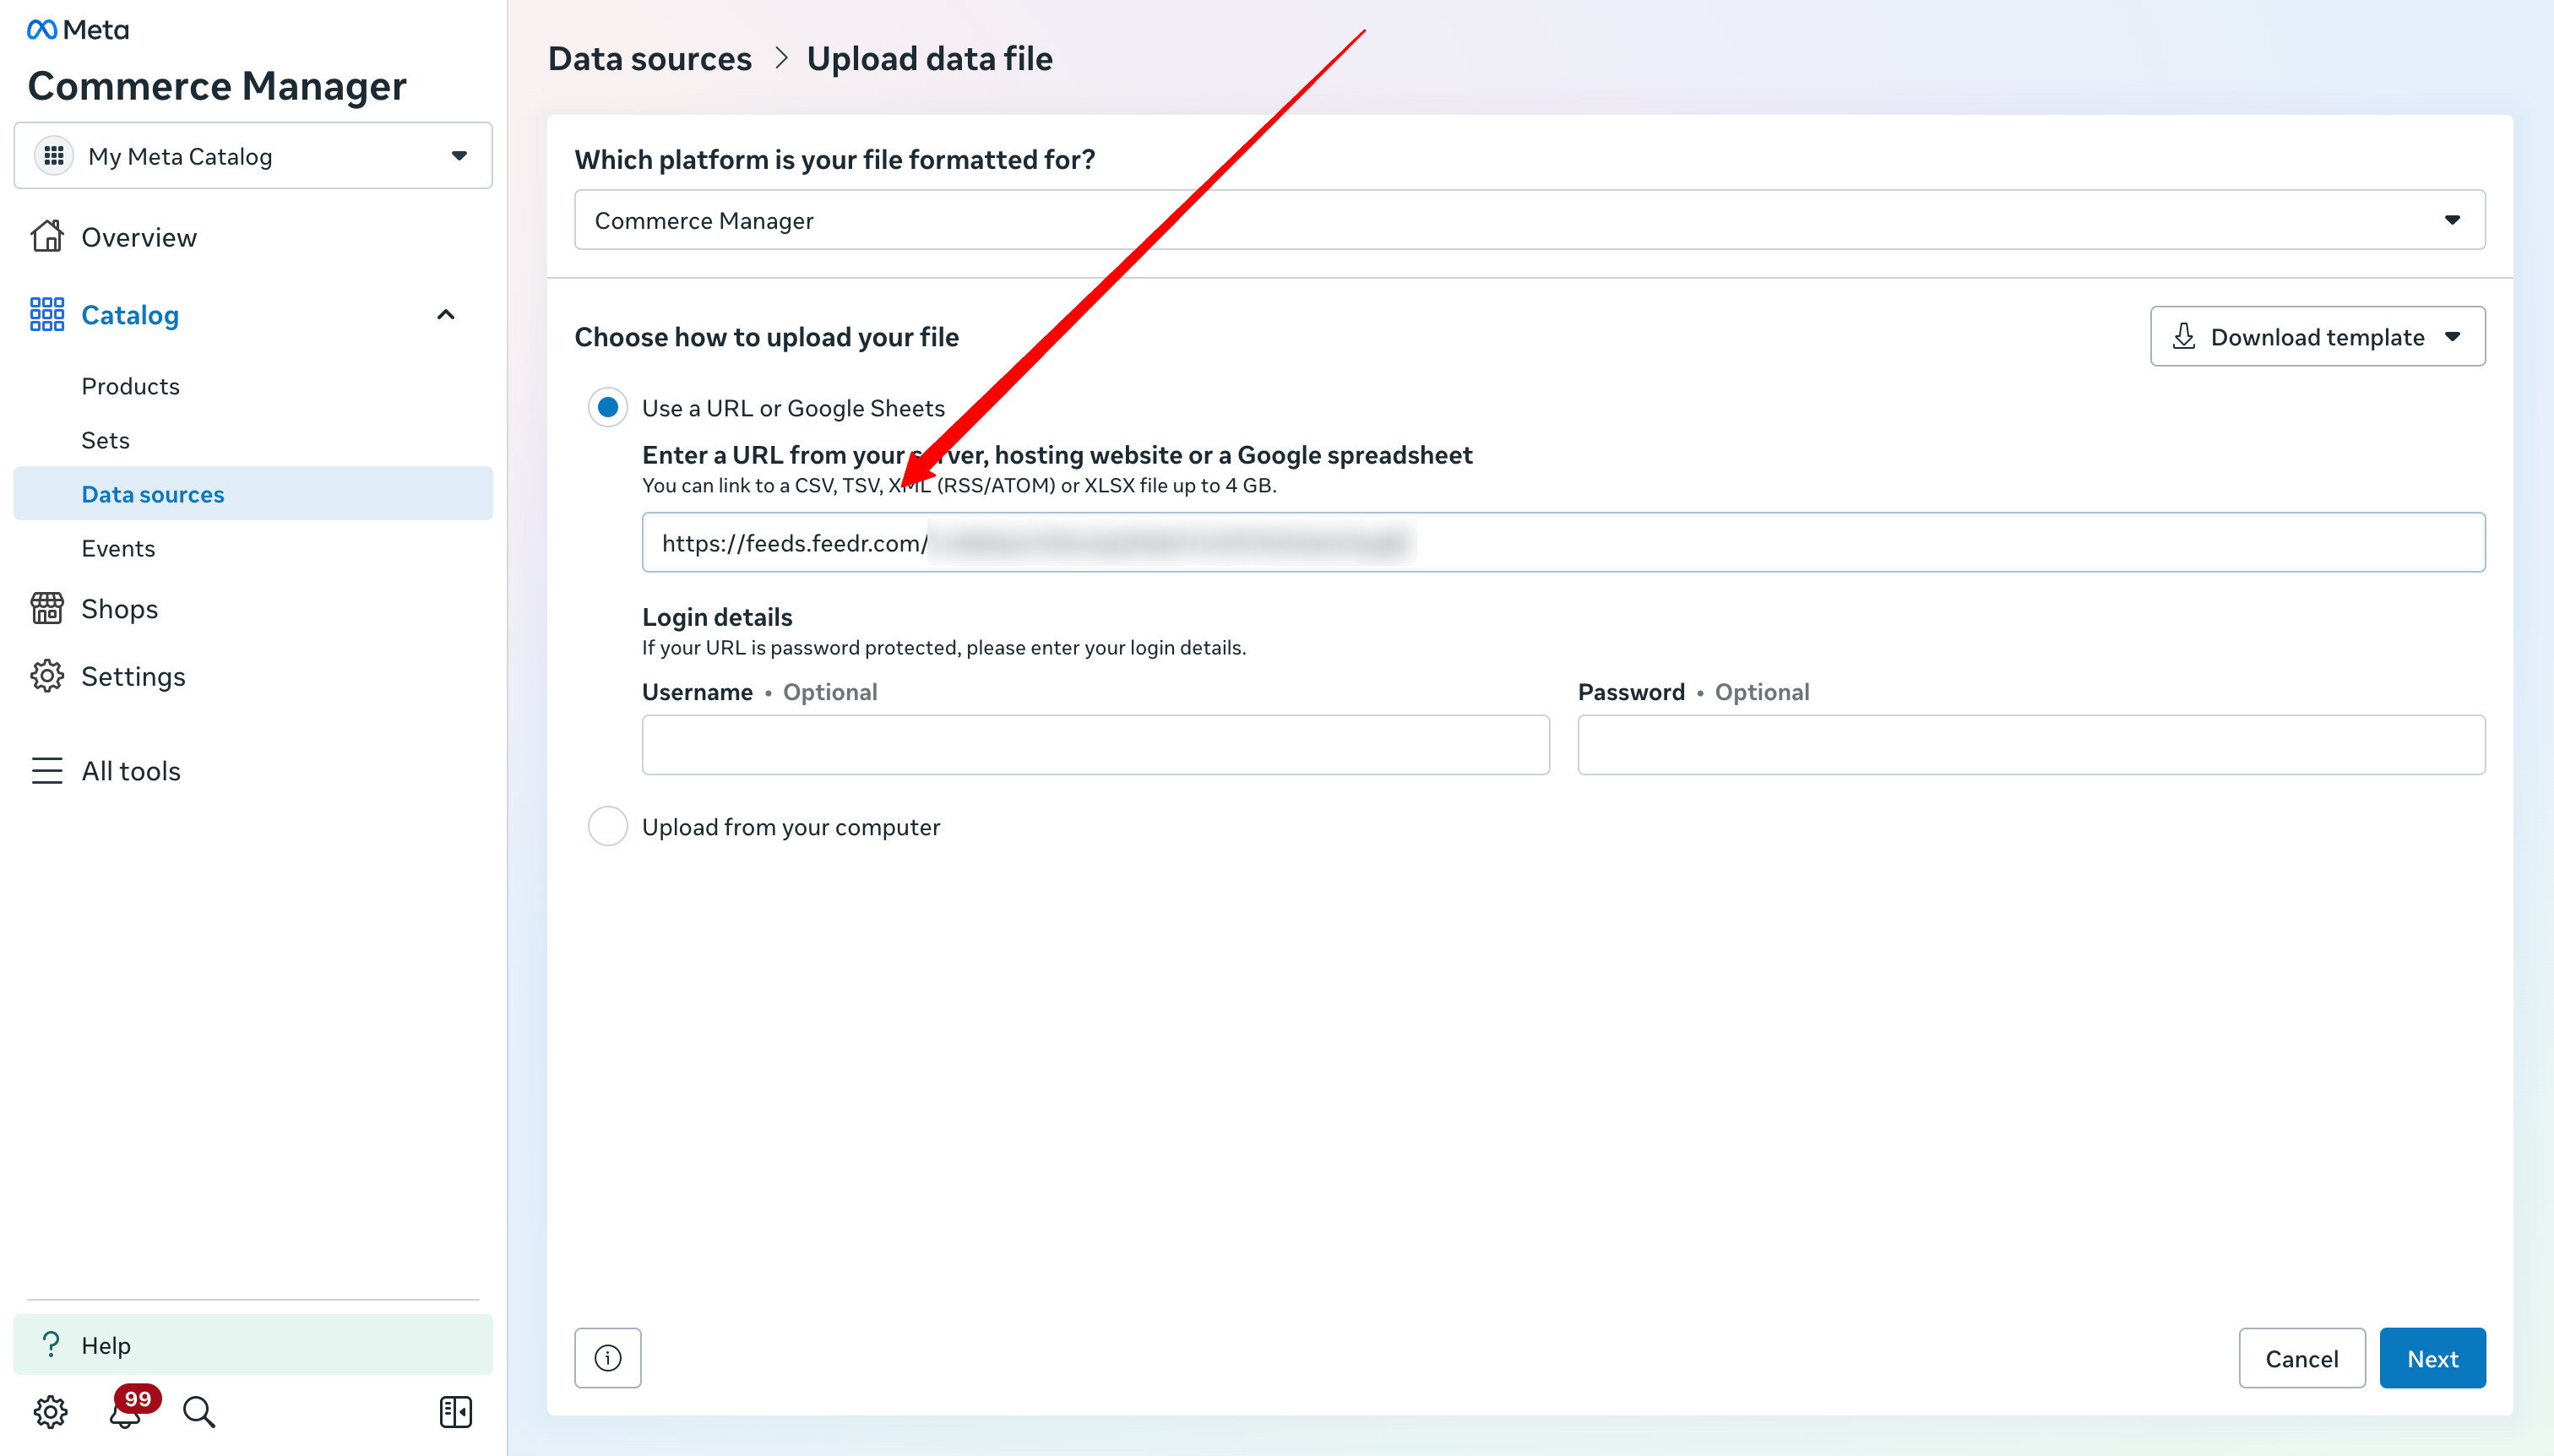
Now you have to find the feed url from Feedr. You can see it after you have created the feed in Feedr. The url needs to be entered on the next screen.
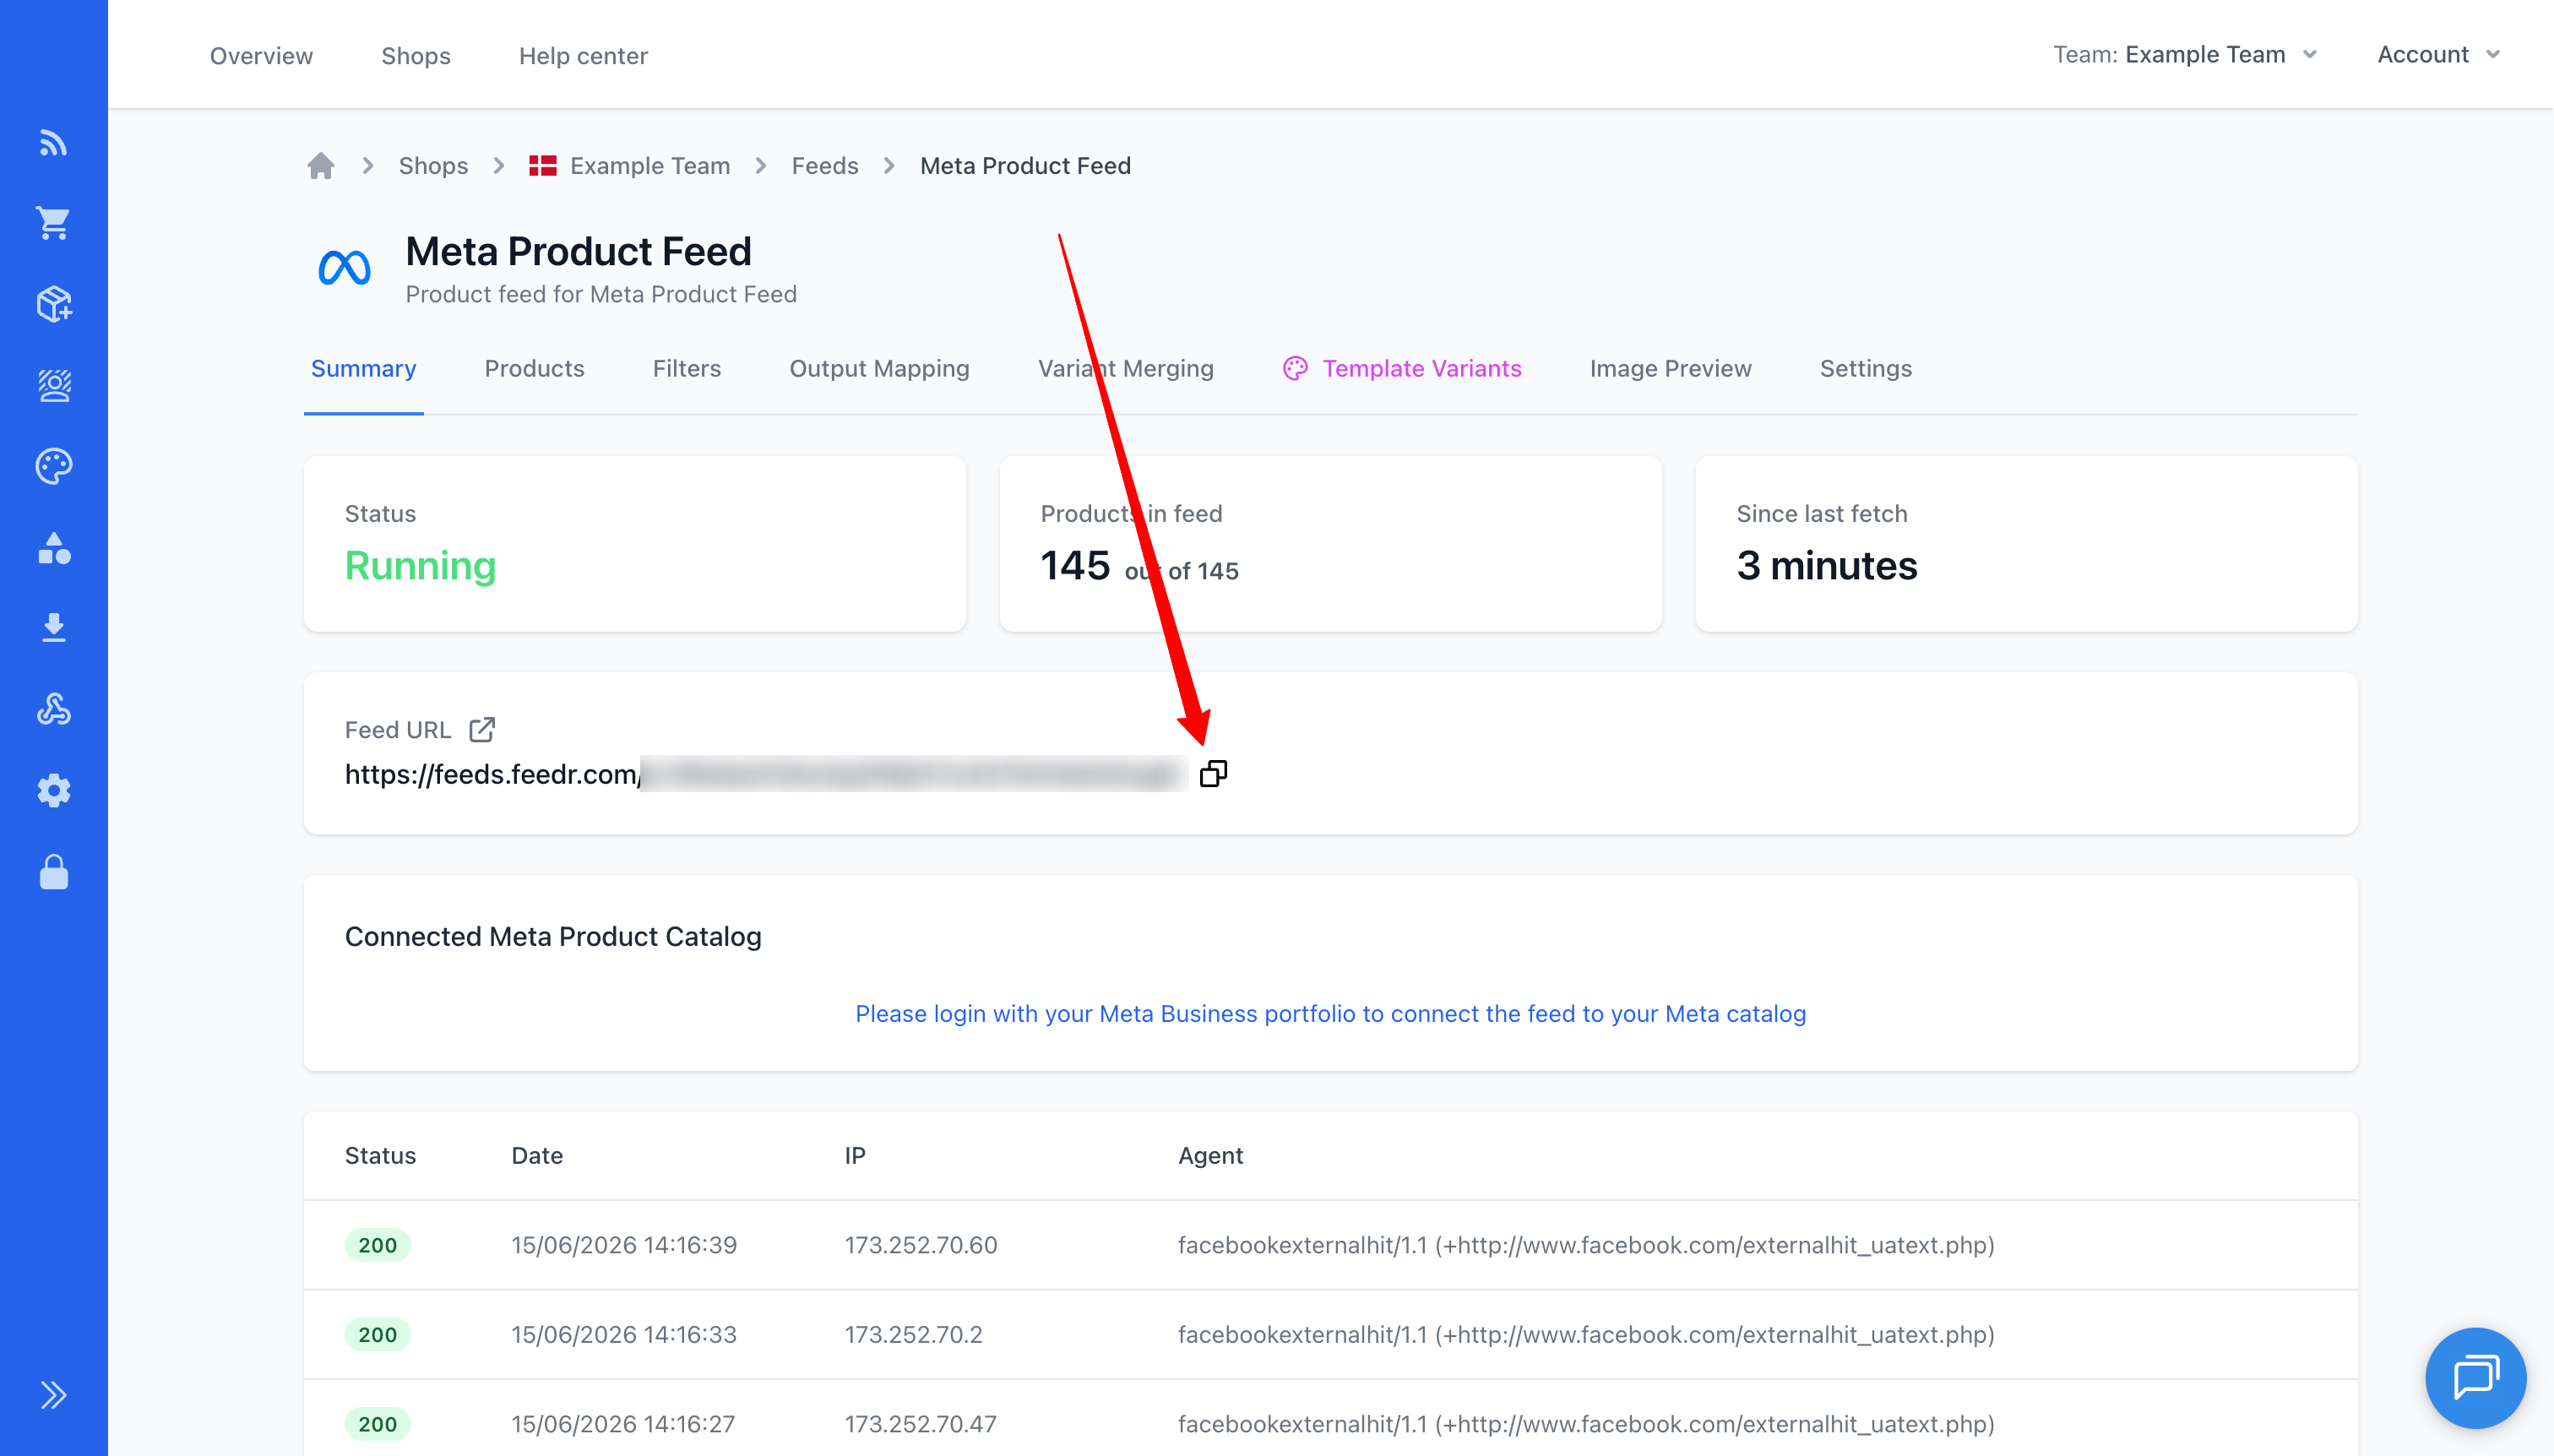
Fill in your feed url and click next:
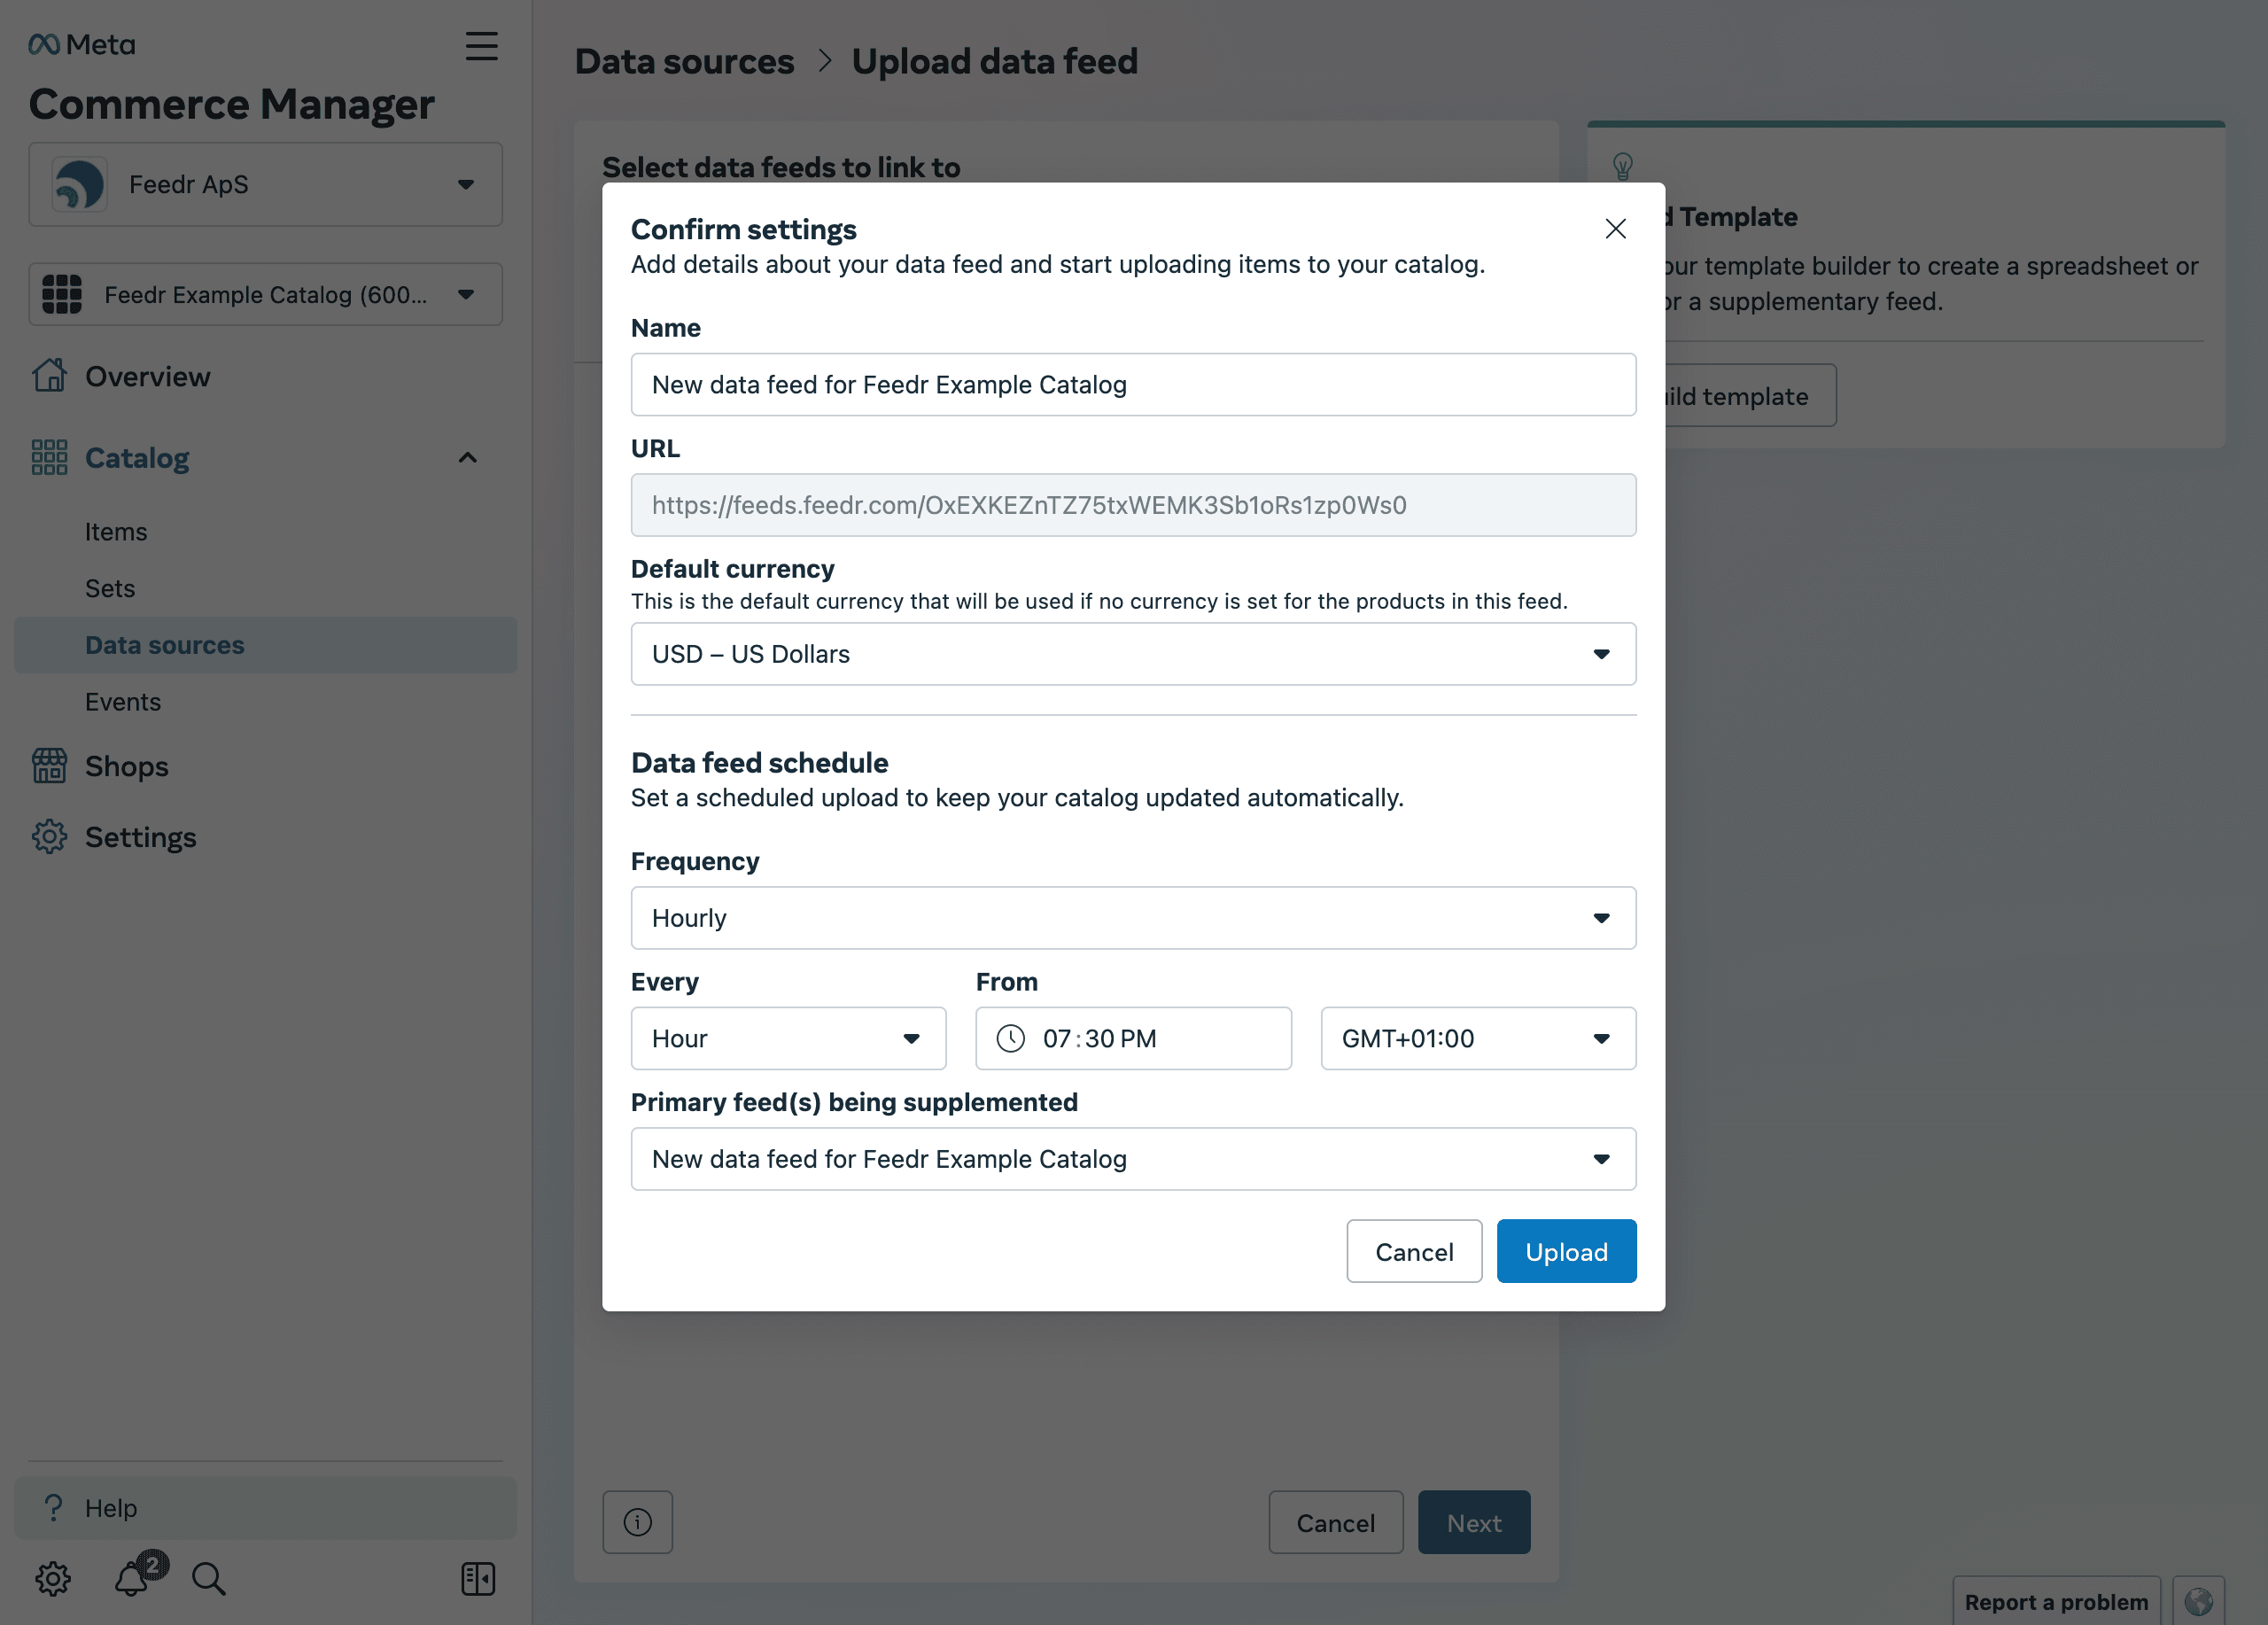
Now you will be prompted to confirm the settings. You can also give the data source a name, choose default currency and define a fetch schedule.

After Meta has fetched the feed (time varies depending on the size of the feed) you can verify that the products have been imported correctly. To do that go to the Items tab to view all imported products.